Hello everyone! It's been a little while since I've posted, and I still have a few Tim Holtz Sizzix Chapter 3 projects to share. I've been spending quite a bit of time in the craft room creating for Tim Holtz Idea-ology Christmas, which was just released on his Facebook Live last weekend. If you missed that, there's a link to the video replay on his blog here. But, for now, back to Halloween!
I'm such a big fan of the Colorize Dies and this Skelly is a great addition to this line.
Colorize dies have lots of different layers, creating more dimension in your makes. There's a very helpful instructional video for each Colorize die on the Sizzix website, explaining all the steps.
The Curio Box is a Bigz XL die, so you can die-cut chipboard and heavier materials. I had some white chipboard, which I used to cut out the bottom piece of the box. I didn't want the box to be very deep, so I cut down the sides about 1/2 inch.
Glue your corners together and cover the box with patterned paper. I used a piece from the Tim Holtz Abandoned paper stash. This will go behind a large Halloween Baseboard Frame (TH93986).
Adhere this to the back of your Baseboard Frame. Distress the edges of the frame before or after the box is adhered.
This is the Foundry 3D Embossing Texture Fade, die-cut from Tim Holtz Mixed Media Heavystock and painted to created an aged look. I have a tutorial on how I paint these pieces here. I used Ripe Persimmon, Carved Pumpkin, Fossilized Amber, Fired Brick and Ground Espresso paint. I also add a bit of Glazing Medium to my paint in the end layers, which gives it a bit of a polished look.
Die-cut all your Skelly pieces from this embossed paper. I managed to cut out all of them from this one piece. I cut them out one at a time, just so I wouldn't waste any of my paper. Takes a bit longer, but at least I didn't have to emboss and paint another sheet.
Adhere all your pieces together, if you have any problems with the sequence, the video really helps! I also inked the edges of the pieces. The grey parts are from paper coloured with Distress Oxide Sprays and inks, the back of the eyes and the zigzag highlights are black kraftstock.
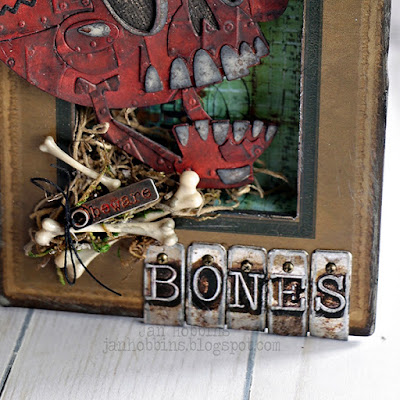
Skelly is adhered to the edges of the box, slightly coming out on the one side. For embellishing my frame, I used moss from the craft store, Boneyard bones(TH93964), Beware Story Stick(TH94063), black heavy thread, and Type Chips (TH94031). I also used Mini Fasteners Screw Brads Hardware (TH92790) on the Type Chips to fasten them to the frame.
Here's another look at my finished Skelly Frame! Hope I've inspired you to create your own Skelly with something a little different than the usual colours.
Hope you come back to visit, I've a few more Sizzix Chapter 3 projects to share, plus some from the new Christmas Idea-ology release and in October there's another Chapter from Sizzix coming. Lots of inspiration!
With this crazy year we are all experiencing, it is so nice to have creative hobbies, isn't it? Now if I could just persuade my husband to learn how to cook, I'd have more time for it all!
Until next time,
Jan


4 comments
jan, this project is so awesome. I love how you cut Skelly from the red metal...pure genius!
All I've got to say is WOW! I didn't get the skelly die because I have a skull die who needs more than one, well that would be me!
This is so creative! I appreciate you taking the time to blog and post your how-to inspiration. I bought the Curio Box, but haven’t braved its use. So helpful to see how The Makers use it. Thanks for sharing!
Will you be sharing any information on your 2020 Advent Drawer. I love it so much and I am so inspired to do a project of this kind. Thanks!
Post a Comment