Carta Bella Paper Blog Hop


Hi Everyone!
Welcome to the Carta Bella Paper Design Team Blog Hop!  Join our Design Team on their individual designer blogs as they share their current projects using Carta Bella Paper products.  Follow the blog hop list below to hop from one blog to the next.  ONE winner will be selected from each blog to receive a Carta Bella Paper collection kit of their choosing.  To qualify for the drawing, please leave a comment on each corresponding blog.  All comments are due by midnight EDT on Wednesday, February 27th to qualify.  Winners will be announced on each blog on Friday, March 1st, so be sure to check back to see if you won!

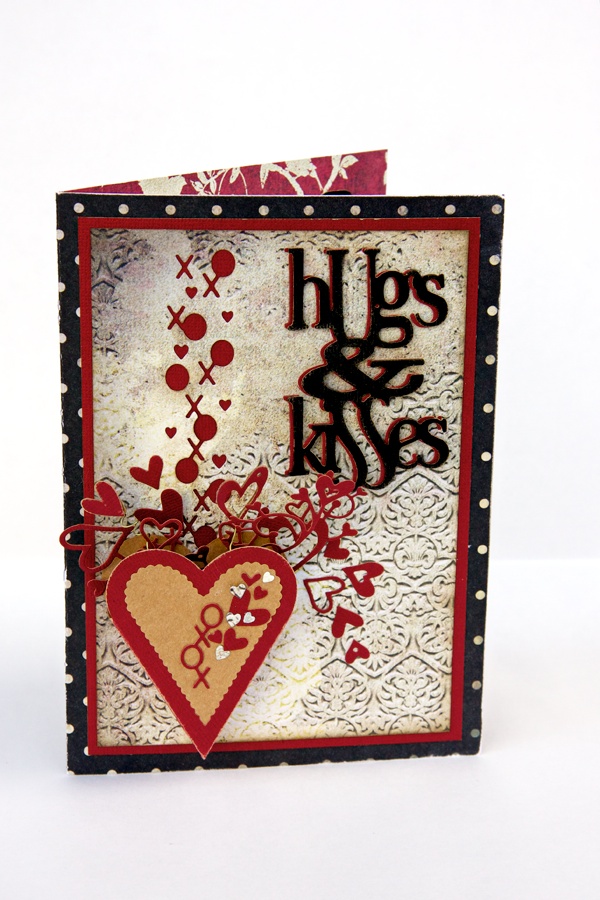
My project I'm sharing with you today, is from Carta Bella Paper's collection, True Friends:


This is a great line for not only scrapbooking the little girls in your life; but also the colors to me, say Easter!  I used an old piece of shaped paper to trace onto my green patterned paper and then hand cut that and also white cardstock ( a little larger).  I just added in some stickers, strips of paper, a die cut doily, and flowers.  The butterfly strip was a Memory Box die that I cut out from white cardstock and also cut into my shaped dot paper, so that the white piece fit into the negative piece. 
These are my two great-nieces who took a trip with us through the Rocky Mountains to Vancouver, where they live.  You would never know by their smiling faces, that we were stranded on the highway for something like 10 hours, due to a bad accident right in a place through the mountains where no one could get through on either side.  Lucky for us, there was a small rest spot with a park nearby where we  could get out of our car.  They never complained once about the long wait!  I think my husband never stopped complaining!
Don't forget to leave a comment on each blog for a chance to a Carta Bella Paper Collection!
Contest ends February 28th and winners are announced March 1st.

     Carta Bella Blog              
     Patricia Roebuck           
     Pam Brown           
     Natasja Verbeek     
     Jen Chapin               
     Tamara Tripodi  
     Jan Hobbins     That's me!        
     Kim Watson     


75

Embrace Imperfection

Today I'm just sharing a tag that I created, using that green embossed piece.  I was playing around with one of the Melt Art Texture Treads by Ranger.  I keep buying these but just haven't had the time to experiment with them. 


 My first attempt was with Utee awhile ago, and it didn't turn out very well. (the beauty of this medium, you can just save and reheat another time!)  So this time, I decided just to pour my embossing powder on my Ranger non-stick craft mat and heat it from underneath.  I used Lindy's Stamp Gang, Spring Leaf Chartreuse embossing powder.  I find that the powder heats a lot faster from underneath and because it's in a small pile, it doesn't blow away.  You have to work quickly, so have everything within reach!  Once it was melted, I just pressed my Graphic Gears Texture Tread on top and went over it with a brayer.  Once it had cooled down, I just peeled it off my mat!  I liked doing it this way on the mat, so I could just glue it down after wherever I wanted.  I added a touch of expresso alcohol ink in some areas and a bit of tinted rock candy crackle paint on the one side.  I was ready to use it on my tag!


I die cut two tags with "Concrete" paper from Kaiser's collection, Base Coat. On one tag I ripped sections in two spots where I wanted the tag underneath to show through.  I then sewed them together as in my photo.  With  the Tim Holtz Gears embossing folder, and Diffuser Embossing plate, I embossed the top corner and applied Rock Candy crackle paint that was tinted with peeled paint distress stain and vintage photo.  I cut apart one of the Prima Wood Borders, painted layers of different colored paint, and used Prima Ingvild Bolme's Junkyard findings to finish it.  A Tim Holtz rub-on at the bottom and stained ribbon finished it off.
Hope this inspires you to play with a different medium and have fun!

Have a great day,

Jan

5

Happy Valentine's Day!

Today Sizzix is celebrating Valentine's Day with a blog hop featuring the amazing "From the Heart" dies by Eileen Hull!
The Sizzix design team members have been busy creating projects with these dies, so please visit their blogs,  they are all incredibly talented!
For my project, I have used Eileen's Valentine Scoreboard XL Box die, Easel Pro die, and Flowers with Heart Petals die.  Here's my project:


The easel is my first Pro Big Shot die that I have used, and I love it!  I think this easel will be used a lot, especially for small gifts.  I started by cutting out the easel with Sizzix's Sizzles 12 x 12 Mat Board.

I then covered the front and back with Ranger's adhesive Metal Foil Sheets.  Next, I embossed the entire easel, doing this in sections (top, bottom and each side) with Sizzix's Daisy Blast & Paisley Palooza Textured Impression set.

I've used this technique quite a few times, I never get tired of using it and it always comes out different, depending on the products you use.
Paint the entire surface with black paint and then swipe the surface with a paper towel, removing the paint on the raised areas.  After the paint dried, I lightly sanded the raised parts and alcohol inked the bare metal with Espresso Alcohol ink.  After the easel was dry I glued the side pieces to the front.


There's my easel, now the heart shadow box.  I cut out the Valentine Scoreboard XL Box with the white mat board and assembled my box.


I then cut out the heart (not the sides) twice from patterned paper.  Instead of die-cutting out the sides again, I cut out strips the same width, for the inside and the outside of the box.  Cover the inside and the outside rim of the heart, then the back and inside with the heart shape.  Ink the edges.


For the gathered trim, I cut out strips of paper about 1" wide.  Machine gather the strips, wet the paper, blot it lightly, and then carefully gather.  Once this dried, I glued it around the outer edge of the heart.  Add a bow to the top. Now you are ready to decorate the inside!  
For the inside, I die cut flowers using Eileen's Heart Petal Flowers.  I made two, one larger than the other.  I also die-cut the film strip and tickets with Sizzix's Tim Holtz Mini Filmstrip & Mini Ticket Decorative Strip die.  Tim's mini ticket stamp from his collection, "Going Somewhere" fit perfect.
I adhered some light acrylic, stamped with white Stazon and a Dictionary stamp from Stephanie Barnard behind the filmstrip and then curled the one end.

There's my finished heart.  I've started making a heart shadow box every year for Valentine's Day, so eventually I think I'll have a nice collection!  Hope you enjoyed this tutorial and check out Eileen's other dies, I know there's quite a few that are my favorite ones to use!  I should mention that the papers I used were from Basic Grey's True Love collection.
When you visit the Sizzix blog, don't forget to leave a comment for a chance to win a Eileen Hull prize package!  Have fun visiting the Sizzix Design Team blogs for lots of inspiration!

                 Jan Hobbins  that's me!

Happy Valentine's Day,

Jan
35

Love Layout and Card Tutorials

Not only do I love Hydrangeas, but I really love the new Thinlit dies by Sizzix.  Today I have a step by step tutorial on the Sizzix blog, on how I created this layout:


Hope you join me there!
With Valentine's Day coming up in a few days, there's always room for another card idea!  I also have a step by step card tutorial on the Carta Bella Blog featuring their new collection, "Devoted."
Here's a sneak peek:


Thanks so much for taking the time to visit me there, and your comments are much appreciated!

Jan

1

Just sharing....

a few projects!  I realized as I was working on this post about Urban Scrapbook's Monthly Layout Kit, that I never shared last month's layout!  So here's my January and February layouts.  First is February's which I think we still have some left for sale at the store.  The February kit features Fancy Pants' collection, "Love Notes".

I really love this color combination, red, black, pink and kraft.  The large hearts were cut out from templates I printed off the internet.  I printed my photo on one of the patterned papers that has very faint printing.  That's my husband in the photo, and in the envelope there's another little photo of him.  It's showing what he is carrying over his shoulder...my purse.  He' always carrying my purse for me, when I'm taking photos, is that love or what, lol!  It's hard to tell in the photo, but I die-cut the filigree heart into the side of the envelope before it was taped closed, and then die-cut the heart again in red and adhered it into the die-cut envelope.
It was a fun kit to work with, and the design team all came up with some fantastic layouts.  You can check them all out here.
Here's my January monthly layout:


This kit featured Echo Park's collection, "Winter Wishes".  There were some great snowflake die-cuts included in this kit, which I embossed some of them with Shabby White Embossing Enamel by Stampendous.  You can check out the rest of the Design Team's layouts here.

Because Valentine's Day is fast approaching, I have been working on some cards for Urban Scrapbook's display.  Can I just say, that I think our store has the largest inventory of scrapbooking dies in the city!  There's Sizzix (we just received the first of Tim Holtz's new releases), Memory Box (a whole wall full!), Impression Obsession, Poppy Stamps, Spellbinders, CottageCuts, Cheery Lynn, and Dee's Distinctively!  So here's a few cards featuring just a few of our dies:

Memory Box - Bingham Heart , Grand Heart,  Lovely Aster
Spellbinder - Bitty Blossoms
                
Memory Box - Precious Heart Box, Hugs & Kisses, Cherish Border
Sizzix - Tim Holtz Valentine Stacked Words Decorative Strip Die

Sizzix - Tim Holtz Valentine Stacked Words Decorative Strip die
Memory Box - Owl Heart Tree die
Memory Box - Silverdale Heart, Serafina Heart, Cupid Heart

A birthday pop-up card:

Sizzix - ornament bigz die, Luxury in the Details Decorative Strip die
The inside -  Sizzix - Sizzlits Baroque Ornament die, Pop 'n Cuts XL die

Impression Obsession - Twig Wreath die
Memory Box - Floral Delights
Cheery Lynn - Thank You word dies
Sizzix - Circle framelits
They are on display at Urban Scrapbook, so if you are in the area, stop by and visit!
Have a great weekend!

Jan


2

A Couple of Tags

I think I was suffering a bit from creative overload, these past weeks.  I would start something and just stare at it, give up, and start something else.  Whenever I start to feel this way, I make a tag.  I just start playing with different mediums and product, adding stuff until I'm either satisfied, or it's a disaster and I throw it out.  That's what I like about tags, there's no big commitment!  With that being said, here's two tags I made:
This is one of those items you create that you can't exactly remember how you achieved this, but you like the result!  I did start with my Sizzix Tim Holtz tag diecut and Sizzix Floral & Vine Texture Impression embossing folder.  Next I sanded the embossed part, added a bit of turquoise and orange paint, black gesso, some rock candy crackle paint, Tim Holtz stamps, Lindy's Stampgang embossing powder, Prima Flowers and Tim Holtz embellishments.

This next one was created because I really liked these Studio Calico canvas feathers I used.

I first inked my tag before I stuck the adhesive backed feathers on.  I then took some light modeling paste and tinted it on my craft sheet with Peacock Distress stain.  With a small spatula, I applied it to my tag, thicker around the feathers, thinner on the edges.  I scraped some off so my feathers still were raised.  I think (sorry I can't remember exactly what I did next) I sprayed a bit of Lindy's spray, stamped in the top corners, embossed with Lindy's gold embossing powder.  I painted embossing ink on parts of the feathers with Ranger's Embossing Dabber and then applied Lindy's Midnight Gold Embossing powder. I usually go back and forth applying more layers of color, until I'm satisfied. 

 My tags are usually a mess on the back, so I like to adhere a piece of cardstock on the back and cut it just a bit bigger than the tag, so it has a nice edge.

There's my two tags!  If you need something to get you going creatively, just make a mess, play with all those mediums that you are hoarding, and make a tag!

And lastly,
Check out Echo Park's Website and download their new free "Creative Cards Idea Book"for some great card ideas.  I have a card in there!

Until next time,

Jan


5
Back to Top