Gift Card Holders

I hope all of you had a wonderful Christmas!  Mine was so busy, I can't believe it's all over!
I meant to post these last minute gift card holder ideas before Christmas and completely forgot!  So, here they are anyways; you could take the basic idea and alter it for any occasion:
This first one is made using Sizzix's In The Bag die with the movers and shapers magnetic die, Mini Reindeer and 25 set.  I cut out the 25 with the bag die and adhered patterned paper behind the openings.  The deer was cut out with paper and chipboard.  The papers here are from Kaisercraft's Turtle Dove collection.
My next package is cut out with the Tim Holtz Pillow Box die (with Tim Holtz paper) and the insert is with his movers and shapers Wish die.  I covered the word, wish, with Ranger's Crackle Accents. The poinsettia's are cut out with Tim Holtz's movers and shapers mini Poinsettia die and red kraft Coredinations paper, topped off with Rock Candy Dry Glitter.  The leaves are from Sizzix's Birds and Branches Decorative strip, also cut out with Green Kraft Coredinations paper.

This little box is actually the Suitcase XL die from Sizzix.  I cut it out with mat board called Little Sizzles, from Sizzix and then embossed with the Diamond and Circles textured impressions folder.  After painting a layer of turquoise, silver, and brown paint, wiping off the excess in between each layer; I cut out the trees with my movers and shapers mini Pine Tree die, overlapping the middle one.
With one of the cut out trees, I stained it in a few places and adhered to the front.
My final gift card holder is made from the Movers and Shapers Pocket Envelope and Kaisercraft Turtle Dove paper.  I added the bird and leaves ( Kraft Core Core'dinations paper) cut out from my Sizzix Birds and Branches Decorative strip die.  I inked, then applied Rock Candy Dry Glitter to the leaves and bird.  Just add a ribbon to the branches and you are done!

I get a lot of use out of these Mover and Shapers dies, there are so many different looks you can get just by adding a different mini magnetic die to cut out the center.

Have a great New Year!

Jan


2

Carta Bella Sketch

Today I have a layout featured on Carta Bella Paper's blog using their collection, "Christmas Day".   You can use this sketch that was created from my layout to create your own:


Here's a sneak peek, visit me at Carta Bella Paper to see the entire layout!!


Have a great day,

Jan
1

Happy Holidays!

I can't believe it's Christmas in six days.  My list of things to do gets longer and the days seem like they are getting shorter.  The only reason I'm sitting down to write this is; yes I am crazy, I'm waiting for a coat of paint to dry so I can put on another coat.  My husband and son were moving a mattress down our stairs last month and because it was such a tight squeeze on our curved staircase, they put a hole in our drywall.  It's one of those little jobs that you totally ignore until the very last minute and my husband has been threatening to paint his patch work if I don't.  I let my husband paint once, never again!  I was pregnant with our second child so I couldn't paint our son's bedroom.... my husband painted the entire room during half-time on a football game he was watching.  Unfortunately, most of the paint didn't end up on the walls.  There have been a few times where he's tried to sneak in some touch ups in places, but the tell tale signs of paint everywhere didn't go unnoticed.  So, here I am trying to get this done, as our family Christmas dinner is at our house.
I'm not supposed to be doing things like this right now; as just because my life isn't busy enough, I had some minor surgery last week on my arm.  Thank goodness it's not on my writing hand!  It's amazing what you can do with one arm!
I have help arriving today though, my oldest son Reece, is coming home for Christmas from Australia!  He hasn't been home for over two years, so we are looking forward to his visit.  Typical Canadian, he's already scheduled to play in a hockey game on Saturday!
Some other really exciting news in our family, our daughter Cassandra was chosen as a contestant on the reality show, "Fashion Star"on NBC.  It's already been filmed, everything was top secret, so it's been a big surprise for everyone.  Can't wait to watch the show starting March 8th to cheer her on!  She's not allowed to say anything about the show, so it will be nerve wracking to see how far she makes it.
That's a little bit of my busy life, I'm sure you all trying to check off your lists too!  But back to scrapbooking, here's a layout I did for Carta Bella Paper, using their Winter Fun collection:


I took one of their coordinating cardstock papers and lightly stamped snowflakes (Tim Holtz snowflake stamps) with white paint.  Just be adding some stickers, hand cut paper and a diecut snowflake, and a photo, my layout was done!
Back to my painting, have a great day!

Jan
1

A Christmas Gift Box

Today I have a tutorial on Carta Bella Paper's blog.  Here's a sneak peek of my Christmas Gift Box:


Hope you visit me there!

Have a great day,


Jan

1

Holiday Wreath Card

Today I have a tutorial on the Sizzix blog on how to make this card:


There's even a surprise inside!  Hope you visit me there!

Jan
1

Merry & Bright

Today I have a card tutorial featured on Carta Bella Paper's blog.

Hope you visit me there!

Have a great day,


Jan
0

December Monthly Challenge

This month at Urban Scrapbook, our December challenge kit was all about Merry & Bright, which it certainly was!  Our papers that were included were from Carta Bella Paper's collection called, "Merry & Bright and there were lots of fun embellishments to work with.


I hadn't used my new Tim Holtz stamp yet called, "Christmas Blueprint"so I decided to use it as part of my background.  I just stamped with clear embossing ink and clear embossing powder to make my own resist on paper.  After that, I dry brushed white acrylic paint over top and wiped off the paint on the snowflakes.  For those of you who haven't dry brushed paint, it just means wiping of some of your paint from the brush onto paper towel before you apply it.  This way it just goes on lightly, but you still see your brush strokes.  Because my snowflakes were embossed, the paint wiped off easy.


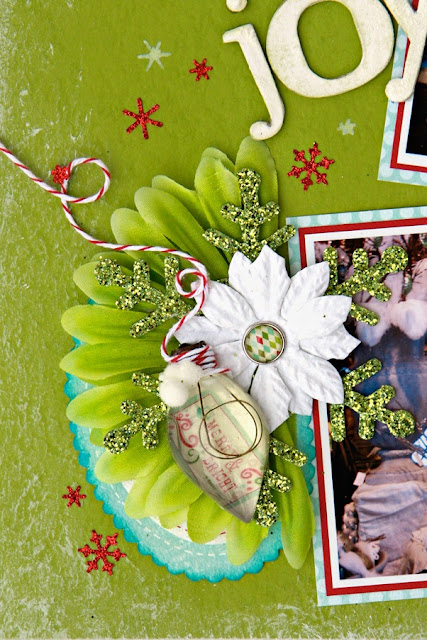
Love these light bulbs from Prima!  They come with a word(like a rub on) on the acrylic top, but I just scratched it off  and put a piece of paper underneath.  
The kits are for sale at the store, but they go fast!

Last year Urban Scrapbook donated a decorated tree to the "Festival of Trees".  We ended up winning silver and a couple of people's choice awards.  We all worked hard to make all the flowers out of white cardstock and the bird out of red cardstock.  I don't know how many we ended up making, but it was A LOT!  
This year we entered again, but inside of a tree we made a Snow Lady.

Not flowers this year, but a lot of snowflakes!  Pat and Lori did an amazing job building the body from scratch!  Pat made the top out of paper mache and the little houses are from Melissa Frances house kits.


We ended up winning gold and two people's choice awards!  It's a lot of work, but so rewarding!  Everything is auctioned off and the proceeds go to the University Hospital.  It is amazing how much work all the volunteers put into this festival every year.  
Hope you are enjoying this season wherever you are!

Have a great weekend,

Jan


1

Page Maps

I'm sure you have all used Becky Fleck's Page Maps at some point.  For those of you who haven't; for years, she has been creating sketches for all of us scrapbookers who have hit that creative wall.  This month the Carta Bella Paper design team was invited to take part in the December maps.  Here's a peek at my double page layout:

I used Carta Bella's Winter Fun collection for my layouts. To see the rest of my 2-page layout, check out Page Maps December 2012 maps here!  There's some great inspiration there to help those times when you need something to kick-start those creative juices!
Have a great day,

Jan


1

Sizzix Blog Hop


The U.S. and U.K. Sizzix design teams have joined forces today for a Festive Blog Hop, so there is double the inspiration!
I'm sharing with you today, a Christmas decoration I made using the Sizzix Tim Holtz 3-D Star die.


I cut out two of each size of star.  The paper I used is from Glitz's Joyeux collection.


Fold the the tabs under and crease the scored lines.  Glue the two sides together with your choice of adhesive.  I used Sookwang tape.  If you are using very thick paper or glitter paper, I recommend a hot glue gun, it holds better.  There's a thin wire that goes through the middle of both the stars and to make things easier, I placed that wire in between  the two star halves before I glued them together.  I cut about an 18" length of wire(allow for extra).


After the stars were glued together, I covered them with Rock Candy crackle paint.  I covered one side, let it dry, then applied it to the other.


When the stars were dry, I dabbed a bit of Picket Fence and Antique Linen stain on the edges and random areas of the stars.  Next, I used an embossing dabber (love this stuff!) on the edges and creased areas.  The embossing powder I used was Ranger's White Puffs.  I didn't even know that Ranger made an embossing powder that puffs up when heated!  I saw it the other day, and had to try it!  I think I might have overheated it in some parts, I'm going to have to experiment with it a bit more.  But see that spot where the puffed embossing powder got in the crackled Rock Candy?  It looks so cool!  I painted a little on certain areas with more rock candy and applied Dry Rock Candy Stickles glitter.


Using the bow from my Sizzix Holiday Wreath die, I cut it out with Red Kraft Coredinations paper, sanded the edges, applied Rock Candy Crackle paint, and Rock Candy glitter.


For the little pennant on the bottom, I used one of the Cash Keys from Tim Holtz.  But instead of the numbers, I wanted a small Christmas picture, so I cut out a portion of a sticker from Tim Holtz's Seasonal Salvage Stickers.  I used the outer part of the oval sticker for a template.  I put the picture in the blank medallion and covered it with the epoxy cover.


Now you are ready to assemble your ornament.


If you want a small spool and beads in the middle like I did, pull your wire so there's extra to play with in between the two stars and cut apart.  I strung my beads and spool, then twist the wires together again, hiding the attached parts inside the spool.  Finish off the bottom, attaching the medallion.  Finish off your top, leaving a space for the bow.   I attached the bow with very fine vintage gold bullion angel hair wire and then continued on wrapping it loosely around the stars.  This wire comes in very tightly coiled pieces and when you pull it slightly apart, it can be used on your projects.  I love using this stuff, but it's very hard to find.  I found mine at Tinsel Trading Company on my last trip to New York.
I think these stars are one of my favorite Sizzix releases this winter, there's so many ways you can use them!  Hope I have inspired you to try making ornaments out of this die, they would make great gifts!

Make sure you visit the other Sizzix designer blogs listed on the U.S. Sizzix site and the U.K. site, they have outdone themselves!  And what would a blog hop be without prizes!  If you would like a chance to win a pack of Textured Impressions Embossing Folders, comment on Paula's post on the UK Sizzix blog (depending on your location) or Tammy's post on the US Sizzix blog(depending on your location).  10 lucky winners will be chosen from each of their blogs on Wednesday, December 5th.  Winners will be announced on Thursday!
Until next time,


Jan    
24
Back to Top