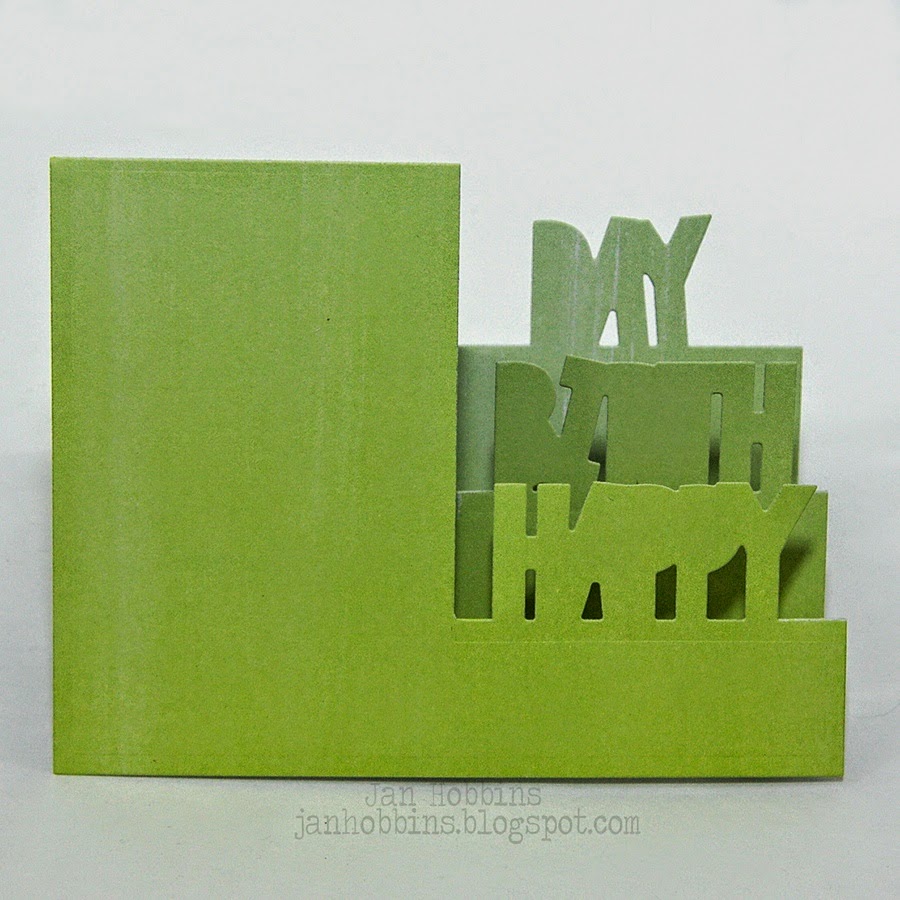
HAPPY BIRTHDAY CARD TUTORIAL

Hi Everyone,  I'm sharing a short card tutorial here today featuring one of Sizzix's new Stephanie Barnard Step-up card sets that were released this year at CHA:


These Step-up card framelit sets have everything you need to make your card.  This one is the Happy Birthday (660142)framelit set. 


I first cut out my card base using my Sizzix Big Shot and Magnetic Platform.  Love this platform for thin dies.  They do not move!  All you need is the platform, two standard cutting pads, your paper, and die for your "sandwich".


After your card base is cut out, fold along the crease lines, so it looks like this.


Next I die-cut my Happy, Birth, Day, in black cardstock and one patterned paper , one black cardstock scalloped frame.  Adhere the letters to the card base. With thin or small letters I usually use a liquid glue pen.  I took a Black Soot Distress marker and ran it along the edge of the scalloped patterned paper rectangle. I then pop-dotted it to the scalloped black rectangle and adhered this to my card front.


I die-cut various accent pieces that are included in the set(cupcake, presents, candles, and small rectangle) and adhered these to my card.  I also added in a Pink Paislee flower, small chipboard heart, and ribbon to complete my card.  The paper collection I used is called, "Love Notes" by We R Memory Keepers.  

These cards are so easy and quick to make!  

Thanks for stopping by, have a great weekend!

Jan

2

A "VINTAGE" HEART

I have a Valentine's Day inspiration post on the Urban Blog today.  I explain how I created this:


Hope you visit me there!

Have a great weekend,

Jan
1

SIZZIX LAYOUT TUTORIAL

I have a tutorial up on the Sizzix blog today featuring this layout:


Hope you visit me there!

Have a great day,

Jan
4

TIM HOLTZ CHA LAYOUTS

It's hard to believe this month is over in less than two weeks! I haven't been very productive, hope to change that soon. This bad cold that I have been suffering with since the end of December, is finally going away. This week I actually have been able to get a decent night's sleep.

I haven't shared my Tim Holtz CHA projects yet.  I was in such a scramble to get something done, I really didn't take great photos.  I can't imagine how these companies get everything prepared for the show when it gets earlier and earlier.  It used to be at the end of January, beginning of February, so the holiday season was over and people had time to create, get their samples in, etc.  Just mailing in the samples is a challenge, with all the holidays.  I'm sure most of you have seen a lot of the videos and photos, and can agree… Tim Holtz has the most amazing booth!  He has a link to a lot of the videos on his blog here.

I feel so honoured when asked to make samples. There are some amazing artists who contribute, which are featured on Tim's blog and also Paula's.   I'm usually their layout girl, and anything else I have time for.  This year, I didn't quite do as much as I would have liked, it came at a time when a lot was going on with family, but hopefully I have inspired a few people!


Love the new Correspondence paper collection, so easy to work with.  I think when I did this layout, I was hooked on Tim's, make your own sand technique, from his July tag.  I used the same type of technique, but with different colours on that one torn edge, just for a different texture.  The stamped images were stamped with, I think, metallic distress paint.  Without the layout here, I'm not sure, or I could have used Distress stain spray (I'm slightly addicted to that stuff).  I used Ranger's texture paste, mixed with a bit of Brass Distress stain and Tim's TH025 Arrow stencil.  Once dried, I then painted some of the arrows with the Fired Brick Distress pen and my Ranger Waterbrush.  I used some of the new Idea-ology flashcards, charms, ephemera, paper string, and one of my absolute favourite new release dies, the handwritten thinlit series(the word, Adventure).  I can't wait to get these dies, they are so beautiful!
This photo is of my dad (the person in the front) travelling by train, across Canada.  He had signed up for the Australia Airforce just before he turned 18, and they were sent to Canada for flight training. It was his first time, and probably most of them, travelling outside of Australia.  It was quite the adventure for them in the beginning.  I think he said they had a total of about two weeks flight training and then were sent off to war, stationed in Burma.When I look at his photos, I can't stop thinking how young they all were.  Canada must have given him a good welcome, as he immigrated here after the war, and stayed!


As soon as I saw the postal themed papers of the Correspondence collection, I thought about my husband's grandmother's treasured letters.  She was originally from Wales, and came here with her new husband to start a new life.  She saved every letter from home, and some go back to the 1930's.  My mother-in-law passed them on to me and I really want to scan them, so everyone in the family has a copy.  There's so much history written in those pages.  It's a big project, one I have yet to start, but I really want to do this one day.  We became quite close, his grandmother and I, and I can remember when she received a letter, she was so excited to share her family's news.  We would all sit down with a cup of tea, and she would read the letter out loud.  When I finally met this side of the family, I really felt like I knew them all already.
I used a bit of Distress spray on the background, added in some of the new Special Delivery Remnant Rub-ons, and Design tape.  Tim also released a new rubs metal stylus tool, which I got to use.  Love this, the rubs just lift off so easy!
When I saw these small metal Foundry Frames, I gasped!  So beautiful!  I want more!  The Tea Cup and Doily are from his new Sizzix collection.  There are two cups and a saucer in this die, and the cup has a slit in it, so you can add embellishments or the other cup.  The doily is one of two in his Textured Impression embossing set.  The other is a smaller doily version.  I sprayed this one with a combination of Distress Stains. I think it was Stormy Sky, Picket Fence, Brushed Pewter and maybe Broken China. I am addicted to combining different colours with Brushed Pewter, love the metallic look.  I just finished a Valentine heart using different colours with Tarnished Brass, yummy!  That's another day, though, sorry.  I added in some ephemera, metal arrows, and my journaling in an Industrious Sticker frame, along with some borders of the same.  The "love" is also a Sizzix Handwritten thinlit die.

Well, that's a brief description of my two layouts, I have also some cards that I did, but I will save that for another day.  Yikes,  I did not realize the time and I need to leave for work!

Have a great day, and make sure you check out Tim and Paula's blog to see the gorgeous samples that the other designers created!

Jan
9

Sizzix Inspiration


Hi Everyone!  Today I have an inspiration post on the Sizzix blog:


Hope you visit me there!
There's lots of amazing new Sizzix product released at CHA, you can see some of it here.

Have a great day,

Jan

7

First Tag of the Year

Yes, it has been awhile since my last post.  Last month turned out to be very busy; with the holidays, family, work, and a few projects for the Tim Holtz CHA booth (I know, how cool is that!).  With CHA even earlier this year, the projects need to be done and sent away before the end of December.  I always seem to push it to the last moment, and no matter how I send my stuff, it never gets there in the time it should.  It  always amazes me why a 3 day Xpress package goes east to Chicago from here and then back west to California, taking eight days.  Well, enough of my ranting, hope all of you had a great Christmas and New Year's.  I've been suffering with a terrible cold and flu since New Year's, so being stuck at home has given me a chance to do some scrapbooking without deadline anxiety!

As I was packing away my Christmas decorations, I started thinking about this box I had altered years ago.


I covered a wood box that looked like a present, with patterned paper.  Remember when printed acrylic sheets were so popular?  I loved this one with snowflakes, not sure what company, Fancy Pants, maybe?  Anyways, I love the look of see-through dimensional layers, and cut out the snowflakes, layering them with thin wire.


I had added in a bit of alcohol ink in the turquoise colour.  I really like this look and decided to make a tag with the light layers of snowflakes.


I am really addicted to Tim Holtz Distress Stain Sprays right now, especially the combination of Brushed Pewter, Picket Fence and another colour.  I was in a spray frenzy with my last Tim Holtz project using Iced Spruce, but I wanted to do a colour I don't use a lot.

So, this time after I embossed my tag with Sizzix's Tim Holtz Snowfall Embossing folder, I sprayed my combo of pewter, white and this time, Shaded Lilac.  I should mention that with this embossing folder, it's heavier on one end with texture and almost nothing on the other end, so I embossed each end of my tag separately.  After my sprayed tag was dry, I lightly sanded the raised parts and went over lightly with Distress Picket Fence paint.


The foil snowflakes are die-cut from Ranger's metal foil tape adhesive sheets and Sizzix's Tim Holtz Paper Snowflakes thinlit die set.  I coloured the foil with Alcohol Inks and directly applied some of the flakes to my tag, and one to an acrylic snowflake. The acrylic snowflakes are die-cut with Bazzill acrylic and Sizzix's Tim Holtz Stacked Snowflake Bigz Die.  This acrylic is discontinued but is now made under the American Craft's label.  It's thin, but not enough thin enough to use with the thinlits, or thin dies.  I alcohol inked these too and added a few white rub-ons from Tim Holtz Christmastime Rub-ons.  I just poked a hole through the center and strung my snowflakes with very thin wire and leaving a bit of space in-between.  To finish off my tag I dyed some white crinoline type fabric with alcohol ink.  When dying ribbon, I usually put my colorant in a small ziplock bag with my ribbon, seal it and squish it around.  Less mess on my hands!  For the tinsel type thread, I took a piece of Tim Holtz Silver Tinsel Twine and pulled the end of the thread.  Kind of like pulling a piece of crochet.  If you're lucky it will unravel right away, but if not, just pick at the loops to get it started.  I didn't want the tinsel to be as thick and it worked out perfectly!  I also dyed it with alcohol ink (I think it was a combination of Pink Sherbert, Sailboat Blue, and Wild Plum) just using a couple of drops of each colour.  I almost forgot, I added a border on the bottom of my tag using Tim's Industrious Border stickers.
And that is my first tag of 2015!  I love doing tags, it gives my an opportunity to experiment with product and not have to commit to a large project.
I don't know if any of you have been checking out Tim Holtz's blog, but the new products are amazing!  
I think I gasped when I saw those small metal frames and the Sizzix word die-cuts in my cha package!

That's all for today, have fun checking out all the sneak peeks for CHA!  It starts on Saturday and I know that Urban Scrapbook is going to try and post photos daily.

Thanks for stopping by,

Jan
5
Back to Top