Hello there! I have been patiently waiting (that's really hard for some of us scrapbookers) for quite a few dies I had ordered from Sizzix and so I was happy to see most of them arrive a month ago!
Sizzix heaven, right? Usually when I get a new die, I want to use it right away, but this many is a little overwhelming! I'm slowing making my way through them, June was such a busy month and not much time for crafting. I'm hoping July will be different!
It's been awhile since I've created a 3-d project, it seems like I usually find time only for cards or layouts lately. Not that I don't like creating those, but I like getting lost in the creation of something a little more. In that wonderful pile, was the new Tim Holtz Village Brownstone, Village Rooftops, and Village Bungalow dies that were the inspiration for this project. I have a tutorial here with lots of photos, enjoy!
I wanted to make a grouping of houses on a base, and I ended up covering a box to place my houses on. The papers I used were from Blue Fern Studio's beautiful collection, 'Tranquility".
This was just a 7 3/4" x 7 1/4" x 2 1/4"deep paper mache box. I gessoed the edges, then painted them with Distress paint, a combination of Stormy Sky and Black Soot before covering with paper.
I also covered the inside of the box. Love this woodgrain paper in the Tranquility collection!
I built two
Village Brownstones and a
Village Dwelling, with my patterned paper. I die-cut the walls first. There is directions on the back of the package, but there is also PDF instructions on the Sizzix website, right next to the die photo.
I die-cut the window frames and roof with a different colour of paper so they would contrast. The frames were then adhered to my house.
I cut small pieces of Tim Holtz Tissue and glued these to the inside of the windows.
Once I had my windows and doors finished, I adhered the wall of the house together. I applied tape to the tabs at the top of the house, for the roof.
Now for the
Village Rooftops! I cut out the twelve strips and one ridge cap for each roof. These were lightly sanded and inked before adhering to the roof.
After my shingles were adhered, I die-cut the chimneys and adhered them to each roof.
Next, came the
Village Bungalow accents. I die-cut two dormer windows for one of the brownstones. There is also shuttered windows, which I die-cut two for one of the other houses. Fence pieces were also die cut.
Here is a photo of my finished
Village Dwelling house. I added the shuttered window die-cuts to each side after I took this photo.
Here's all three completed houses. That tiny doorknob on the middle house is a Tim Holtz Hex Fastener (TH93268). The houses are ready for my box base.
I decided to put legs on the box. These are Tim Holtz Metal Box Feet Foundations(TH92821). These were applied with Ranger's Matte Medium. Isn't it amazing how a set of legs can change an ordinary box into an amazing piece.
I had a thin round metal filigree piece (I think it was from Fab Scraps) that bent very easily to fit over the edge for decoration. It was attached with a rhinestone brad. Now the box is ready for my houses.
I was going to hot glue the houses to the box top, but didn't want the glue to show. So I cut small strips of paper, bent them in half, then hot glued these to the bottom as shown. The hot glue was applied to the bottom of the strips and then my houses were adhered to the box.
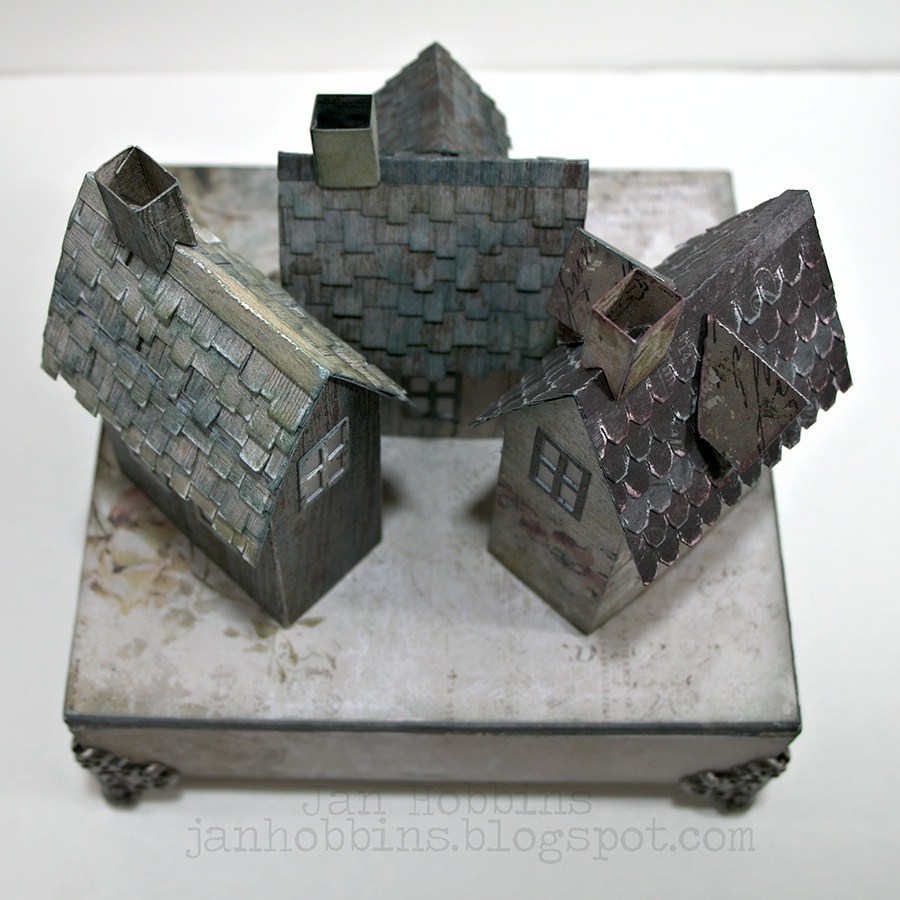
Here's how the placement of the houses look from the top.
Here's the houses from the front.
The fences were bent slightly so they were curved, and then adhered in-between the houses.
Here's the back of the box.
I die-cut many little flowers using Sizzix's Tim Holtz
Tattered Flower Garland Decorative Strip die and the Tim Holtz
Tiny Tattered Floral Thinlits set. The light ones were die-cut with cream cardstock and lightly inked with Squeezed Lemonade and Hickory Smoke Distress Ink. I usually use my hot glue gun to adhere the bottoms of the Tiny Tattered Florals so they stay secured when rolled with a Quilling Tool that comes with the set.
I also die-cut a few pieces from Sizzix's Tim Holtz
Wildflowers Thinlits Set for my flower clusters.
I hot glued the flowers on the inside of the fence pieces and a few on the outside.
And that my friends, is the end of my tutorial! Here's another look at my finished project.
This is what it looks like from the back.
Thanks for stopping by,
Jan