CHRISTMAS CARDS

Hi everyone! Well, December has arrived and so did 12 inches of snow this weekend.  It looks like a winter wonderland here, so it definitely puts me in the mood for Christmas!  My house is all decorated and I even have a few cards to share!


I was able to purchase the Tim Holtz Stamptember set from Simon Says Stamp before it sold out.  Love these images in this set.
I used the bird, sentiment and music notes stamps for this card.  My sentiment was stamped on the smooth side of Distress Watercolor cardstock and die-cut with Tim's Tattered Banners.  My stamped bird with the music notes was coloured with Distress Markers and a water brush.  I also used Distress Oxides on the background.  The frame was created with Stacked Baroque Tim Holtz die, and the foliage from the Funky Festive set.  My pinecone paper is Tim Holtz Christmas Worn Wallpaper TH93777.


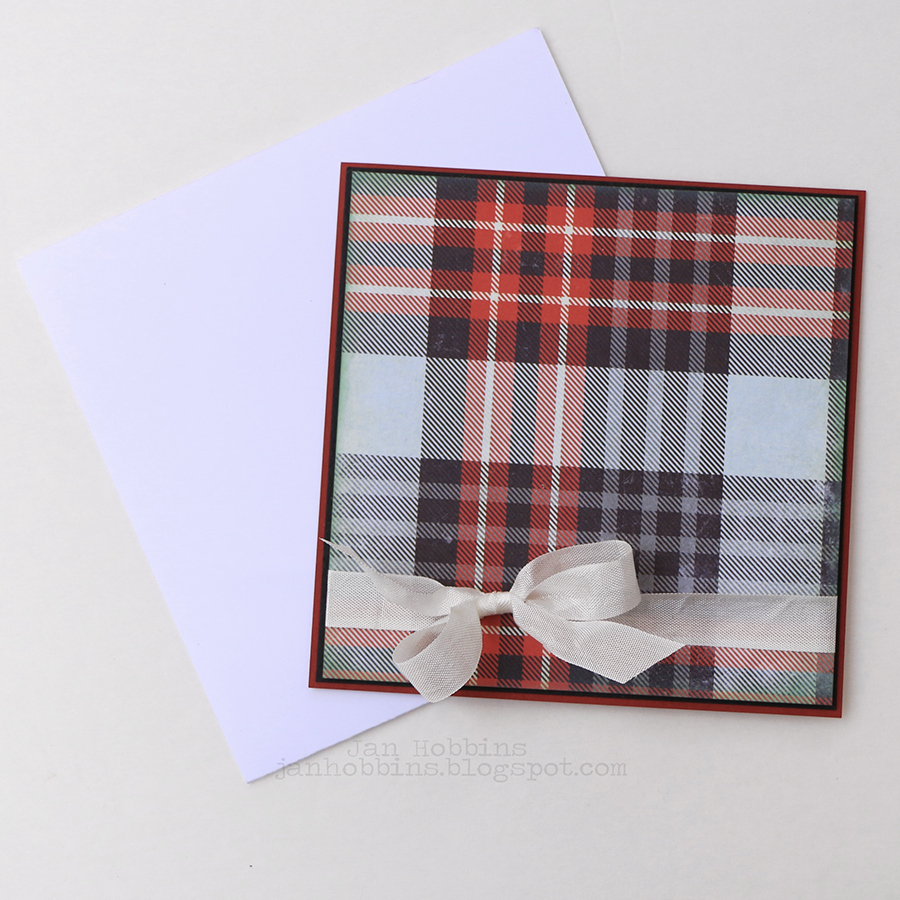
The stamped images(coloured with Distress Markers/watercolour brush) on this card is from Tim's Stampers Anonymous set, Yuletide CMS356. The card base is stamped in Oxide ink with the music note stamp from the Stamptember set. I also used Oxide ink on my stamped background.  My foliage is Tim Holtz Sizzix 662425, the little trim on either side of the sentiment is from an older set, Holiday Knit 660981. The plaid paper is Tim Holtz Christmas Paperie TH93739, the distressed Silver cardstock is Mushroom from TH93784.

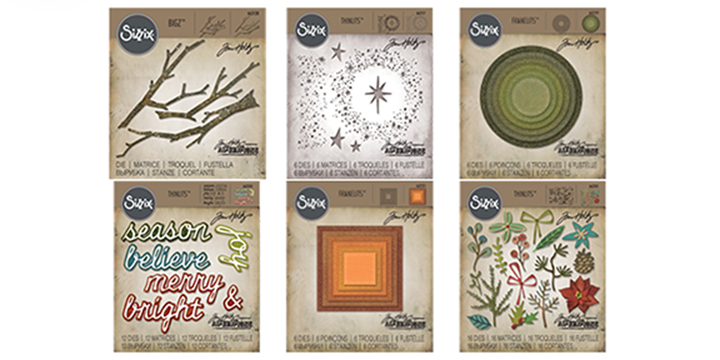
I also am sharing the rest of my cards created for Tim's Holiday Sizzix Release Video.


These two cards feature the 3-D Kaleidoscope  Texture Fade folder.  They both were embossed on gold metallic kraft cardstock, but I used Distress paint to alter them. This one was used like a frame, with Tim's Stacked Label die cut out in the middle. A piece of Christmas Ephemera was adhered behind.  My foliage was Distress Oxide coloured Mixed Media cardstock and gold metallic kraft cardstock all cut out with  Funky Festive Thinlits set.  Paper was also from Tim Holtz Christmas Paperie.  My sentiment was from TH Christmas Quote Chips.


Lighter shades of Distress paint was used on my embossed gold metallic kraft cardstock here.  The snowflake is Flurry #4,  and Joy is Shadow Script Christmas.  The star in the middle of the snowflake is one of Tim's Mirrored stars.


I had created the background before I decided to use it for this card from Distress Oxide inks and Mixed media cardstock.  It's fun just to create different looks from these inks, and save them for future use. I had intended to go with just the brown tones, but somehow that Blue Jeans Distress crayon snuck in there once I had adhered my die-cut Flurry #2, #3 and #4 snowflake dies to the background cardstock.  I also added in some Crackle Texture Paste around the snowflakes before colouring.  Once I had this background finished I added in chipboard die-cut snowflake Ice Flake which I also die-cut it in Gold Metallic Kraft cardstock to adhere on top of the chipboard.  I added some clear Rock Candy Crackle paste and Oxide Distress ink to this too.  A White Christmas rub-on was adhered to a piece of gold metallic cardstock.


And my last card created for this holiday release, was a fun card using the Crazy Bird die and stamp set.  I added the beard, moustache and hat from the Cool Yule Thinlits set.  My foliage is the Funky Festive set cut out from white cardstock.  A Quote Chip, Woodgrain cardstock and Christmas Deco Sheets finish off my card.

Hope my cards have inspired you in your card making or Christmas crafts!  Thanks so much for visiting me here and your wonderful comments are much appreciated!

Until next time,

Jan


5

LET IT SNOW CHRISTMAS VIGNETTE

Hello friends!  One of my favourite things to create with Tim Holtz Idea-ology products, are little vignettes.


 I don't know about you, but I love all the Trinket Tins so much that I have a really hard time using them, I just want to collect them!  I've actually purchased more than one of each... to use and one or two to keep!


The first thing I did, was cover a Vignette Wood Box (TH93279) with plaid paper from Christmas Paper Stash (TH93739) and sand the edges.  I then adhered some Funky Festive and Mini Holiday Greens die-cuts on the top of my box where my trinket tin was going to sit.  I didn't do too many as I wanted it still to be fairly flat.  With the matching plaid Christmas Design Tape (TH93760), I taped all the inside of my tin, both sides, close to the outer edge to finish off the inside, except the edges that will sit on the box (I'll tell you why in a bit).  A piece of Worn Christmas Wallpaper (TH93777) with a wintery scene, was cut to fit the inside of my tin lid.  A Christmas Quote Chip (TH93753) with four little mini fasteners (TH92790), love these, they look like little screws, in the corners.  At this point, I have not put the box top or anything else in the deep side of the tin.  Place your tin on the box where you want it placed, and hammer a small nail through the tin and wood box, both sides, lid and bottom of your tin.  Your tin is now secure on the box to continue on embellishing.  I just glued a piece of foam underneath where the nail came through, or you could bend the nail.  Add in a piece of Design tape to the bottom of your tin, both sides, to cover the nails.


This is the view from the back, where you can see my Christmas foliage peeking out from the tin bottom.  I tucked in a few more pieces after the tin was nailed down.


The smallest of the Vignette Box Tops, there's 5 in the package (TH93755 - Ribbon Icicle Decorations; 3.38 x 4.75 inches) fits inside the trinket box with a bit of room above and below.  I've just die-cut some Distress Cardstock with  Funky Festive and Mini Holiday Greens to fill in that empty space.  I wanted a 3-d looking scene inside, so I found this photo ephemera from the Christmas Ephemera pack.  It was a bit wider than my box top, which was perfect.  I just taped the two sides to the front corners, giving the photo a curve.  This created a half circle area to create a "floor" by just adhering a small piece of cardstock to the bottom.  This was covered in Tim Holtz Grit paste(for snow) and a mini tree.  Rock Candy Glitter was added while still wet. Adhere the box to the inside of your tin, leaving a space on the bottom and top for your greens.  Greens were added to the top of the tin with Tiny Bells (TH93744), ribbon and a Christmas Token.


Love these Salvaged Snowmen (TH93774)!  Fun to paint or alter anyway you want, the same as the Salvaged Santas, which I altered with just Gold Mixative Alcohol ink and glitter here.  I've used Distress Paint and antiqued it with a Distress Crayon (diluted with water). To add a bit of snow around my snowman, paper dolls, and tree, I used Grit Paste with Rock Candy Glitter added while wet. This will anchor your embellishments to the box a bit more securely even though they were glued down first. The Icicles (TH93778) were accented with Distress Rock Candy paint, glitter, and a touch of white Picket Fence paint.


A tree Ephemera piece was adhered to the corner of the tin. The edges were inked and a bit of Rock Candy glitter added.  For my tree in the front, I used a Woodland Tree(TH93757) which was coloured with Bundled Sage Distress Spray, glittered with Rock Candy Glitter, and placed in a thimble(TH93772, my favourite item from this Christmas release!) which was coloured with Alcohol Ink.    I bit of snow was also placed in front of the thimble.  Some Beaded Berries(TH93779) were coloured with alcohol ink and placed among the foliage.


Well, I think describes about everything.  Sorry, I didn't take any step by step photos this time.  I find it really slows down my creating process, especially in the winter here, when it gets dark so early and there's a shortage of good light!  Hope I've encourage you to use one of your trinket tins!

Thanks so much for visiting me here, and thank you for your wonderful comments, they are much appreciated!

Happy Crafting,

Jan


12

PEACE ON EARTH CARD

Hello there, I still have a few cards to share that were created for the Tim Holtz Holiday Sizzix video.     Today I'm sharing one made with the Wise Men Thinlits die.  It is so beautiful, I decided to keep it simple.

You can tell I was getting closer to my deadline, no time for photos featuring the steps! Lol! 
I used Tim Holtz Watercolour cardstock to die-cut my thinlits, using the flat side on top.  The wise men and the star were then adhered with Collage Medium to another piece of Watercolour cardstock, this time using the textured side.  The Wise Men Thinlits piece doesn't have any cut sides or bottom, so you can choose how wide or deep you want the bottom.  Love this idea!   How many times, have you wished for just a bit wider die to cover your card dimensions.
 

I've used my favourite dry brushing technique to create this painted look (Distress Paint).  I go into more detail on how to achieve this, in this post from last year's Inspiration series or this one with the 3-D embossing folders.  I love how the different colours of paint work with the texture of the watercolour paper.  I kept my colours in the same gold or yellow tones to keep it simple.


I've used this Metallic Tim Holtz ribbon(TH93338), and Tiny Bells (TH93744) across the bottom.  Funky Festive leaves and foliage under the bells and to finish it off, 'Peace on Earth' die-cut from Thin Alphanumeric Thinlits in Gold Metallic Kraft Cardstock. This card front was matted on dark brown, then Gold Metallic Kraft Cardstock.  I also add a strip of Tim Holtz Design Tape to the very bottom.

Hope I have given you a bit of Christmas card inspiration!  There's still more to come so I hope you visit me again.  Thanks so much for your comments here and on Instagram, I appreciate them all and am grateful for all the crafty love!
Have a great weekend!

Jan
7

COOL YULE CHRISTMAS SHAKER CARDS

Hi everyone! It's hard to believe that November is half over already.  That means cardmakers have either finished all their Christmas cards or if you're like me, haven't started yet! For some inspiration, here's a couple of shaker cards I created for Tim Holtz that were also featured on his Sizzix Holiday Part 2 video.


This fun Thinlits set, Cool Yule is one of my favourites from this year's Holiday release. You can create all sorts of different looks for each of the four characters.  The Snowy Stars Thinlits set was perfect for using around my shaker opening.


Die-cut the Snowy Stars ring on a piece of white cardstock.  Using the Stitched Circles die that fits on the inside of the ring, die-cut a circle in the middle.


Cut out a piece of clear acrylic and adhere to the back of your die-cut starry cardstock. Then die-cut an adhesive backed foam ring(if you want a bit more depth to your shaker box, use two of these), using two sizes of the stitched circles and glue onto the acrylic piece.


Die-cut your character pieces and adhere.


Cut out another ring from cardstock and adhere to the front of the card.


Your character will be adhered to the front of the acrylic piece.


Fill the circle with your shaker bits.  I just used the cut out star pieces from my starry ring.
Adhere a die-cut stitched circle to the back foam ring.  I used strips of foam the same depth as the ring, around the die-cut cardstock.


I chose a coloured piece of cardstock to adhere behind the front so it shows through the stars.


Adhere the two mat papers onto your card base, then your white die-cut card front.


Finish off your card front with a sentiment, I used the Christmas Shadow Script.  The stars are from the Snowy Stars Die set too.  The words, 'tis the, are from the Holiday Talk Metallic Sticker Pkg. (TH93347).


I used the same idea, but a square cutout instead of the circle.  I used the straight strip of stars and cut it out four times, around the cutout stitched square.  Some of the strips slightly overlapped, but you can't really tell.  The bingo card is from Tim Holtz Christmas Ephemera pack. The branches are from Tim's Branches Bigz Die and the greens are from Funky Festive.  Happy Holidays is also a Holiday Metallic Sticker.  The plaid paper is from last years Christmas Paper Stash.


4

MERRY MOOSE CHRISTMAS CARD

 Hi everyone, I have one of my Tim Holtz Sizzix Christmas cards to share with you today.  This is one of the cards I created for Tim's Sizzix Christmas video which you can watch here.


I love this whimsical Merry Moose Thinlits die set!  My foliage is created with the  Funky Festive Thinlits set.


Love all the little details with this set.  I used Tim's Substrate Sheets(TH93291) that die-cut beautifully. These papers have a suede type texture that can be sewn, stitched, punched, painted or stained.  I used Distress Oxides to colour.   Sizzix also makes Leather sheets, which are similar.

 
These trees are so fun, I'm sure I will be using these a lot!


Behind my moose, I used Tim's Bigz Die,Tree Rings.  I had a piece of adhesive backed thin real wood, I had been hoarding from a long time ago, perfect for this die.  The edges and raised areas were inked.


                                         Can't have a moose card without plaid, right?


A bit of ribbon, Ephemera Card and a Tim Holtz Christmas Quote Chip, complete my card.  

Thanks for stopping by, I will be sharing more cards!  


Jan

5

GHOULISH TUNNEL CARD

Hi everyone!  I'm sharing a Halloween Tunnel Card using Tim Holtz products today.


After watching Jennifer McGuire's tutorial on Tunnel Cards, I really wanted to try one.  Jennifer has a great video on how to create the inside of this card.


Love this skeleton and frankenstein from the Ghoulish set!  I've got two layers inside my oval tunnel.  Keep in mind that your card has to close, so I've just used flat die-cut accents on the different levels.


The patterned paper on the front of my card is actually Tim Holtz Halloween Collage Paper (TH93727) adhered to black cardstock with Vintage Distress Collage Medium.  The brown tinted collage medium gives the paper a yellowish tinge.


I used the ovals left from my negative layers die-cut on the inside using Tim Holtz Sizzix Stitched Oval Thinlits. The "Fright" was cut out twice and adhered slightly off-centre.  My Skeleton is die-cut with Ghoulish Set (663091) from Distress Mixed Media cardstock that was coloured with Distress Oxides.  The leaves are from Fall Foliage Set 660955), also coloured with Distress Oxides on Mixed Media Cardstock.  The branches are from Tangled Twigs 663086 and Twisted Edge (661589) Thinlits which are cut apart.  I cut a Tim Holtz Pumpkin (TH93312) in half, and added in Mummy Cloth.


Have you ever looked at a die and thought I wish I had a stamp like that?  To create one, just die-cut your shape out of adhesive backed thin foam sheets.  I usually get mine from Michaels.  I save flat pieces of the hard plastic that stuff is packaged in, a piece cut out slightly larger than your shape works great to adhere the foam die-cut to.  This isn't a high quality stamp, and you're only going to get a silhouette stamped image but it gets the job done!  I originally wanted to do an alcohol lift with these stamps on a sheet of Translucent Yupo paper (Ranger Ink) and use the Yupo sheet for my background, but I couldn't find where I put my paper.  I did find my Mica(non-porous) sheets which I thought would turn out even better, but the shapes didn't show up  on the Mica as well as I would have liked.  Instead, I used the lifted Alcohol inked image on my stamps and stamped on a porous piece of watercolour paper.  I then coloured the paper with Distress Oxides.  You can colour your paper before or after as your stamped images are permanent, because they are done with alcohol ink.


Thanks so much for stopping by!  I can't believe how fast this month is going and I really need to finish a few more Halloween projects!  Hope you visit again!


Jan


2

MR. SINISTER HALLOWEEN FRAME


Hi everyone!  Welcome to my first Halloween tutorial of this year!  I couldn't wait to start creating once my new Halloween goodies arrived.  As soon as I saw this Tim Holtz Sinister Bigz die, I knew I needed to have this one.  The skull is in three pieces.


I had created a shadow box earlier this year using one of the large Collage Frames (TH93711) and a vignette box and loved the idea of having room behind the frame to create a 3D vignette.


How can you not love this flocked paper from the new Halloween Paper Stash(TH93712)!  I covered the front of my frame with this. Sand and ink the edges.


I wanted my skull to be a little thicker, so I cut out two from Sizzix's Little Sizzles Mat Board.  This is an alternative to chipboard, it is light weight and cuts beautifully!  I cut out another skull from Distress Watercolor Cardstock.  This was lightly coloured with Distress Oxide inks.


Once all my pieces were adhered together, I applied clear Distress Embossing Ink all over the top, then embossed with clear embossing powder.  I did this twice to get a thicker coat of embossing on top to get a deeper impression from my stamp.


For the third layer of embossing, I wanted a more aged look so I used Vintage Beeswax Baked Texture embossing powder, but another coat of the clear will work too. Apply the distress ink, then your power.  Before heating, have your rubber stamp (only red rubber used for this as clear acrylic stamps would melt) ready as you have to work quickly.  My stamp is from Tim Holtz Entomology Set (CMS328).  As soon as your powder has melted all over, press your stamp into the piece while it is still warm. Lift after you have your impression.  If you're not happy with the impression, just reheat and try again!


This is how it will look.  I liked the small writing on this stamp, and usually choose a small pattern when doing this technique.  It's really just for the texture, so I'm not worried about it being perfect.  I also find that a finer embossing powder works better, the stamp impression will show up better.


To grunge it up a bit more and the stamped impression to show up more, apply Distress Crayons. Add a bit of water and wipe off the excess, leaving the colour mostly in the recessed areas.


I didn't press my stamp into the teeth, it's a small piece and I thought it would stand out more being plain.  Put this aside and work on the frame next.


This amazing Tim Holtz Sizzix Thinlits die is called Tangled Twigs.  Look at the detail! There is no cutting edge around the outside, so you can leave as much as you want, I did about 3/8". I die-cut this from black cardstock.  I also die-cut one from a piece of flocked or velvet cardstock which was backed with an adhesive sheet before cutting out. I left about 1/8 inch edge on this one.  I had this piece from a long time ago and loved that velvety look like the flocked pattern paper.  Because this is an intricate thinlits die, it wouldn't have cut through the two layers, so this is why I cut two separate pieces.  I carefully pulled the adhesive off one edge of my velvet piece and lined it up with the cardstock, pulling away the backing as I lined it up.  Because the skull is resting on the twig cutout, this velvet layer gave it more strength and it couldn't tear.  Something to consider when deciding what material you want to use.  Now that I think of it, Tim Holtz Substrate sheets would work really well.


I folded the edges underneath to fit inside the vignette box, which was covered with patterned paper first.  The die-cut was adhered about halfway down.


Cover the outside with patterned paper (Tim Holtz Halloween 2017 Paper Stash).


Adhere the frame to the box with Distress Collage Medium. Once that dried, I determined where my skull was going to sit, and clipped a few of the twigs behind the eye socket so they could come over the top of the skull.  I die-cut a small section of the twig die from a velvet piece to go over top of the left side of the skull.


Adhere the skull pieces to the edge of the frame and the branches behind.  I used black foam adhesive squares to the back of the bottom skull pieces so they were higher on the one side.


Color some Tim Holtz Baubles (TH93759) with Alcohol Ink.  I used Pebble, Mushroom and Pitch Black.  I used larger ones on the bottom as you can't see them, the box is slightly lower than the frame opening.  I adhered one inside the one eye and started out adhering the larger ones.  I used collage medium or a strong clear liquid glue.  Wait until these first ones are dry before adding in the smaller ones, so they all don't fall off from the weight.


To complete my Sinister Frame, I adhered two metal pieces from the Halloween Vignette Accents pkg. (TH93730).  These were both aged with Distress Paint.  A small pearl brad was adhered to the center of the bottom piece.  The words 'the silence' was from the Halloween Clippings Stickers (TH93719).  
Well, that's all I have today, hope you enjoyed this tutorial!  I can't wait to get started on my next project...actually I have a few on the go. 

Thanks so much for stopping by, 
until next time,

Jan


9
Back to Top