CHRISTMAS DIVIDED DRAWER - TIM HOLTZ IDEA-OLOGY CHRISTMAS 2021

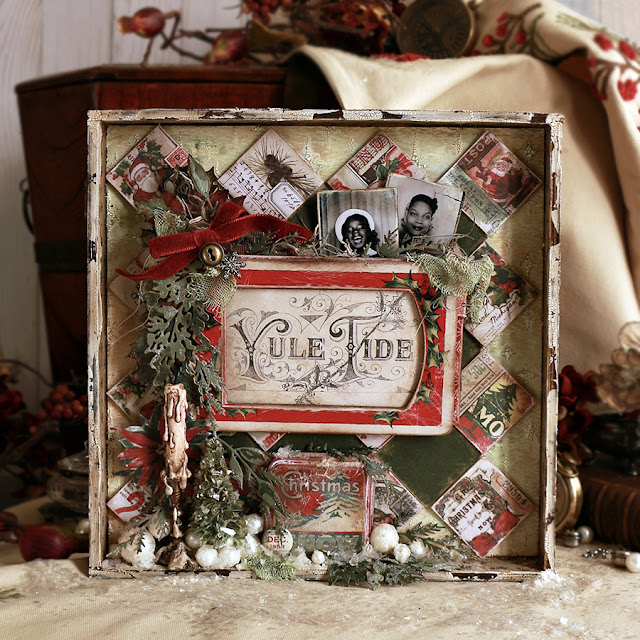
 Merry Christmas everyone! Today I am sharing the third project I created for the Tim Holtz Idea-ology 2021 YouTube reveal.  


I love making these little Christmas Vignettes, hopefully one day they will be a treasured keepsake for my family.  I have used one of my favourite vignette structures, the Divided Drawer th93793, for my project.


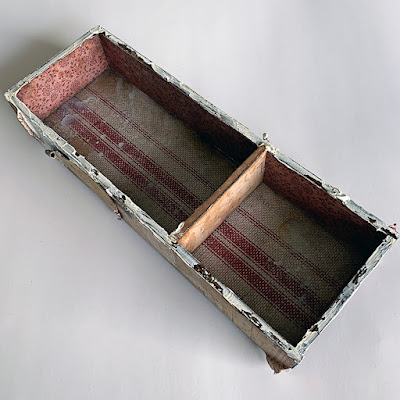
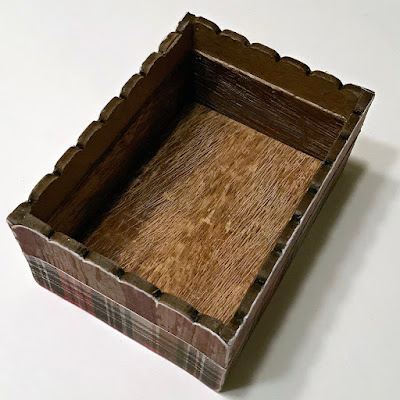
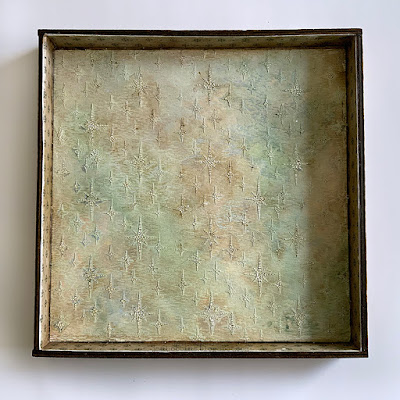
The Divided Drawer has 2 inner shelves, which are removable, and I have removed one so that the bottom has a larger space.  I've covered the inside with Christmas Backdrop papers th94181.  Instead of covering the front edges of the box with paper, I have randomly applied Distress Crackle Texture Paste tda71303.  Once this has dried, apply Distress Brown Crayon and rub with something damp to get it in the cracks.  I usually just use my finger, that I have swiped on a damp paper towel.


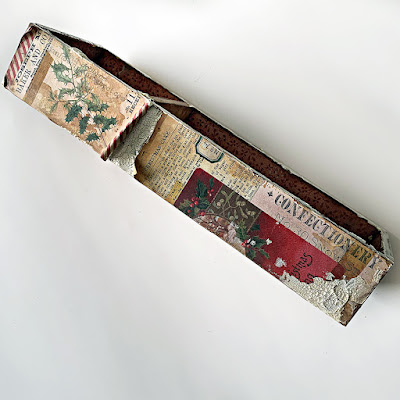
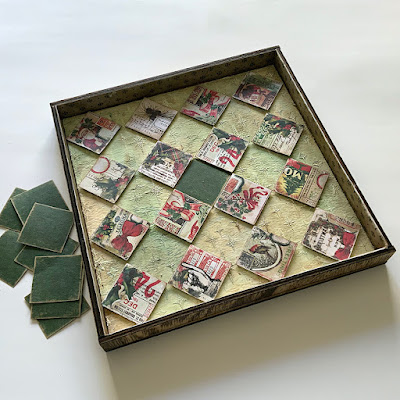
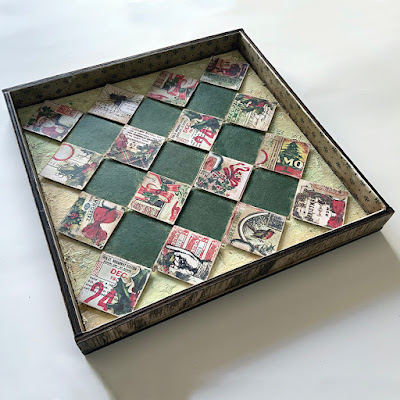
For the sides of my box, I have used the Christmas Pocket Cards th94190.  Love this package, there are 55 pieces all double sided, three different sizes (3 x 2, 3 x 6, & 3 x 4"), perfect for journaling, small areas, December Dailys,  and cards, plus most of them already look like you have collaged them.  I've distressed some, ripped the edges, or rolled up the edges with crackle paste underneath to give the box an old look.


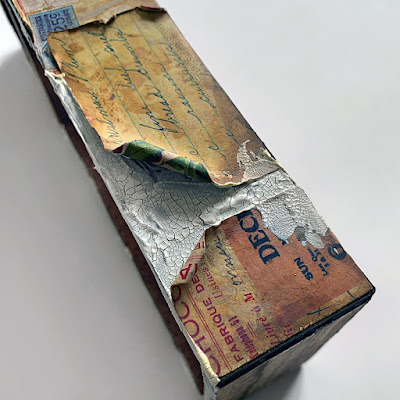
After the crackle paste has dried, also age it with the Distress crayons.


I've covered the back of the box with this Christmas Backdrops paper.  I have a somewhat Christmas confectionery theme to the project, so I chose papers that related to that.


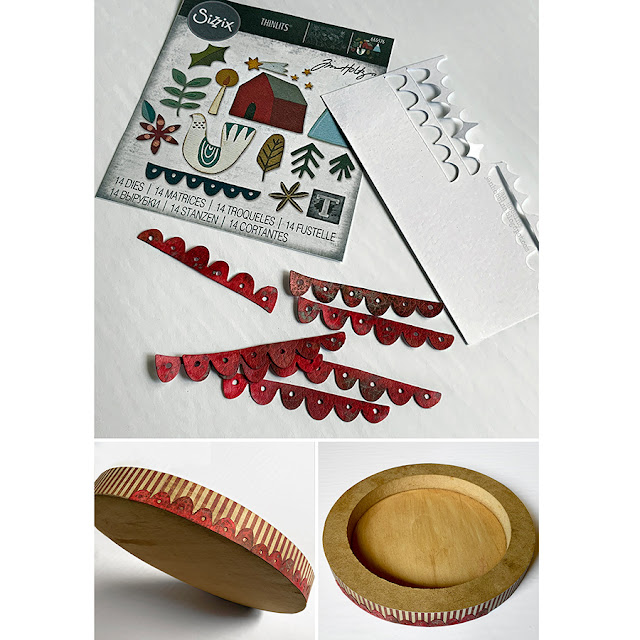
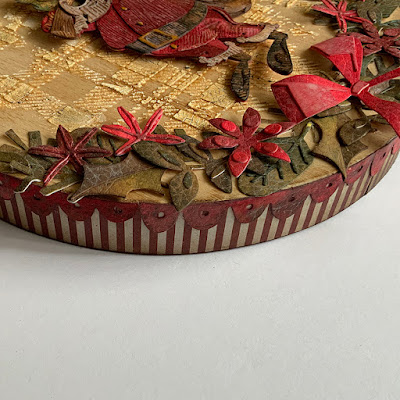
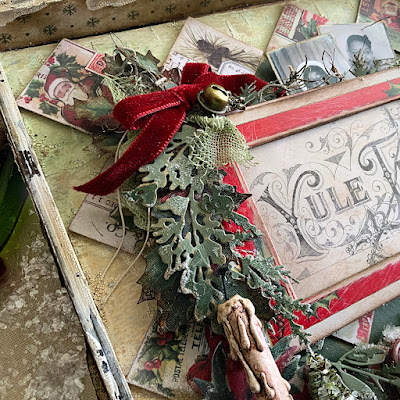
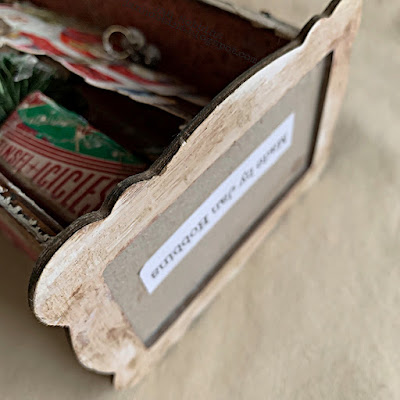
 Instead of adding legs to the bottom of my box, and wanting it to be a bit more secure while standing,  I made my own base slightly larger than the box.  I've taken a Baseboard Lace Frame th93786, aged it with Distress crayons, and then glued a small chipboard rectangle (approx. 4 x 2.5") which has been covered with this striped paper from the Christmas Worn Wallpaper pkg. th94182. I've added this extra layer to cover the hole in the frame. There are also a few Snippets Ephemera labels th94188 with a Christmas Remnant Rub,  and a Label Sticker Sentiment th94205 on the top and sides of the Drawer.


I then adhered this base to the bottom of the divided drawer. 


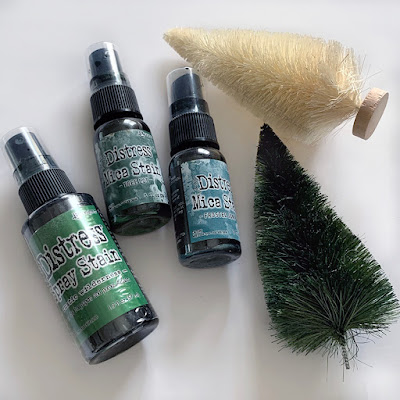
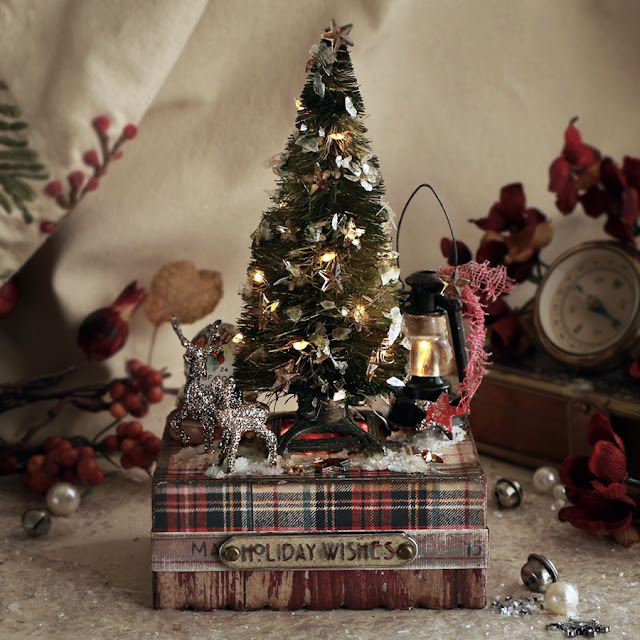
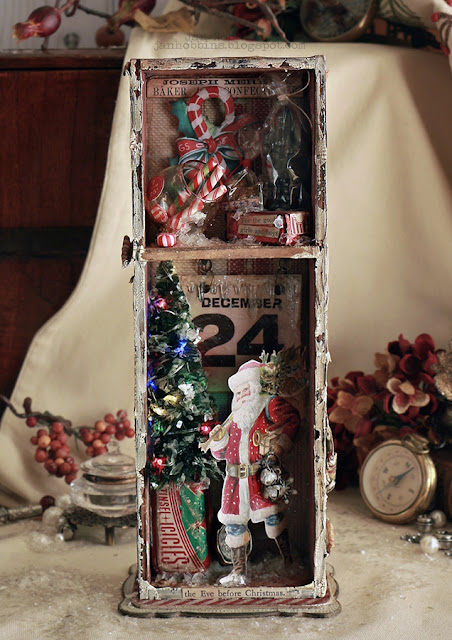
Spray your Woodland tree th94212 with your chosen colours.  I've taken the base off and clipped a bit off at the bottom.  Before doing anything inside the box, I've drilled my hole for the Christmas Tiny Lights th94106 that go on my tree.  I've drilled a couple of inches above the bottom corner and an inch in from the side, where the tree is going.  The tree is the only thing that I have lit up in this vignette.  You could always light up the top with another strand if you wanted.


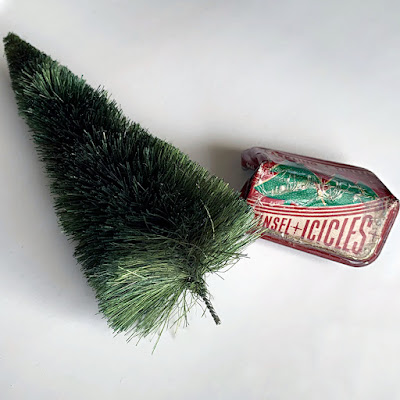
For my tree base, I used one of the Christmas tin tops th94204.  I made two cuts on the sides across from each other with wire cutters, just enough to bend my tin.  Caution, though, this is metal and the cut edges can be very sharp.  I used pliers to bend the tin.  It looks pretty beat up as I sanded and used the Christmas Ranger's Ink Icicle Crackle (Holiday Texture set tsck78227), but that's what I wanted!  It doesn't have to be perfect, you really just see the front part.


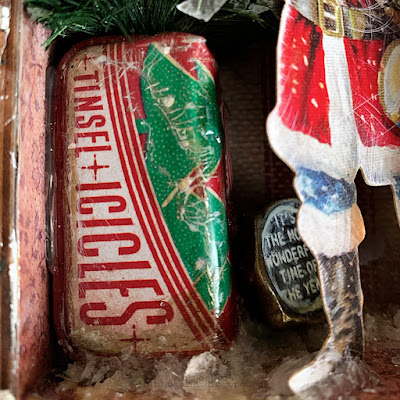
With your lights pulled through the back hole, wrap them around your tree. For the Distress Mica Flakes TDR69140, you can either apply them to your tree before wrapping the lights or after.  If you want to do it after the lights are on your tree, leave about 4 inches of lights closer to battery end, so there's enough room to apply your mica (I just use Glossy Accents with my finger all around, then pour on the flakes, tap lightly to remove excess on a paper) outside the box.  Once the glue has dried, just tuck in the extra lights near the start of your strand.  I had a dense foam piece that I stuck my tree end into, narrow enough that the tin could be glued to it, and then the bottom and side of your box.  I've added a Christmas Quote Seal th94202, using a Picket Fence Distress Crayon to highlight the words. I've glued this in with a thick small foam piece, so it's standing up.


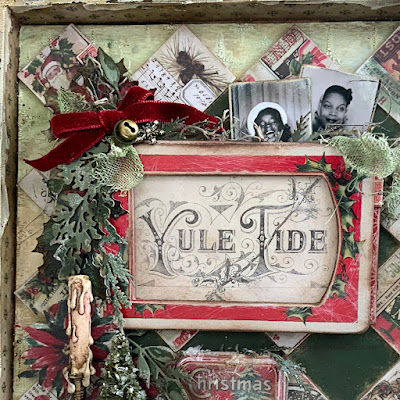
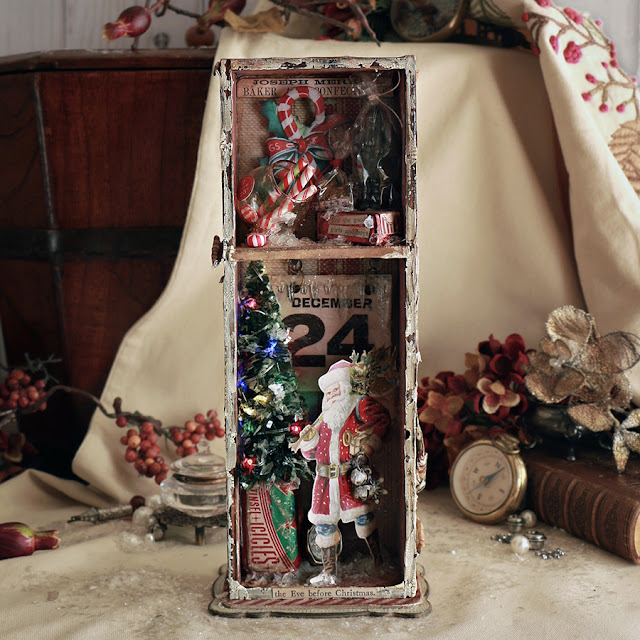
For the back of the bottom drawer I used this "December 24" piece from the Christmas Layers pkg. TH94185.   These layer pieces are a thicker coated cardstock, they sand and distress quite nicely.  I've a piece of the Mini Icicles th94206 to the top.  I'm sure you have noticed, I have applied  Distress Mica TDR69140 or Distress Clear Rock Candy TDR35879 to pretty much everything!  I've added it to the icicles here.  There are already two holes punched in the top, so I added some rings and hung the sign with two nails from the Vignette Hardware pkg. TH93668.  I think this set is being discontinued, which is sad as I use this a lot, there's the antique nails, eye screws, long screws, and hooks in it.  


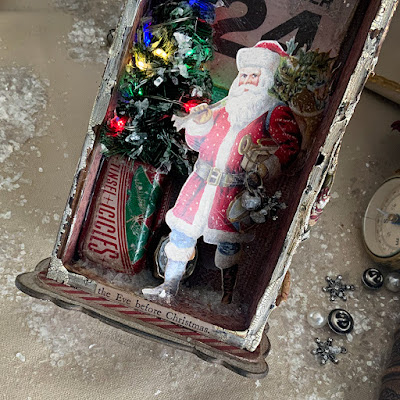
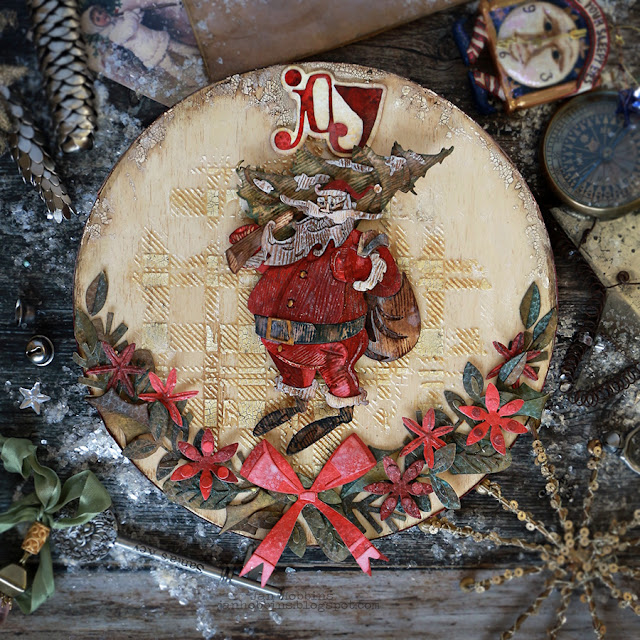
Once you have all those pieces attached, next is your Santa (Christmas Layers TH94185).  This one also is made from the thicker coated cardstock.   Before adhering him to the box, I've added a jump ring with two Tiny Bells TH94201 and a Snowflake Adornment TH94200(these snowflakes are so beautiful!) on the ring.  I had a little Tim Holtz Clip Bail TH93292 (discontinued but it's just a small metal clasp that turns a charm into a pendant) but you could use a small ring, which I attached the jump ring  and then poked the clasp into the Santa's hand so it looks like he's holding this.  The snowflake and bells were also coated with Rock Candy Glitter.  Because my Santa isn't flat against anything, I adhered behind his feet to the bottom and just at the back edge of his sack to the side with a hot glue gun.  You can't see glue behind the sack, but to cover up the glue at his feet, just apply either Translucent Grit Paste TDA71730, Snowfall Grit Paste from the Holiday set TSCK78227, or even a thicker amount of Glossy Accents, and apply Distress Mica or Rock Candy Glitter while any of these are wet.  That's the beauty of grit paste, it can cover up lots of things, and look like it's part of your project.  I've also added it around the tin base, and most of the floor of my display box.  I've  added a book clipping (the eve before Christmas) to the bottom front edge of the box from the Christmas Sticker book TD94183.


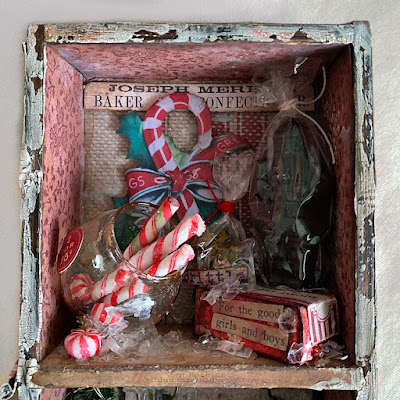
Now for the small section at the top of the drawer.  There's some Christmas Ephemera TH94187 in the back(candy cane), the little sign (Joseph Merkel Baker) is from the Christmas Pocket Cards, just cut out from one of the papers, th94190 pkg.  The candy jar is the Snowglobe th94015, without the base and upside down.  Inside there's Glossy Accents with Rock Candy glitter and Mica applied while wet, then the Red & White Confections with a little added glitter inside. There's a small price sticker from the Ephemera pack on the outside.  I applied a larger amount of Translucent Grit Paste on the bottom of the shelf and stuck the Globe into it.  Add lots of Mica Flakes and another candy piece.  The little Candy Box is made just like previous ones made here for Halloween. A peppermint Ephemera piece was added on top and book clippings (from the sticker book) added to the side.  There's a little bag of peanut brittle on top of the box at the back.  Glossy accents applied on a piece of plastic, coloured with alcohol ink, then cut into tiny pieces.  Clear plastic wrapped around and tied at top, then the word brittle( cut out from paper piece).`


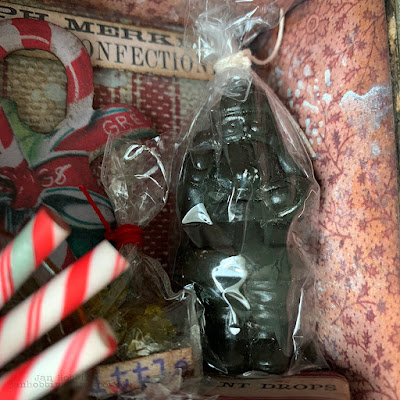
My chocolate Santa is the from the Christmas Salvaged Package TH93995.  The Santa figure was painted with thin coats of Ground Espresso Distress Paint.  I've dried the layers in-between, and did about three layers, to give it a matte chocolate look.  With plastic from packaging, I made it look like it was a bag, string closing the top. 


Again, to hide any glue or spaces at the bottom, I applied Grit paste (Translucent or Holiday set) then Mica Flakes.

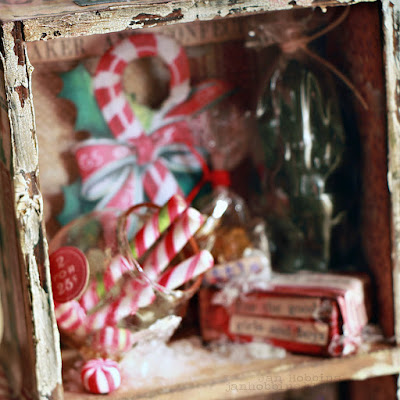
                 Here's another look at my Christmas Divided Drawer.  I realized that when I looked at these photos, I left the front shelf blank on the front edge, and I was going to put another book clipping there!  Which I did when I got my drawer back.  I guess I was in such a hurry to get my projects done, I forgot!


Here's a photo of the tree with the tiny lights on.

Well, that's my last Tim Holtz 2021 project to share.  Hope I've inspired you to create something with all the Tim Holtz goodies you have acquired.  Even if you are running out of time, at least you will have inspiration and a stash for next year.  I always find that I am in the mood to create Christmas things, even after Christmas is over.  We have terrible winter weather in January to March here, so it's a good time to stay home and craft.
We had a winter storm here last night and this morning, so I didn't want to leave the house, which turned out great, so I could get this post done!  I still need to get a few Christmas cards finished, so if I'm not last minute, I will share.


The view from my kitchen window this afternoon, looks nice and Christmasy, but it's -18C with the windchill -25C!  


Merry Christmas and Happy Holidays!

       Thanks so much for visiting me here and all your kind comments, they are greatly appreciated!

Until next time,

Jan


1

CHRISTMAS TREE VIGNETTE BOX - TIM HOLTZ CHRISTMAS IDEA-OLOGY 2021 RELEASE

Merry Christmas everyone!  I'm sharing another project created for Tim Holz and his Christmas Idea-ology YouTube reveal.

This YouTube reveal and all Tim's videos are always available to watch on his YouTube Channel.  There's so much inspiration in every video, along with lots of tips and tricks.


My base is the Vignette Box which is 4" x 2 3/4".  The box is only 1" deep and I wanted it a little higher, so I added on the Scalloped Etcetera Trim to the bottom.  My woodgrain paper is from the Christmas Backdrops pkg. TH94181 and the plaid paper is from the Christmas Pocket Card Pkg. TH94190.  I love some of the full patterned sides of these cards, the patterns are smaller, perfect for small areas.  The "Made in England" trims are from the Christmas Worn Wallpaper pkg. th94182.


I've used the Tim Holtz Sizzix Decorative Trim Thinlits(665435) die to cut out my scalloped paper pieces that match perfectly with the Stampers Anonymous Etcetera Trims THETC-008.  These trim pieces are glued onto the edge of the box first and when dried, then the paper pieces. You will have to cut the baseboard pieces to fit to size.  I've used Distress Collage Medium, which is amazing, how well and sturdy it adheres any surface.  I use this medium to glue my metal pieces too.  


Next, the plaid paper is glued on.  I've overlapped the sides, about 1/8" over the woodgrain, for extra security on the seam between the trim and box.


Don't you love these Christmas Tree Stands(th94198)?  I've aged mine a bit, with alcohol ink and a bit of paint.  I've also added in acrylic.


I cut a piece of Tim's Frosted Acrylic Sheet, which is retired, but you may have some in your stash! (th93153)  I've used alcohol ink to colour it and cut a circle in the middle for the base to fit.  I've done this, as I will be putting a few of the tiny lights in this part.


Before adhering the base to the vignette box, I've drilled a hole in the centre for the Tiny Lights strand. The strand will come up under the box, through the hole to the back side of the stand, wrapped around the tree and back down, leaving enough to go back across to the bottom of the lantern.  I've used just two lights for the inside of the lantern.  This is what the base looks like with the tiny lights.


I've dyed my bottle brush tree (Woodland Tree Lot th94211) with green Distress Sprays and also some Frosted Tree Lot Mica Stain Spray (limited release from Ranger Ink TSCK78234) to give it a bit of shimmer.  I've alcohol inked some Mirrored Stars (th94207) and added those to my  tree, along with clumps of Distress Mica Flakes TDR69140.  I've taken the base off my tree and adhered it into the base.


The lantern th94199, has been aged, you can do this with alcohol ink and Distress Paint. I've also used a light brushing of Bronze Distress Paint.  I've also added a bit of Alcohol Ink (Latte or Butterscotch) to the Lantern glass.  A piece of dyed Idea-ology Mummy Cloth was tied to the lantern handle.  Once you have the lights on the tree, push your remaining couple of lights into the lantern cavity.  Glue your lantern to the box base.


My Decorative Deer th93994 are covered with glitter from the Ranger Distress Holiday Sparkle set. tsck78210.  The glitter was applied with Glossy Accents.  In the back corner, I've glued two Wood Slices TH94209, staggered.  To glue the Quote Flair Button th94196 standing up, I've used  Snowfall Texture Paste, from Ranger's Distress Holiday Texture set tsck78227.  This is the glittery texture paste you also see on the box base, and the deer were also glued on with this.  I just applied a good clump and attached my embellishments before it dried. I've added some around the tree stand and lantern to give it a bit more security.  There's also a bit on the Quote button.


On the back of my Quote Button, I've cut out a small piece of paper, applied the "joy" Christmas Remnant Rub th94194, and fit it into the center of the button.  Red stars (with a bit of Holiday Sparkle glitter added) were added to the back and in front of the lantern.  Some were from the Christmas Baseboard pkg. th94193 and the thinner ones were from the Christmas Layers pkg. th94185.  


For the front of the box, I attached a Christmas Word Plaque th94203 with Fastener Hardware.  I alcohol inked the words with red.  Then I applied in the recessed areas, Grit Paste.  My project is complete!


Here's another look at my Christmas Tree Vignette Box!


Thanks so much for stopping by,  I've got one more project to share, hopefully in the next few days.  I've been busy sewing some Christmas gifts, so I have been away from my paper crafting and the computer.   Also my house is a disaster and I have taken over every room! lol. 

See you soon,

Jan


2

WOODLAND SANTA PANEL - TIM HOLTZ SIZZIX CHRISTMAS 2021 YOUTUBE RELEASE

Hello friends!  I can't believe today is December 1st!  As usual, just like every other year, I am not even close to getting everything done by the beginning of the month. But I am sharing the last of my Tim Holtz Sizzix Christmas 2021 YouTube reveal projects. 


I've got a bit of a woodland theme going here , and it's not just this wonderful Woodland Santa Colorize Thinlits set, but also, my base is a Birch wood cradled(the top is birch but the stretcher support is mdf.)round panel.  My love for woodland themes must be the Canadian in me!  My local art store has these panels in different sizes, this one is 8" in diameter. 


I started off decorating the edge (it's about 3/4" wide) with Christmas Idea-ology striped paper from a previous year and cutting out this scalloped trim from Sizzix Funky Nordic Thinlits set 665576.  I do love a good trim or border piece, and especially this one! Ranger's Distress Cracked Leather cardstock (TDA71280) was used for my trim and foliage.  I cut out the trim and then coloured it, but it would be easier to colour first.  Although, when you colour after, the edges are a little darker and there is no white core showing from the paper.  Glue these to the edge of your panel on top of the paper.


For the top of my panel (sorry I have no photos!) I applied with Distress Crackle texture paste tda71303, with the Stampers Anonymous Plaid Layering Stencil THS097.  I immediately applied a bit of Distress 
Antique Linen Embossing Glaze tde70948 to the larger stencilled areas.  I just applied a little with my fingers, as I didn't want the glaze all over.  I used a fine paint brush to kind of push the bits that I didn't want on the flat wood, onto the stencilled squares.  Let this dry naturally, then heat set with your embossing gun.  Hope that made sense!  This was just to give the stencilling a bit of colour as close to the wood colour as I could but a bit of texture.  I also used the Crackle Texture Paste very sparely around the top edge, and later a Distress crayon to colour in the cracks and slightly darken the edge.  My foliage is all die-cut with  Distress Cracked Leather Cardstock that was coloured first in various reds and greens.  These foliage pieces are also from the Funky Nordic Thinlits set. Loved the look of these die-cut with the leather paper! The bow was die-cut from an older Sizzix set,  Deck the Halls Colorize Thinlits set (one of my favourites!).  Adhere the pieces to the bottom half of your panel.  Just wanted to mention that I did not seal my wood panel.  I tested a small patch on the back to see if I liked it, but I only used Distress Collage Medium, as I didn't have a sealant and I didn't like the end result, so I decided not to use it on the front. 


Now for my Woodland Santa!  I wasn't sure about doing this in Distress Woodgrain Cardstock tda57826, as some of these pieces are really small, but I was determined!  I think the face pieces were the hardest, so you could do these in regular cardstock.  I pre-coloured my woodgrain cardstock in reds, browns, and greens, using oxides and inks.  The white pieces are lightly coloured brown, and then inked with Distress Picket Fence ink.  I think that inking the edges of your pieces does bring out the shapes more, or even inking parts you want slightly darker. Keep this in mind, when you are colouring your papers, it's always good to have parts that are light or dark, so you have options for different die-cut pieces.  After your Santa is assembled adhere him to the center of your panel.  I used foam adhesive dots. The word "JOY" was die-cut with the Tim Holtz Sizzix Thinlits set, Festive Words, also from the Distress Cracked Leather cardstock.


Here's another look at my finished wood panel!    That was the final Sizzix project created for Tim's YouTube live, but I have a couple of Idea-ology projects still to share.

Thanks so much for stopping by,


Until next time,


Jan

1

DASH AWAY ALL CARD - TIM HOLTZ & SIMON SAYS STAMP DIECEMBER DIE SET

Hello friends!  I'm sharing a card today featuring a special limited edition Tim Holtz Sizzix die set from Simon Says Stamp , in celebration of their DieCember event. This set is free with a $25.00 minimum purchase of any Tim Holtz product.  Check out the Simon Says Stamp YouTube video where Heidi and Tim reveal the die set and his amazing Village Dwelling projects here:  https://youtu.be/5jfls2PBq0s

It's hard to tell in my photo, but this is a shaker card!  


I created a background with Distress Mixed Media Heavystock, Distress Sprays and Oxide Sprays (Faded Jeans, Chipped Sapphire, Speckled Egg, Antique Linen, Scattered Straw and a little bit of Distress Flickering Candle Mica Stain on the moon). The small amount of yellow tones were applied first and where I wanted my moon. The stars were die-cut about center, my background cut to size, then machine stitched around the edge.  Gold Kraftstock was cut slightly larger and adhered behind.


My Santa in the sleigh silhouette was die-cut with black smooth Kraftstock, the moon with a scrap piece of Distress white Heavystock that had yellow tones with a bit of Flickering Candle Mica Stain on it.  I used the large  3 1/2"size of the Sizzix Domes(664190).  I'm not sure if these have been discontinued, I hope not!  


I added in a couple of clouds and my sentiment, stamped with Simon Says Stamp limited edition Tim Holtz Stamptember set.


After my moon and clouds were glued down, I added a small amount of Tim Holtz Mica Flakes (TDR69140) in the centre and then adhered the dome over my scene.


Next I die-cut foliage from the Sizzix Festive Bouquet 665565 in Distress white Heavystock.  I added in a very small touch of colour with a wash of Stormy Sky Distress Ink applied with a watercolour brush.  After my pieces dried, I applied Distress Clear Rock Candy Glitter with Distress Collage Medium.  These pieces were adhered around the outer edge of the dome to form a wreath.


For the finishing touches of my card, I stamped my sentiment on a scrap piece of coloured Heavystock, die-cut the stars again on each end, and backed this on gold cardstock.  The silhouette and sentiment were adhered to my card front.  This card front was adhered with foam adhesive squares to patterned paper (Christmas 2020 Worn Wallpaper) and then my cardstock base.

If you are interested in this free gift, I wouldn't wait too long, as there are limited quantities!
Hope this inspires you in your card making!

Thanks so much for visiting!

Until next time,

Jan


3

YULETIDE SQUARE VIGNETTE TRAY - TIM HOLTZ IDEA-OLOGY CHRISTMAS 2021 RELEASE

 Hello friends!  Today I am sharing a project I created for the Tim Holtz Christmas Idea-ology 2021 YouTube live.


The base for my project is the new 9 x 9” Vignette Display Panel.  I didn't take very many step by step photos as I was creating. I really didn't have much time to get my projects done so there was some late night crafting! 


For the inside of my panel, I’ve used the Sparkle stencil(THS132) with Distress Texture Paste, on  Distress Watercolour cardstock. After the paste dried, I coloured lightly with Distress Oxide and Distress Sprays. Sorry, I didn't have the colours written down, I'm pretty sure Bundled Sage was used though, lol! The inside edges are covered with Backdrops Christmas paper TH94181. 


Next I used the Christmas Collage Tiles (TH94189) and green cardstock cut the same size as the tiles to create my background pattern. The Collage tiles are adhered with foam adhesive squares so they are raised. 


This is my background pattern completed.  Something similar to a quilt pattern. At this point, you can finish off the front edge of the panel sides.  I just apply Distress Opaque Crackle paste TDA71303 randomly on the fronts, let dry naturally, then colour with Distress Brown crayon.


For the sides and back of my tray, I'll show you how I finished it here now, but I did do mine later on, as I wasn't sure how I was going to finish these parts yet.  I applied pieces of the Christmas Post Cards TH94192, Christmas Ephemera TH94187, Christmas Snippets TH94187 or any other paper pieces.  These  can be cut, torn, curled, anything to make them look like they have some history on this box.  I leave some of the wood box exposed and once you have it all glued on, apply Distress Crackle Paste randomly.  I have  even cut out a piece of chipboard the size of my label or paper, laid it down, then apply my crackle, then lift off the chipboard.  You are left with the blank spot that you will glue you paper piece onto, after your crackle has dried and you have tinted and coloured the crackle.  I use any dark brown Distress Crayon, usually Walnut Stain.  Apply this into the cracks, I usually wet my fingers lightly from a wet paper towel, and rub the colour in. After I apply a light wash using Distress ink from my craft mat, and a watercolour brush.  Heat dry.


For the back of my tray, I covered it with Christmas Collage Paper TH94192 and Distress Collage Medium.  You have to apply it a little heavier, so the paper becomes transparent, and then apply the collage medium on top after.  If it tears in places, I'm ok with that, but you can always cover those spots with more tissue or your Distress Crackle paste.  The label in the left cover, is an example where I used the piece of chipboard (not glued on) the same size as the label, and  then applied the crackle paste.  The label glued on after, looks like it's embedded into the paste.


Now for the embellishments. I’ve used the Yuletide card from Christmas Layers(TH94185) which is a thicker coated cardstock and placed it behind a Baseboard frame (th94143). This is the front of my pocket. 


Next I took one of the Mini File Folders (th94191) and propped it open with a Christmas Snippets Label(th94190) with a stamp sticker on top, from the Christmas Sticker Book(th94183).   This holds the file folder open like a pocket. My Yuletide frame is adhered to the front of this pocket.  This pocket is filled with foliage, a tiny amount of spanish moss, Bundled Sage tinted Mummy Cloth TH94155 and two Photo booth photos (these have been distressed on the edges) that are in the Christmas Paper Doll package TH94184.  You could fill this pocket with your own small photos or a small piece of memorabilia.  


I die cut a selection of Christmas foliage from Sizzix Holiday Brushstroke 2,(665578) Festive Bouquet (665565) Thinlits sets and also used poinsettia die-cuts from the Christmas Worn Wallpaper scraps(th94182). The foliage is a combination of cardstock, oxide or ink coloured Distress Heavystock.  These pieces all have randomly applied Rock Candy Glitter to them.
The poinsettia pieces are shaped slightly with a Tim Holtz Sizzix shaping tool 665304 (a metal ball) to curve the petals, then Rock Candy glitter applied randomly.  Do enough of these to cascade down the side of your pocket, a few in your pocket, and on the bottom of your tray.


I have also used Idea-ology Warm Velvet Trim th94115, Tiny Bells th94201, and Snowflake Adornments th94200 for the top corner.


Here's a better look at the photo booth photos, and the snowflake adornment (love these!!)


For the bottom of my vignette tray, I have used a Drippy Candle th94172, Candlestand Adornment th94166, Woodland Tree Lot th94211, Baubles Findings th94099, Tin Tops th94204, and Mini Flair th94197.  The Drippy Candle is adhered to the top of my Candle Stand (coloured with Alcohol ink to make it darker and more vintage).  Once that was secure, I added more drippy parts at the base and down the candle stick with hot glue.  Colour the drips with paint and Distress Crayon.
The Baubles are covered in the Holiday Snowfall Grit Paste (this is Ranger's limited Holiday Texture Set, tsck78227) with some Distress Mica Flakes added into it.  The Christmas Tin Top is covered with Icicle Crackle Paste, also from this Holiday set.  White Picket Fence Distress Crayon is rubbed into the cracks.  The Holiday Snowfall Grit Paste is applied on top and also on the base of my tray.  My small tree is coloured with green, and Mica Flakes applied.  I think I've got everything! 


Here's another look at my Yuletide Square Vignette tray!  Any little embellishments can be used for these vignettes to create your own Christmas magic!

I still have two more Idea-ology projects and another Sizzix one to share, hopefully soon.  My back is still bothering me to sit too long, so I'm doing things a little at a time!  But, my house is decorated, finished this week!  Yeah!

Thanks so much for visiting here, and also for the lovely comments.  They are so appreciated!

Until next time,

Jan


2
Back to Top