FREE TO FLY CARD - TIM HOLTZ RANGER INK FOUNDRY WAX RELEASE

Hello friends! If you managed to catch the Tim Holtz YouTube Live today (March 12th), you are aware of his very new Ranger Ink product, Foundry Wax.  I was lucky enough to receive some to create with, and all I can say is, wow!  This wax is nothing like any other wax that you have used.  I don't know about you, but it is very dry here, so every time I would buy artist's wax products, they would dry out in no time and I would have to throw them out.  Also, when heated, it looks more like leafing and is permanent. If you have ever tried gold leafing, you know how messy that can be!


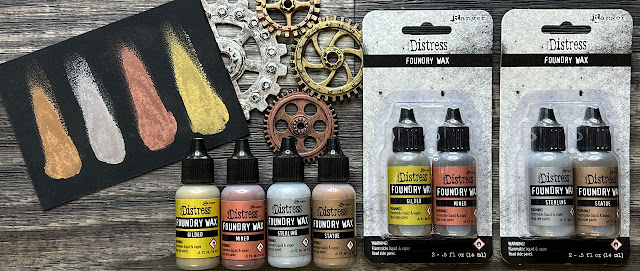
Foundry Wax comes in two different sets.  Wax Kit #1 is Gilded and Mined and Wax Kit #2 is Sterling and Statue.

  
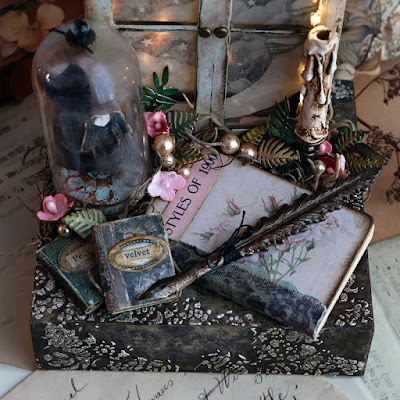
I've created this card using the Mined Foundry Wax, which is a very rich coppery colour.  Just a quick explanation to show you a few different ways to use it.


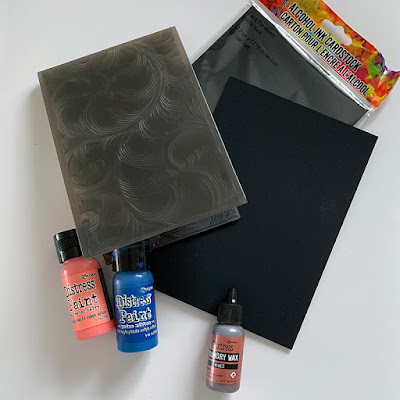
I first embossed a piece of Black Alcohol Ink Cardstock with the 3D Elegent Embossing Texture Fade.  I used this cardstock as I love the matte velvety texture and it's really black.  It is designed to work with Alcohol Inks, Pearls and mixatives, therefore it doesn't buckle and is a good weight. I wasn't sure what medium I was going to use when I first started, I was thinking Alcohol Ink, but then I just decided to use paint to see how Foundry Wax worked with this medium. 


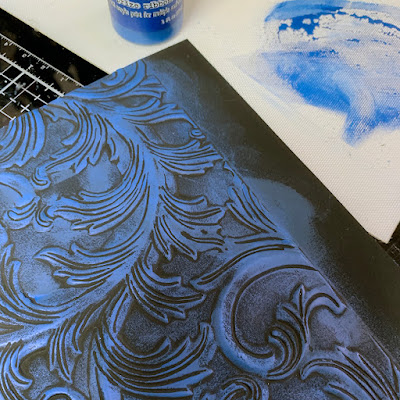
After embossing, I applied a very small amount of Prize Ribbon Distress Paint, almost dry brushing it, so my black still showed through.  I dry brushed a touch of Saltwater Taffy Distress Paint in a few areas, just to give it a bit of warm colour.


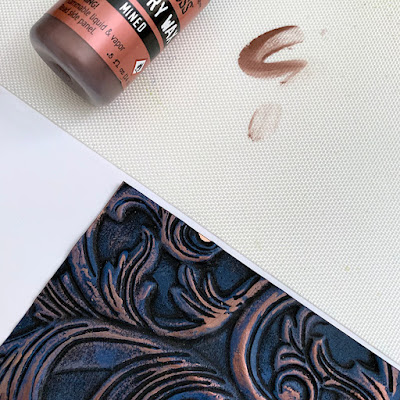
After my paint dried, I started applying my Foundry Wax.  I did this with a very small amount on my craft mat at a time.  I’ve used my finger to apply it on my embossed surface but you can also use a small brush. Since this is a very new product, I would suggest watching Tim's video to hear all his tips and tricks with it.  He has so many different amazing techniques using this product.  It dries very fast, once out of the bottle, so I used small amounts at a time.  A little goes a long way. You won't want to waste any, as you will want to use it on everything!  Once I had it applied to my surface, I used my Embossing tool to heat it.  It doesn't take long, a few seconds, and like magic, it turns shiny immediately! A word of caution, do not heat next to your Foundry Wax bottle, it does react to high heat very easy!  That was cautionary advice from Tim!


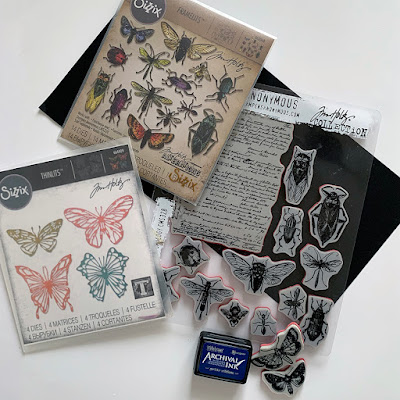
Next, I used it on a butterfly die-cut.  I used Metallic Kraftstock for the large butterfly, lightly sanded the edges.  I also used this Entomology Stamp Set with matching dies for the smaller butterflies.  These were die-cut out from regular black cardstock, then stamped with Prize Ribbon Archival Ink,  and embossed with clear embossing powder.  I wanted the Foundry Wax to pick up all the raised embossed stamping on my butterflies. After my stamped and embossed images were finished, I applied the wax with my finger. Wow!


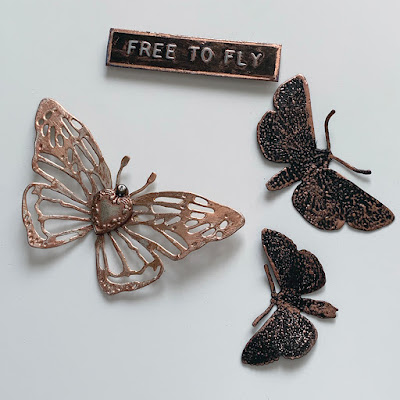
I love how this wax highlights the stamped images, can't wait to try other stamps!  I didn't use a lot on the larger butterfly, but I did use it directly on the metal Heart Adornment.  Love how it works on metal! (I use my Tim Holtz reverse grip tweezers to hold my metal piece to avoid burning your fingers)There was a tiny bit left on my mat, so I touched up my label sticker too.  I did say, you will want to use it on everything, didn't I? lol!  On all my items, I have applied the wax with a thinner amount, but you can also apply it heavier or even reapply more layers. 


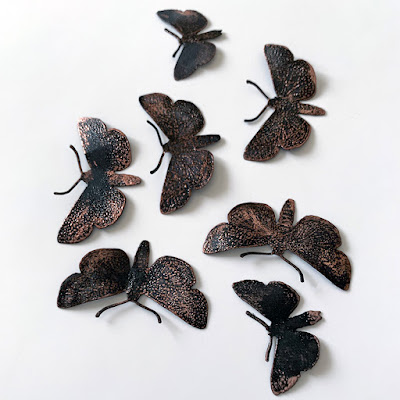
I was having fun making my butterflies, I couldn't stop.  I'll save them for another card!


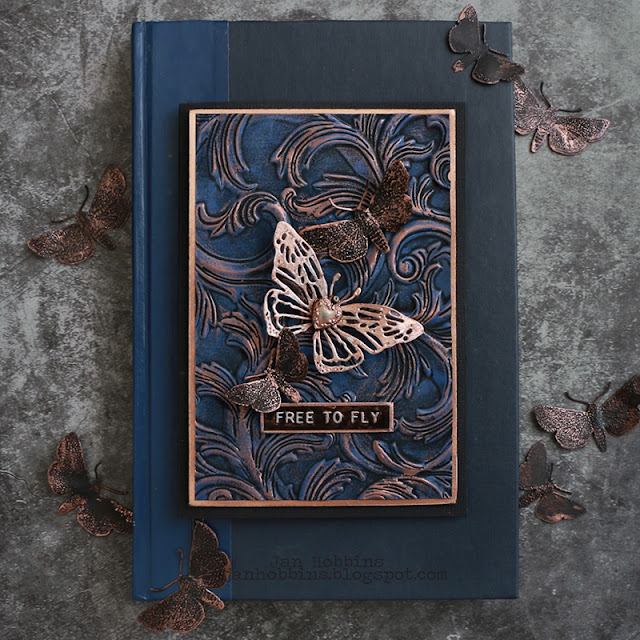
I matted my card front to a piece of copper Metallic Kraft Stock, then my black card base.  Adhere your butterflies and label sticker, and the card is done! I’m sure I will be trying this wax on everything! There's so much to learn and experiment with Foundry Wax.  Hope you try out this new product, I can't wait to see what everyone creates!  

Thanks for stopping by,


Jan

Materials Used:

Alcohol Ink Matte Black Cardstock TAC65487
Mined Foundry Wax
Scribbly Thinlits 664409 (large butterfly)
Entomology 663068 (small butterflies)
CMS328 Entomology Stamps
3D Texture Fade - Elegant 664172
Prize Ribbon - Distress Paint & Archival Ink
Saltwater Taffy Distress Paint
Metal Heart Adornment TH94130
Label Sticker TH94229 (Free to Fly)


5

SEAMSTRESS DESK VIGNETTE - TIM HOLTZ IDEA-OLOGY 2022 RELEASE

 Hello everyone!  I’m back sharing another project, this one is with the new Tim Holtz Idea-ology 2022 release.  If you didn’t catch Tim’s live release on his YouTube Channel, you can watch the replay anytime, details on his blog. He will have photos and links to the other Makers projects also there.  Make sure you check them out, there’s some amazing makes and lots of inspiration!  Now onto my first project!  This one was not sent to Tim for the YouTube Live.


This project was all because of the Moon Transparency, one of my favourite images. My scene in this vignette is the desk of a seamstress.  So many women in my family are/were sewers. I've been sewing, since a very young age and my daughter is a fashion designer, so this theme has special meaning to me.


There are different plastic images in this new package, some wonderful butterflies which I can’t wait to use. I decided to use the moon in a window and of course Tiny Lights to light up like stars. I’ve used a Baseboard Window Frame to place in front of the image and Vignette box.  


I’ve covered the vignette box with the new Metallic Colored Kraftstock the back has been distressed. 


The sides have been embossed with the Quilted 3D folder, then distressed. 


The base is a new Square Vignette Box, which gives more room for all those embellishments. This was covered in paper from the new Backdrops Volume 3 pkg. I’ve used the Doily stencil and Distress Crackle paste randomly around the edges. Walnut stain distress crayon was applied in the cracks after it had dried.  


Before assembling my base, I worked on my embellishments. These new domes are a medium size, perfect for displaying those small items. I’ve used the centre of a small embossed Impresslits Medallion on my dome base. This has Distress embossing glaze, then Distress Crayon applied to it, giving it a metal look. The outside of the base is covered with new Linen Tape.  


The glass dome has a very small amount of Collage Medium applied to the inside, just enough to give it an aged look. I’ve added a strip of Design Tape Trim around the bottom edge. These trims are perfect for covering the edges of the vignette structures also, they are the same width. I wanted it to look like clothing samples in the dome, so I used the new Tiny Paper dolls, removing the feet, hands and heads (sorry, that sounds terrible , doesn’t it). The clothes were tinted with Distress Crayons and Memo pins were hot glued to the backs. These were poked into the dome cork base. 


In the Ephemera Memoir pack, there's my favourite, the book covers.  I love making little books with these, wish there was a whole pack of these! I've added a Snippets Label Ephemera to the front of one (a word from Book Clippings added later) and Ephemera Snippets on the other.  I've also made a larger book, using a piece of ephemera for the front cover (glued onto a piece of chipboard).  For the spine, I've used a piece of the Linen Patchwork Design Tape and the title is a piece of ephemera.


I've grunged up a Quill Adornment, with Alcohol Ink and Distress Glaze.  This was adhered to a pen nib, also grunged up.  I've wrapped the area where the two are adhered (with Distress Collage Medium) with some black Tim Holtz EclecticThread (I think this is retired, but could still be available in retail stores)


Even though this was a Halloween release, I love these Drippy Candles and Candle Stands.  Also grunged up.  I've used Distress Collage Medium to adhere these together.  It's amazing how well this medium holds, even with metal.


Now, to get my main pieces together.  I've drilled a hole in the top of my Square Vignette box and the bottom of my Vignette box for the Tiny Lights to go through.  Adhere the two boxes together with Distress Collage Medium (before attaching the moon transparency and window frame).  Thread your lights through from the underside of the bottom box, into the top one.  I concentrated the lights more where the stars were and left a bit extra outside the box for the candle.  Adhere the transparency, then the window frame.  I have added two Brad Fasteners for knobs on the window frame.


Here's with the lights on, so you can see how the lights look like stars.  Now, I'm ready to build up my Vignette box with my embellishments.


The back of my vignette.


The top of my Dome has a small Ring Fastener (minus the ring!) to hold a clear Bauble (Christmas release), both adhered with Collage Medium, and a bit of thread tied around to cover up the glued section.
The top of my window box has a Quote Seal, highlighted with Distress Picket Fence Crayon and Picket Fence paint around the inside edge.  I've used a bit of Spanish Moss and Sizzix die-cut leaves also.


Next I've added my small Dome, candle, Books, and Quill pen.  The tiny lights are just behind the candle (there's just two, cut off any extra lights you don't want).  Fill in the spaces with Spanish Moss, Baubles (coloured with Mushroom Alcohol Ink), Bouquet Flowers (dyed with Distress Pink Sprays) and die-cut leaves.


Here's a side view of my vignette.


Here's another look at my finished make!

This is the first of my Idea-ology makes, more to come!

Thanks so much visiting, hope you enjoy this new release as much as I do.

Until next time,

Jan


Materials Used
TH94247 Backdrops Volume 3
TH94242 Vignette Boxes Squares
TH94248 Baseboards Windrow Frames
TH94241 Transparent Things
TH94239 Display Dome Small
TH94225 gauge Dials
TH94220 Adornments Quill &Arrow
TH94221 Ephemera Pack Memoir
TH94228 Kraftstock Metallic Colours 
TH94230 Linen Tape Patchwork
TH94235 Paper Dolls Mini
TH94236 Quote Seals
TH94188 Ephemera Snippets Labels
TH94152 Snippets Ephemera
TH93279 Vignette Boxes
TH92909 Pen Nibs
TH94166 Candle Stands
TH94172 Drippy Candles
TH94099 Baubles
Th94180 Baubles Halloween
TH94019 Tiny Lights
TH92833 Split Ring Memo Pins
TH94128 Design Tape Trims
Th93060 Ring Fasteners
TH93569 Bouquet Findings
TH92703 Brad Fasteners
THS018 Doily Layering Stencil
tda71303 Distress Crackle Texture Paste
Distress Crayons, Inks
Distress Embossing Glaze - Speckled Egg
Alcohol Ink - Mushroom
Sizzix 662702 Funky Floral
            662720 Medallion 3D Impresslits
             665734 Quilted 3D Texture Fade 


4
Back to Top