Hello friends! One of my favourite things to create with Tim Holtz Idea-ology products, are little vignettes.

I don't know about you, but I love all the Trinket Tins so much that I have a really hard time using them, I just want to collect them! I've actually purchased more than one of each... to use and one or two to keep!

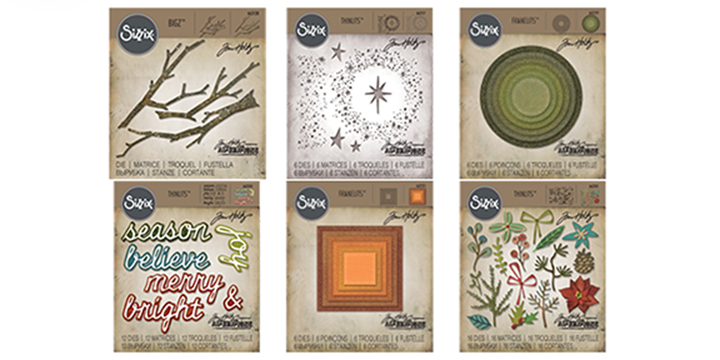
The first thing I did, was cover a Vignette Wood Box (TH93279) with plaid paper from Christmas Paper Stash (TH93739) and sand the edges. I then adhered some Funky Festive and Mini Holiday Greens die-cuts on the top of my box where my trinket tin was going to sit. I didn't do too many as I wanted it still to be fairly flat. With the matching plaid Christmas Design Tape (TH93760), I taped all the inside of my tin, both sides, close to the outer edge to finish off the inside, except the edges that will sit on the box (I'll tell you why in a bit). A piece of Worn Christmas Wallpaper (TH93777) with a wintery scene, was cut to fit the inside of my tin lid. A Christmas Quote Chip (TH93753) with four little mini fasteners (TH92790), love these, they look like little screws, in the corners. At this point, I have not put the box top or anything else in the deep side of the tin. Place your tin on the box where you want it placed, and hammer a small nail through the tin and wood box, both sides, lid and bottom of your tin. Your tin is now secure on the box to continue on embellishing. I just glued a piece of foam underneath where the nail came through, or you could bend the nail. Add in a piece of Design tape to the bottom of your tin, both sides, to cover the nails.

This is the view from the back, where you can see my Christmas foliage peeking out from the tin bottom. I tucked in a few more pieces after the tin was nailed down.

The smallest of the Vignette Box Tops, there's 5 in the package (TH93755 - Ribbon Icicle Decorations; 3.38 x 4.75 inches) fits inside the trinket box with a bit of room above and below. I've just die-cut some Distress Cardstock with Funky Festive and Mini Holiday Greens to fill in that empty space. I wanted a 3-d looking scene inside, so I found this photo ephemera from the Christmas Ephemera pack. It was a bit wider than my box top, which was perfect. I just taped the two sides to the front corners, giving the photo a curve. This created a half circle area to create a "floor" by just adhering a small piece of cardstock to the bottom. This was covered in Tim Holtz Grit paste(for snow) and a mini tree. Rock Candy Glitter was added while still wet. Adhere the box to the inside of your tin, leaving a space on the bottom and top for your greens. Greens were added to the top of the tin with Tiny Bells (TH93744), ribbon and a Christmas Token.

Love these Salvaged Snowmen (TH93774)! Fun to paint or alter anyway you want, the same as the Salvaged Santas, which I altered with just Gold Mixative Alcohol ink and glitter here. I've used Distress Paint and antiqued it with a Distress Crayon (diluted with water). To add a bit of snow around my snowman, paper dolls, and tree, I used Grit Paste with Rock Candy Glitter added while wet. This will anchor your embellishments to the box a bit more securely even though they were glued down first. The Icicles (TH93778) were accented with Distress Rock Candy paint, glitter, and a touch of white Picket Fence paint.

A tree Ephemera piece was adhered to the corner of the tin. The edges were inked and a bit of Rock Candy glitter added. For my tree in the front, I used a Woodland Tree(TH93757) which was coloured with Bundled Sage Distress Spray, glittered with Rock Candy Glitter, and placed in a thimble(TH93772, my favourite item from this Christmas release!) which was coloured with Alcohol Ink. I bit of snow was also placed in front of the thimble. Some Beaded Berries(TH93779) were coloured with alcohol ink and placed among the foliage.

Well, I think describes about everything. Sorry, I didn't take any step by step photos this time. I find it really slows down my creating process, especially in the winter here, when it gets dark so early and there's a shortage of good light! Hope I've encourage you to use one of your trinket tins!
Thanks so much for visiting me here, and thank you for your wonderful comments, they are much appreciated!
Happy Crafting,
Jan


