Hello there! My goodness, I don't know where this month has gone. It seems like it was just the start of summer not too long ago. I wish I could say I was busy doing something exciting or I've been on vacation, but just working away at the store and home.
I have a Sizzix tutorial for you today, featuring a new
Home Decor line. This collection is made for the Big Shot Plus Machine (it has a 9"wide opening) and also the Big Shot Pro Machine (12 1/2" wide opening). This collection offers bigger sized dies for creating home decor projects.
I don't know about you, but there are certain shapes I always seem to be drawn too. Stars are one, but lately I seem to like hearts a lot more than I used to. This Heart Wood Plank - Mix the Media item from Jillibean Soup has been calling my name for a while now at the store, which come to think of it; that's why I need to work all those hours, so I can support this
hobby addiction! I created this decorated wood plank home decor piece with help from my Sizzix dies.
The wood plank measures 11" by 9 3/4". It's about 1" thick.
This
Botanical Flourish Bigz Plus die by Lindsey Serata makes a large 11 1/8" by 8" design. When die-cut, it is the negative piece that I used in my project. I thought it would make a great stencil, so using a piece of cardstock, I die-cut my stencil. Your Sizzix Bigz Plus Sandwich for the Big Shot Plus machine would be Cutting Pad, Die facing up, paper, Cutting Pad. The Sandwich for the Big Shot Pro is: Adapter Pad, Cutting Pad, Bigz Die (you might need your mylar shim underneath the die), paper, Premium Crease Pad. If you want to use your stencil more than once, a piece of acrylic would work better. This would look really cool on a wall, wouldn't it?
I didn't use all of my stencil, as it was larger than the heart. Pick which area you would like and lay it down on the wood. I used Black Wendy Vecchi Embossing Paste and applied it using my stencil. Set this aside to dry.
I die-cut one bird from this Bigz Plus die by Katelyn Lizardi called,
Birds in Flight. I covered a piece of chipboard with a piece of Ranger's Foil Tape sheet before die-cutting.
To emboss my bird, I chose Sizzix's
Flowers#12 by Stephanie Ackerman. My bird is larger than my folder, but I did it in three passes. Once I applied my paint, you can't really see any mismatched areas.
Love the embossed pattern of this folder! Now I'm ready to apply my paint.
I had painted my bird die-cut with Black Soot Distress paint. Let this dry for a few minutes, then lightly wipe off the excess paint, leaving the paint in the recessed areas.
Alternate different colours of paint, applying lightly and wiping off excess. I tend to use my finger when applying, there's more control over how much paint to use. It's easier to apply more often, than removing it when too much was used as you really want just the raised areas coated. Once my project was completed and my bird was adhered, I went back and applied a bit more of the brighter colours to get my bird to stand out more.
Next came these
Botanical Leaves and Vines, another Big Shot Plus die, When die-cutting Thinlits Plus, use this Sizzix Sandwich; Big Shot Plus platform, Adapter Pad A, Cutting pad, paper, Thinlits, then Cutting Pad. I used Core-Dinations Tim Holtz Distress Metallic cardstock for this leaf, then lightly sanded.
There are three different Thinlits dies for the Vine layers. The Background layer, which I used Distress Metallic Cardstock, the middle layer, which is a solid die, and the top which has intricate cuts. The intricate die is exactly the same shape as the solid die, so it can be used on the middle cut or a third layer as I have done. I adhered the three layers together. I ended up making two of these vines. With one of the vines, I cut it apart for smaller pieces to tuck in different places.
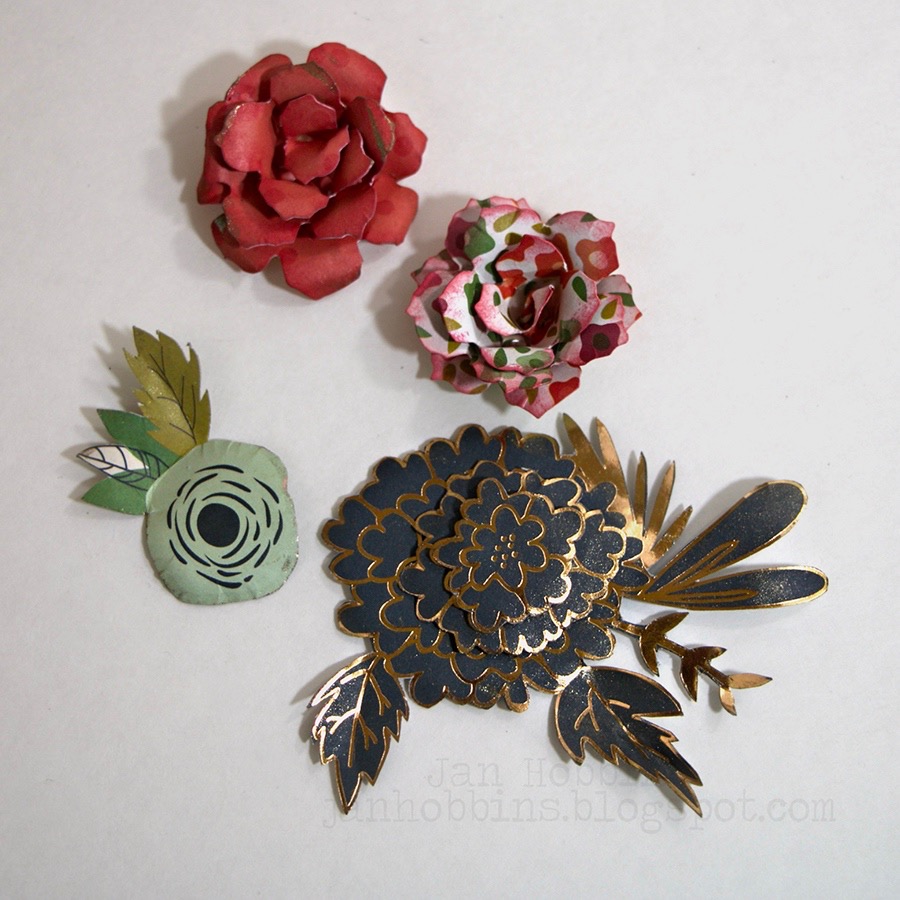
I wanted a few dimensional flowers, so I die-cut a couple out of patterned paper from the Sizzix Tim Holtz
Tattered Pinecone die. These were shaped with a stylus, rolled, and adhered with a hot glue gun.
A few more flowers were hand cut from my patterned papers (My Mind's Eye, On Trend 2) and shaped. I sprayed some Tim Holtz Distress Mica Spray in Tarnished Brass, on my craft sheet. Using the mica spray, I dipped some of the edges of my paper flowers, and painted a few edges with a brush.
The finishing touch to my wood plank is this word "fly" that is the last word to the quote I used, "your wings already exist, all you have to do is fly". Love this Thinlits Plus
Alphabet set by Lynda Kanas! The letters are 3" high and are perfect for any home decor project. I cut them out of cardstock and patterned paper and adhered the two layers together, to make them sturdier.
I printed my quote out on white cardstock, cut out the pieces, then inked with Tim Holtz Distress Pumice Stone ink. This font is from one of my favourite sites,
Creative Market and is called Boathouse Script. Before I adhered all my pieces, I added a touch of gold paint to the raised areas of my stencilled paste with my finger.
I adhered the leaves, vines, flowers, words and lastly the bird, with a hot glue gun. My Home Decor Wooden Heart is ready to hang up! I might have a few other hearts to go with it....
Thanks for stopping by,
Jan