Hello friends! I'm sharing a project today that was created for the Tim Holtz Idea-ology 2022 release. If you haven't watched Tim's YouTube Live of the reveal, his replay video can be viewed here.
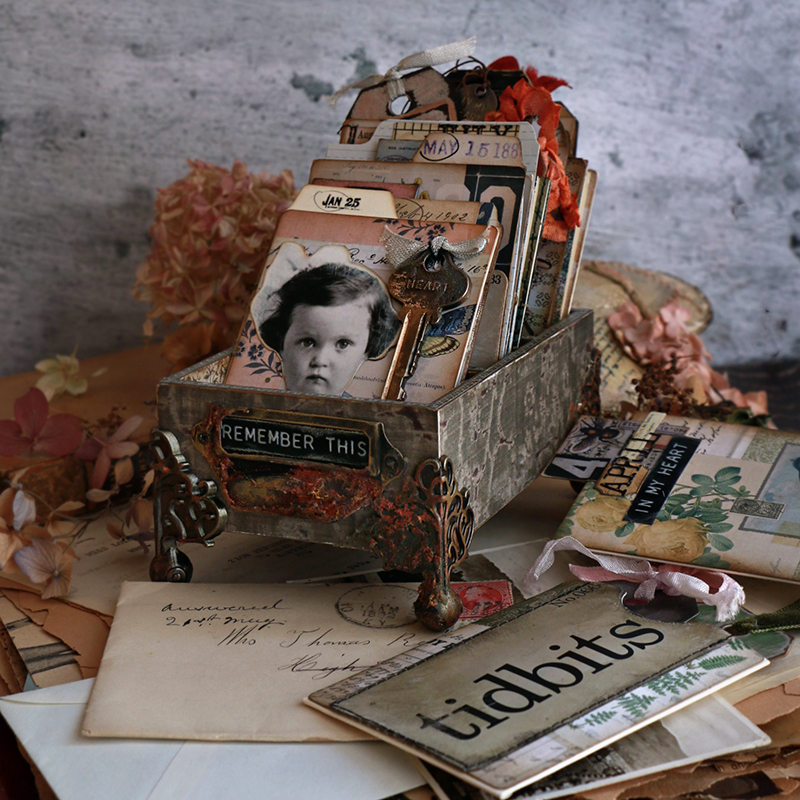
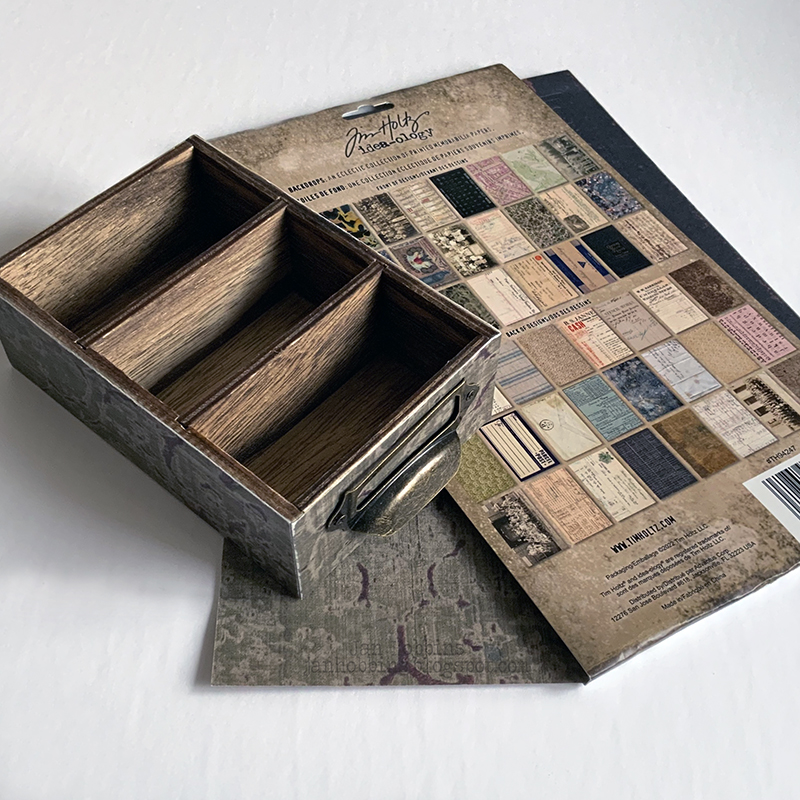
The file box has two dividers which are permanent. It also has a drawer pull on one end. Using paper from the Backdrops Volume 3 set, I covered the outside of my box. I unscrewed the drawer pull first, before applying my paper on the end.

Next, cover the inside with the Backdrops paper.

Once my Card File was covered with paper, I adhered metal Foundations (TH92821) feet to each corner with Tim Holtz Collage Medium. The top edge of the file box was covered with the new Design Tape Trims. Love these! Perfect for covering vignette box edges.

After the foundation feet have dried solid, I applied Tim Holtz Grit Paste in a few areas on and beside the feet. Let this dry. Once the Distress Grit Paste has dried, apply Distress paint to the grit paste. I started with a dark brown, and then lightly applied a darker orange, then yellow to make it look slightly rusty.

I’ve added in a Label Sticker to the front drawer pull.


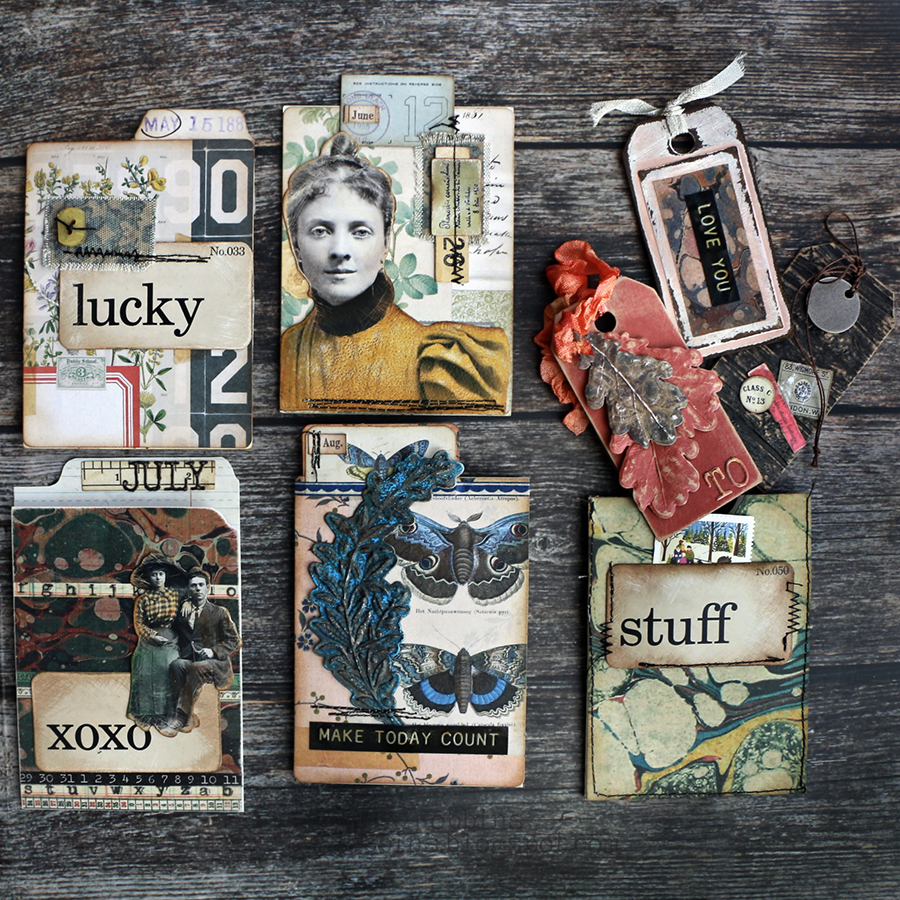
I think this is my favourite part of this kind of make, embellishing the cards! It’s so rewarding to use your stash and being creative. I've used all new Idea-ology product, but what makes projects like these so special, you can use anything. Maybe you have vintage or personal items you can use too, anything goes!
These are the January, February, March, and April cards. My patterned paper used is mostly the new Pocket Cards. I love using these cards for smaller projects, the patterns and designs are a smaller scale. For each month word, I’ve used snippets, ephemera, remnant rubs, anything with a date. I’ve just circled the month part. For months I didn’t have, I used Thinlits dies. The cards are embellished with Flashcards, Label Stickers, Paper Dolls Portraits, Paper Dolls Mini, Word Key, Memoir Ephemera, Ephemera Snippets Number Strips, and Linen Patchwork Tape.

Here's a look at the back of my cards. The February (lots of birthdays in this month!) card is the Mini File Folder cut in half. I've used Design Tape Trims, Snippets, Ephemera, Marbled Design Tape, Backdrops paper, Collage Tiles and lined paper. I've used either lined paper or left the backs plain to write on.

For my pouches, I've used these Pocket cards. The ephemera label has been adhered on the sides and bottom with thin adhesive tape, creating a small pocket for stamps. my small gift tags were die-cut from the small tag set that came with the Sizzix Sidekick. Some of them were die-cut double. Just fold your paper and position the tag die so the top overhangs the paper edge, so it doesn't cut.
May, June, July and August and the pouch. Paper Doll Portraits, Mini Paper Dolls, Flashcards, Design Tape Trims, Snippets, Label Stickers, Linen Tape Patchwork, Ephemera, and some Impresslit Shapes (leaves) were used.

Here's the back of my cards. The flashcard (stuff) was machine stitched on the sides and bottom onto the Backdrops Paper to form a pocket for stamps. I've used Metallic Classics Kraft Stock paper for one of the tags, 3D Mini Woodgrain embossed Black Kraft Stock and the other tag has Impresslits leaves attached.

Here's September, October, November and December cards. Flash Cards, Collage Tiles, Memoir Ephemera, Snippets, Gauge Dials, Remnant Rubs Eccentric, and an Impresslits Medallion. A Collage Tile was machine stitched sides and bottom to form a pocket for stamps. Tags were Classic Metallic Kraft Stock and Distress Watercolour paper. Warm Velvet trim also used.
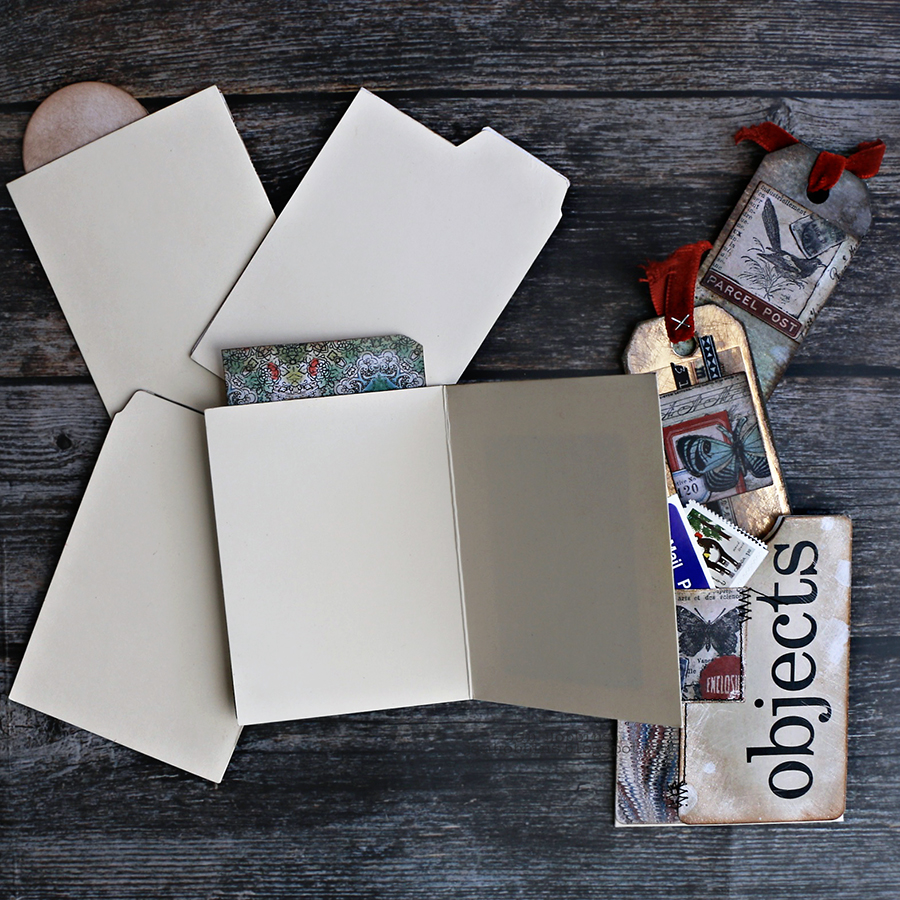
Here's the back and inside of my File Cards. I've left these blank, but can always add in lined paper.

Here's another look at my finished project. Not only are these fun to make but it would make a great gift for someone! Thanks so much for visiting me! Don't forget to visit Tim's blog and check out the other makers and their projects, you will be so inspired!
Until next time,
Jan
Tim Holtz Materials Used:
TH94247 Backdrops Volume 3
TH94217 Collage Tiles
TH94218 Design Tape Trims
TH94219 Design Tape Marbled
TH94221 Ephemera Pack Memoir
TH94222 Ephemera Snippets Number Strips
TH94223 File Cards
TH94225 Gauge Dials
TH94226 Pocket Cards
TH94227 Kraft Stock Metallic Classics
TH94229 Label Stickers Thoughts
TH94239 Linen Tape Patchwork
TH94232 Mini File Folders
TH94233 Paper Dolls Portraits
TH94235 Paper Dolls Mini
TH94237 Remnant Rubs Eccentric
TH94243 Vignette Divided Card File
TH94245 Word Keys
TH94152 Ephemera Snippets Curator
TH94145 Kraft Stock Black
TH92821 Metal Box Feet Foundations
TH94115 Warm Velvet Trim
TH94113 Cool Velvet Trim
664497 Sizzix Lower Case Tiny Type Thinlits
664406 Sizzix Upper Case Tiny Type Thinlits
665374 Sizzix Oak Leaf 3D Impresslits
662729 Sizzix Laurel 3D Impresslits
662720 Sizzix Medallion 3D Impresslits
665460 Sizzix Mini Lumber 3D Texture Fades Embossing folder
Distress Grit Paste
Distress Paint
Distress Collage Medium


3 comments
this is such wonderful and inspirational project!
Gorgeous and inspirational Jan!! I absolutely love it!
These are really beautiful! You put a lot of work into them. I got my File Cards in the mail yesterday, and was surprised to learn that the Pocket Cards don't fit into the "pouch" File Cards. Somehow I would have thought they would...Ah well...
Post a Comment