Hello friends! I can't believe today is December 1st! As usual, just like every other year, I am not even close to getting everything done by the beginning of the month. But I am sharing the last of my Tim Holtz Sizzix Christmas 2021 YouTube reveal projects.
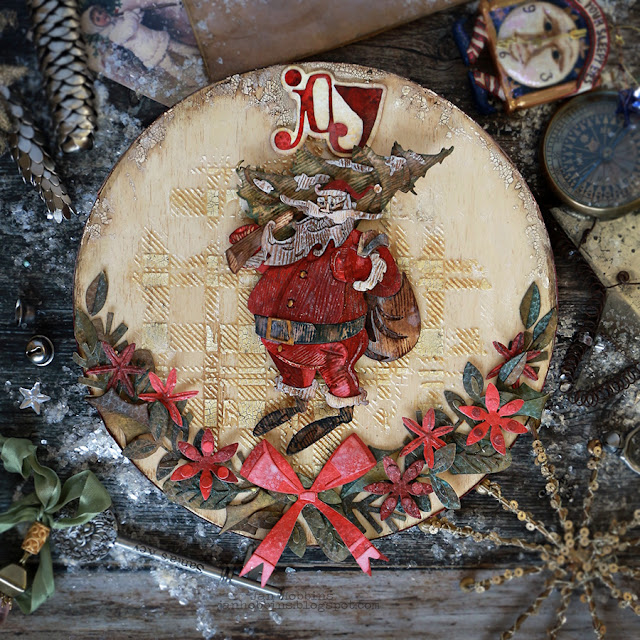
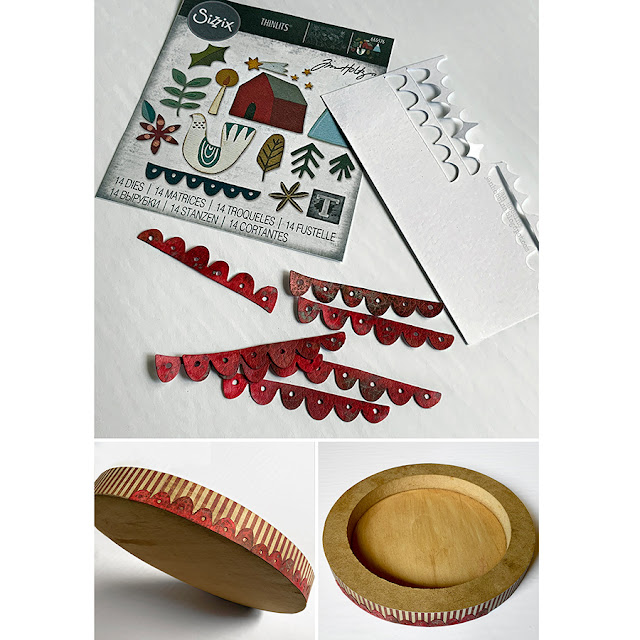
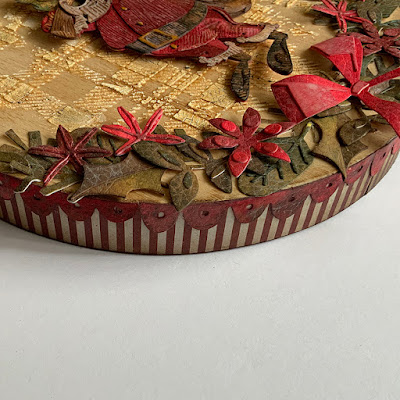
I started off decorating the edge (it's about 3/4" wide) with Christmas Idea-ology striped paper from a previous year and cutting out this scalloped trim from Sizzix Funky Nordic Thinlits set 665576. I do love a good trim or border piece, and especially this one! Ranger's Distress Cracked Leather cardstock (TDA71280) was used for my trim and foliage. I cut out the trim and then coloured it, but it would be easier to colour first. Although, when you colour after, the edges are a little darker and there is no white core showing from the paper. Glue these to the edge of your panel on top of the paper.
For the top of my panel (sorry I have no photos!) I applied with Distress Crackle texture paste tda71303, with the Stampers Anonymous Plaid Layering Stencil THS097. I immediately applied a bit of Distress
Antique Linen Embossing Glaze tde70948 to the larger stencilled areas. I just applied a little with my fingers, as I didn't want the glaze all over. I used a fine paint brush to kind of push the bits that I didn't want on the flat wood, onto the stencilled squares. Let this dry naturally, then heat set with your embossing gun. Hope that made sense! This was just to give the stencilling a bit of colour as close to the wood colour as I could but a bit of texture. I also used the Crackle Texture Paste very sparely around the top edge, and later a Distress crayon to colour in the cracks and slightly darken the edge. My foliage is all die-cut with Distress Cracked Leather Cardstock that was coloured first in various reds and greens. These foliage pieces are also from the Funky Nordic Thinlits set. Loved the look of these die-cut with the leather paper! The bow was die-cut from an older Sizzix set, Deck the Halls Colorize Thinlits set (one of my favourites!). Adhere the pieces to the bottom half of your panel. Just wanted to mention that I did not seal my wood panel. I tested a small patch on the back to see if I liked it, but I only used Distress Collage Medium, as I didn't have a sealant and I didn't like the end result, so I decided not to use it on the front.

Now for my Woodland Santa! I wasn't sure about doing this in Distress Woodgrain Cardstock tda57826, as some of these pieces are really small, but I was determined! I think the face pieces were the hardest, so you could do these in regular cardstock. I pre-coloured my woodgrain cardstock in reds, browns, and greens, using oxides and inks. The white pieces are lightly coloured brown, and then inked with Distress Picket Fence ink. I think that inking the edges of your pieces does bring out the shapes more, or even inking parts you want slightly darker. Keep this in mind, when you are colouring your papers, it's always good to have parts that are light or dark, so you have options for different die-cut pieces. After your Santa is assembled adhere him to the center of your panel. I used foam adhesive dots. The word "JOY" was die-cut with the Tim Holtz Sizzix Thinlits set, Festive Words, also from the Distress Cracked Leather cardstock.

Here's another look at my finished wood panel! That was the final Sizzix project created for Tim's YouTube live, but I have a couple of Idea-ology projects still to share.
Thanks so much for stopping by,
Until next time,
Jan


1 comment
I really love all things woodland too and this is over the top incredible! I really love the vintage feel and your gorgeous arrangement. xx, Autumn
Post a Comment