Showing posts with label Sizzix Design Team. Show all posts

WINTER SHADOW BOX CARD

Hi everyone!  Hope all of you have had a great Christmas.  I haven't been online much this Christmas, it's been a very busy one for me.  We recently did a lot of renovations on our lower level of our house and it was a lot of pressure trying to get things back to normal and completed before the holidays. I always do all the painting in our house and for some reason I thought it would be quick and easy....what was I thinking?! Hopefully I won't have to do that for awhile!  Our oldest son(he lives in Australia) came home for Christmas and brought his lovely partner with him, who has never been to Canada, seen snow, or experienced cold weather.  This may be the one and only time she will ever come again for Christmas, it is currently -33C and with the windchill, feels like -38C.  She has never been so cold in her life.  Who am I kidding, I feel like I have never been so cold in my life and I go through this every winter.  We also host the Christmas dinner in my family, so it is a busy holiday here.  It's worth it though, even though I feel like I could sleep for an entire week after.

I made this Christmas Shadow Box Card for my sister, and then forgot to give it to her.  Sorry, Pat, I will get this to you soon!


Love this Holiday Shadow Box die by Katelyn Lizardi!


There are two variations to make with this Thinlits set.  I chose the outdoor scene, which really could be for any winter occasion.  I first die-cut the back of my card using the main card die.


For the front  of my card, I used the tree insert that fits inside the main card die, creating a window for my scene.  I also die-cut two rectangle pieces that make up the base and top of the shadow box.


The snow pieces were die-cut with white cardstock.  I die-cut adhesive sheets, applied these to the snow fronts, and covered with "snow".


Next I die-cut my trees and deer.  The fir trees and deer were die-cut with cardstock that had been inked with Tim Holtz Distress Oxide inks.  The bare trees were die-cut with Tim Holtz Woodgrain Cardstock that had been inked.  All of the card pieces and embellishment dies have tabs so your die-cuts fold back for easy adhering.


The snow, trees, and deer pieces were adhered to the card base first.  The front and back pieces were then adhered to the base.  The top piece was adhered last.


Mini snowflake die-cuts were added to the front to finish my card off.  I didn't want to add anything more to the front of my card, so I added my sentiment on the back.

Thanks for stopping by, and a very Happy New Year to all of you!

Jan


3

CHRISTMAS PLACE CARDS

Hello friends!  I'm sharing this Christmas Place Card project today:


Sizzix's Designer Lynda Kanase has a new collection called "Picture This" for all your Instax or Fujifilm photos. There are different themes in each set that let you display your mini photos in style.  But when I saw the Photo Stand Set, I immediately thought of Place Cards for my Christmas Table.  Here's a little tutorial to show how I created my place cards.


With the Sizzix Seasonal Photo Stand set, I die-cut my base using Tim Holtz Woodgrain Cardstock.  


After die-cutting, fold along the crease lines.  I then sprayed the stand with Distress Linen Spray Stain, let dry, and highlighted the grain with Distress Photo ink.  I usually run the stamp pad across for a more vivid contrast.  Fold the sides in, along the crease lines and adhere them closed.  You will end up with a slit through the middle of the stand for your photo.


Next I used this cute Photo Shaker Box set for my shadow box.  There are different little words that interchange in the box. I use a bit of masking tape to hold everything in place before die-cutting. Lots of little stamps and extras in this set too.


This is what my die-cut frame looks like.


Fold your photo box on the crease lines, except for the bottom one. Because I'm not building a shaker box, I left this one flat, but just folded in the side tabs.  This will go in the slit on the photo stand.  Next I die-cut my inside name plate with the rectangle frame.  I printed my names on the computer.  These could be stamped too.


The name card was adhered to the back of the frame with 3-d foam tabs.  Place the frame in the slit.  Time to decorate your place card.


There are lots of little embellishment dies in all these sets, I chose to use the snowflake confetti, holly leaf and berry.  I just received one of the new Tim Holtz Sidekick Starter Sets, and am already loving the convenience of this little machine when having to die-cut those little tiny dies.  I need to die-cut a lot of these leaves and confetti pieces, so it goes a lot faster to use this machine.  Just sandwich your die and paper between the two cutting plates and run it through your machine.  For my holly leaf, I used silver metallic cardstock coloured with various colours of green alcohol ink.


I adhered the holly leaf and berry in the corner.  For my snow, I applied Tim Holtz Grit Paste (TDA53422) to my stand, pushed my tree into the snow, and sprinkled Distress Clear Rock Candy Glitter while my "snow" is wet. My Grit Paste is fluffed up a bit to look more like snow. The snowflake and star confetti is adhered to my place cards and Stickle Glitter Glue was applied to highlight them.

Here's another cute idea for place cards.


Instead of names, use photos of everyone (even baby photos to keep everyone guessing!) and add fun embellishments to the photos.

This Sizzix set, Photo Frame with Seasonal Props is a cute set with different props and stamps to add to your frame.  It even has it's own frame with this set.  I stamped my images, coloured, then die-cut.


Here's another look at my finished Christmas Place Cards.
Once you have figured out what you are going to create, it's pretty fast to create multiplies of these place cards.  I've got 4 done, just 17 more to go!

Thanks for stopping by!  Happy creating!

Until next time,

Jan

7

DIY SIZZIX SKATES VIGNETTE

Hello crafting friends!  I have a tutorial up on the Sizzix blog today, featuring Tim Holtz dies used on this project:


I enjoyed making a Halloween vignette on a book for the Tim Holtz Halloween Inspiration Series this year, had to make another for Christmas!

Thanks for visiting me there!

Jan
5

FLOWERS MAKE ME SMILE


Hello everyone!  I've been catching up on my card making lately.  Here's another one using products from Tim Holtz, Sizzix, and Stampers Anonymous.


I've used the Stampers Anonymous Tim Holtz Flower Jar Stamp set, which there are matching Sizzix Flower Jar Framelits.  These stamps are quite detailed so it's great that there are dies to cut them out.


I stamped the larger jar image three times.


One image will be die-cut for the complete image, one for the trim around the jar and the other for the lid(which I die-cut the whole image, then hand cut the lid out).  I also die-cut a jar out of a piece of thin acrylic.


I usually tape the small die with washi tape to hold it in place before die-cutting.


After cutting out the lid, I made a slit through the middle, to put the foliage and flowers through.  This is adhered to the die-cut jar.  I coloured the acrylic jar die-cut with alcohol ink and then cut off the top of the jar(you don't need this part). Adhere this to the jar front, using Glossy Accents, then the twine die-cut on top.


The Glossy Accents underneath the plastic looks kind of watery.  Because the foliage images are very intricate, you will still get a bit of background paper after die-cutting(in this case, white). If that bothers you, just use a light greyish marker, ink or watercolour on those white parts, which dulls the white and gives it a bit of a shadow.


My circles are die-cut from the new Tim Holtz Stitched Circle Framelits.  I've removed the outer stitched part of the patterned circle creating a zigzag edge.


Adhere all the layers you have cut out to your card base, using pop dots on some of them. My patterned papers are from Blue Fern Studios.


I painted some Tim Holtz Typography letters (TH93584) with Ripe Persimmon, Evergreen Bough and Fired Brick Distress paint for my "Smile" word.  Also used was a lightly painted Ruler Piece (TH93565), ribbon and Ephemera Snippets (TH93564).


Here's another look at my finished card!


Thanks for stopping by,


Jan


SaveSave
12

DIY SIZZIX BUTTERFLY BIRTHDAY CARD

I have some Butterfly inspiration on the Sizzix blog today!


Who doesn't love butterflies?  These Sizzix Butterflies Thinlits dies cut out the Tim Holtz Stamper Anonymous Flutter stamps perfectly!  Sizzix is having a fun Flutter contest, check out the details here.  There's a very cool prize!

Hope you check it out,

Jan


1

SUCCULENT CARDS

Hello there! In my previous post I had shared a Succulent DIY project featured on the Sizzix blog.  I couldn't stop creating with this new Sizzix collection from Lynda Kanase, so here are two cards using more dies, stamps, an embossing folder and paper from this collection.


This card features the Succulent Birdcage Die Set w/Stamps.  I stamped the image twice on smooth watercolour paper (Tim Holtz), then coloured with markers and a water brush. One image was die-cut whole and there are two separate dies for the bottom and top cluster of flowers.  These die-cuts were pop dotted on top of the full image. The "hello" was stamped and die cut from this set also.  My mats with the rounded corners and the stamp shapes were die-cut from the Journaling Cards Thinlits Die Set.  The flowers were die-cut using the 2-D & 3-D Succulent set


Inside my card I used the Elegant Succulents Embossing Folder.


This card is featuring the Succulent Silhouette Thinlits Die Set.  When I combine different colours together in a die-cut, I place scotch tape on the back of the die-cut before removing it from the die.  Usually it's the one with all the little pieces, not the main silhouette.  When they are left on the tape after carefully removing the paper from the die, they stay in place and are so easy to place behind the other main die-cut.  I even leave the tape on the back to keep them in place, trimming any excess tape.  The "best wishes" stamp and die are from the Succulent Sentiments set used in the next photo.


This set, the Succulent Sentiments Framelits w/Stamps comes with different sentiment stamps and dies for the centre. Can never have enough sentiments!  The patterned papers I have used for these two cards are also part of this Sizzix collection.

Thanks for stopping by!

Until next time, 
Jan

0

DIY Succulent Home Decor Project

Hi everyone!  I know it's been awhile, but I've been enjoying this amazing summer weather as I'm sure all of you have too!  It's the first time in many, many years that I actually can spend most of my summer days outside.  I was inspired by our unusually HOT weather and did manage to create this home decor project for Sizzix:


There's a tutorial on the Sizzix blog where I am featuring this wonderful new die, stamp and paper collection called "Succulent Serenity" by Lynda Kanase.  Hope you visit me there!

Until next time,

Jan
1

A Vintage Tag

Hi everyone, today I am sharing a tag I created.


I love this new Tim Holtz Lace Texture Fade Embossing Folder from Sizzix.  It's the perfect background for the vintage lady paper dolls (Tim Holtz TH93555).


I sometimes make a slit on the crease of my embossing folders (taking care to leave the edges attached), to allow my tag to extend past, as shown here in this photo.  After my tag was embossed, I applied Distress Oxide ink (Fossilized Amber) to the entire  tag, then spritzed with water.  Once this was dry, I inked with Vintage Photo, the raised areas.


To embellish my tag, I added in the Tim Holtz coloured (with markers) paper dolls, metal corners, metal word band, Designer tape, charmed metal finding with a gum drop inside (tinted with alcohol ink), and ephemera snippets.  My flowers were die-cut using Sizzix's Tim Holtz Small Tattered Florals Thinlits set and patterned paper from Tim Holtz Memoranda, held together with Hex Fastener brads.  The little white flowers (Tim Holtz Bouquet Findings) were dipped in Ranger's Mica Spray (Buttercup) that was sprayed on my craft mat.  

Thanks so much for stopping by,

until next time,

Jan 

SaveSave
6

Celebrate with Floral DIY Card

Hi everyone!  I have a card to share with you today.


After spending a fair bit of time in our local greenhouses these past weeks, all those beautiful flowers inspired me to create a floral card.  


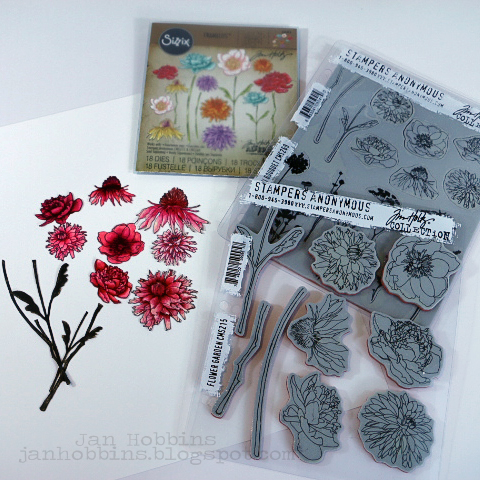
I used the Tim Holtz Mini Bouquet and Flower Garden stamps with the matching Sizzix Flower Garden & Mini Bouquet Framelits set to create my floral images.  The flowers were stamped on the flat side of Ranger's watercolour paper with black archival ink.  I coloured the images with waterbased markers and a water brush.  I usually dab my colour from my markers onto my craft mat and pick the colour up with my water brush to paint onto my stamped image. 


After my images were coloured, I die-cut them with the matching framelits dies. It's so nice when there are matching dies, isn't it?  For the stems, I just die-cut them out of Tim Holtz Kraft Black cardstock, then sanded.  


The oval mat was die-cut from Sizzix's Tim Holtz Stitched Oval Thinlits die.  I used Sizzix's new Satin Sheen paper sheets for my oval and for the pink mat on my card front.

Instead of using an entire sheet of glitter paper for a mat, I just adhered this Glitter Tape from Tim Holtz around the edges.  Once all my mats were adhered (some with pop-dots for added dimension), I adhered my stamped flowers.


My Celebrate was die-cut from the Tim Holtz Thin Sentiment Words Thinlits set.  I used the negative die-cut, trimmed it and adhered it onto a piece of black cardstock that was cut slightly larger.


For the inside, I used the same Sentiment set and die-cut my inside mat.  I adhered a pink satin sheen paper behind, cutting it slightly larger than the patterned paper.


This is how my finished inside looks.


Here's another look at my finished card! 

Thanks for stopping by, have a great weekend!

Jan

2

DIY Card with Sizzix

Hello there!  I have a card tutorial up on the Sizzix blog today, hope you join me there!


Have a great weekend everyone and Happy Mother's Day to all of the moms out there!


Jan


1
Back to Top