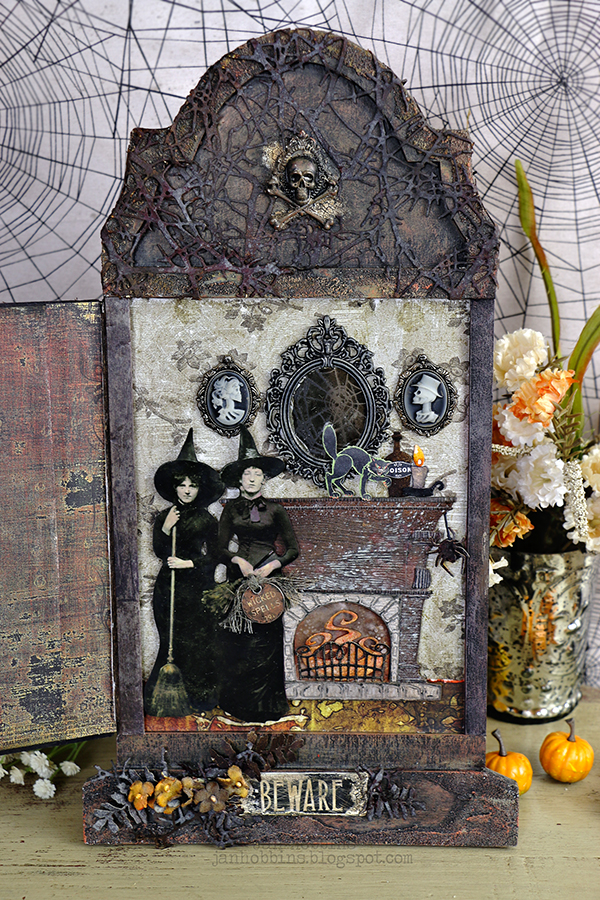
Hello crafting friends! Sorry for the delay with my, "Part 2, Behind the Haunted Door". Here's a photo of the inside of my door.

Just when I think I'm catching up, something happens. I had some crafting deadlines that took over most of my time and then last week my mom(she's 94) had a mini stroke, her fifth, that we know of. We always spend at least 12 - 14 hours in emergency, then she's sent home after all the same tests she has every time, show nothing. This time we got home around 4:30am, which I think is harder on her than the actual stroke. Who am I kidding, it even takes me a few days to get over the stress and lack of sleep! At least she doesn't get as stressed as she used to, she's so busy watching all the action in the emergency ward, and getting all that special attention! All is well, and she's back to her usual self.
Now, let's get back to some halloween crafting! Part 2 of the Haunted Door.
I kept everything quite flat on the inside, as there is not much depth once the door closes. If you wish to fill your inside with more dimensional product, you will have to build up the edges more.

I used Tim Holtz Halloween Worn Wallpaper (TH93974) for the background. This was applied in two pieces for the width, but once you have your embellishments inside, the seam mostly is covered up.

I also added a small piece of patterned paper from the Abandoned Paper Stash (TH93962) at the bottom, to look like carpet. Love this paper, there's so many amazing patterns that could be used for anything, not just Halloween.

Once you have your background paper adhered, you will need to build up the sides and also create your door with chipboard. I had a piece of black chipboard that I used but plain would work also (just paint the edges that are exposed, black). I cut 2 thin strips about 1/2"wide, with my craft knife the length of the space between the tombstone top and bottom. Adhere these on either side with Collage Medium or Matte Medium. To attach your door (details in previous post in creating the front) I used a strip (about 1 - 1 1/4") of Tim Holtz Substrate Paper (TH93291) which unfortunately has been retired. Sizzix makes a leather paper (661146 and 661149)which is similar. This tough paper can be sewn, washed, die-cut, inked, folded, stamped, you name it! It works great for hinges, as it can withstand the opening and closing without tearing. I make a fold 1/2" in, just like you would crease a card except, I creased two lines right next to each other, to give it a wider crease. This helps your door lie flat. Adhere the 1/2" side to your built up edge and the other to your door. I wanted to have a bit more hinge width on the door section to support it better. Once this has dried, adhere your patterned paper (I've marked which paper I used in the photo above) cut to fit the door and up to the crease, covering that hinge side. Colour in the exposed crease with black paint or ink. Cut out two more 1/2" strips of chipboard and paint the one exposed side with black paint, then dry brush with similar colours as the tombstone. These are adhered, once dried, to both sides.

This is the reason, I made the crease in the hinge a bit wider, it has to close over the added strip. This is just my way of adding a hinge, without purchasing metal hinges.


Here's the bottom of the door, explanation is in the first part of this tutorial.

See you soon,
Jan


3 comments
Yippee! thank you...worth the wait!
Jan, this is just crazy good! Thank you for posting such a great tutorial!
I did have a question about the "floor" it appears that there is room there but Im guessing its an illusion as you said you did not have much depth there. I had been toying with ways to get an inch or so depth to have more room to add 3d items and then I came across yours with the door and I want to do it even more.
Thanks for sharing your ideas. I really enjoyed this project
Teri
Post a Comment