
I love all the 3D Texture Fade Embossing folders, and I wanted to highlight this new Rose one that is gorgeous! Here's a short tutorial how I created my Vignette box.

Starting with my Vignette tray(TH93568), I covered the edges and inside walls with Typography Collage Paper(TH93952), using Distress Collage Medium.

The back and sides were covered with patterned paper Memoranda TH93550). Then randomly cover the sides, edges and back with Ranger's Opaque Crackle Texture paste. Set aside to let this dry.
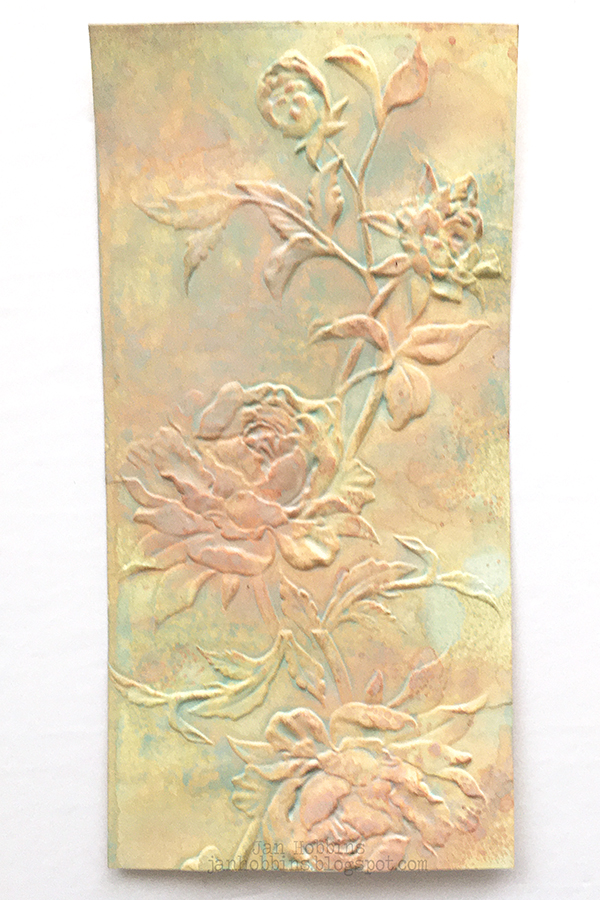
Take a piece of Distress Mixed Media Heavystock and cut to the width of the inside of your Vignette tray. I embossed this first, using the new Chapter 1 3D Roses Texture fade folder. Because my paper is longer, I flipped my paper around and did the other end. You can see the place where there's a seam, but my shelf covers that. You can either colour your paper with Distress Oxides before embossing, or after. I wanted the Oxides to pool around the embossed areas so I chose after. You might lose a bit of the depth in your embossing, you can always emboss it again after. I used Spring colours (it's cold and dark winters here, so any excuse to use bright spring colours is welcome! The Distress Oxide Sprays I used were; Tea Dye, Dried Marigold, and Old Paper. Adhere this to the inside of your Vignette tray.


I used a scrap of Mixed Media Heavystock, coloured with Oxide Sprays, to die-cut the Crochet 2 Thinlits die. This doesn't cut on the ends, so you can die-cut it as long as you want.

After my Etcetera shelf had dried, I applied Distress Crayons in the crackled areas to highlight. The Crochet 2 trim was bent in the middle and this is adhered to the trim end, following the curve. Adhere this to the inside of your tray. It's about 2 - 2 1/2" from the bottom.

The pot was die-cut with Mixed Media Heavystock, coloured with Distress Oxides also.
I used this Bigz die from last year's release called Potted. Slightly bend the ends so it curves.
Adhere this to the shelf.

Die-cut flowers with Oxide Sprayed Heavystock(Tea Dye, Dried Marigold, and Spun Sugar), using the Mini Tattered Florals Thinlits set.

Adhere these to the inside of your pot. Those 3D embossed leaves are cut out from the remanent of the embossed rose background folder. Add in some spanish moss. I also added in a butterfly die-cut from the Scribbly Butterflies Thinlits set. I placed it on the edge of my tray, as I had a hard time covering up my embossed background. Do you ever have that problem? Sometimes I love the background so much, I don't want to cover it, so I pick my least favourite part to cover!

For the base on my tray, I made this from two Etcetera Bracket Trims, and a piece from the negative leftover in-between. I wanted the tray to have a wider base, so it wouldn't fall over. This middle is covered up with paint and then Crackled texture paste. It is then adhered to the bottom of the tray.

To finish off the bottom of my tray, I added in a painted thimble(TH93791) to use as a smaller pot, die-cut flowers, a twig and some spanish moss. On the right side, I added a tinted Baseboard Paper Doll (TH93796) with wings(TH93785). I even glued a tiny amount of moss in her hand to give the doll a little 3D embellishment. A Book Clippings sticker was added also(TH93583).

Another view, looking down.

For the top, I added a Vignette Finial(TH93573) that was painted. A Date Dial(TH93953) was adhered underneath. Moss was also added to complete the top.

Here's another look at my finished project! I think I need to create more spring projects, it's been so cold here the past week and half; around -30 to -40C everyday! I think there was one day, we were the coldest city on the planet! It's finally warming up today, still minus but single digits! Feels almost like spring, but unfortunately we know we have a couple of months of winter to go.
Thanks so much for stopping by, until next time,
Jan


5 comments
Beautiful, as always, Jan. I don't think I'll be able to resist that Opaque Crackle Paste now. This is a stunner!
This is breathtaking...
Wow. This is stunning.
This is beautiful...so much detail, you are very talented and creative!
Really beautiful!!! Love the warm soft colors....and that crackle...oh my!!!������
Post a Comment