Hello everyone, I am sharing the last of my projects created for the Tim Holtz Sizzix Chapter 1 Release.

Love the shape of this Mr. Rabbit Bigz die. Because he's a steel rule die, heavier materials, even fabric, can be used to die-cut this 4 3/4" high rabbit. I've also used the new Intertwine 3D Texture Fade Embossing folder and created a wood basket which is filled with moss and Funky Nature Greenery and eggs.
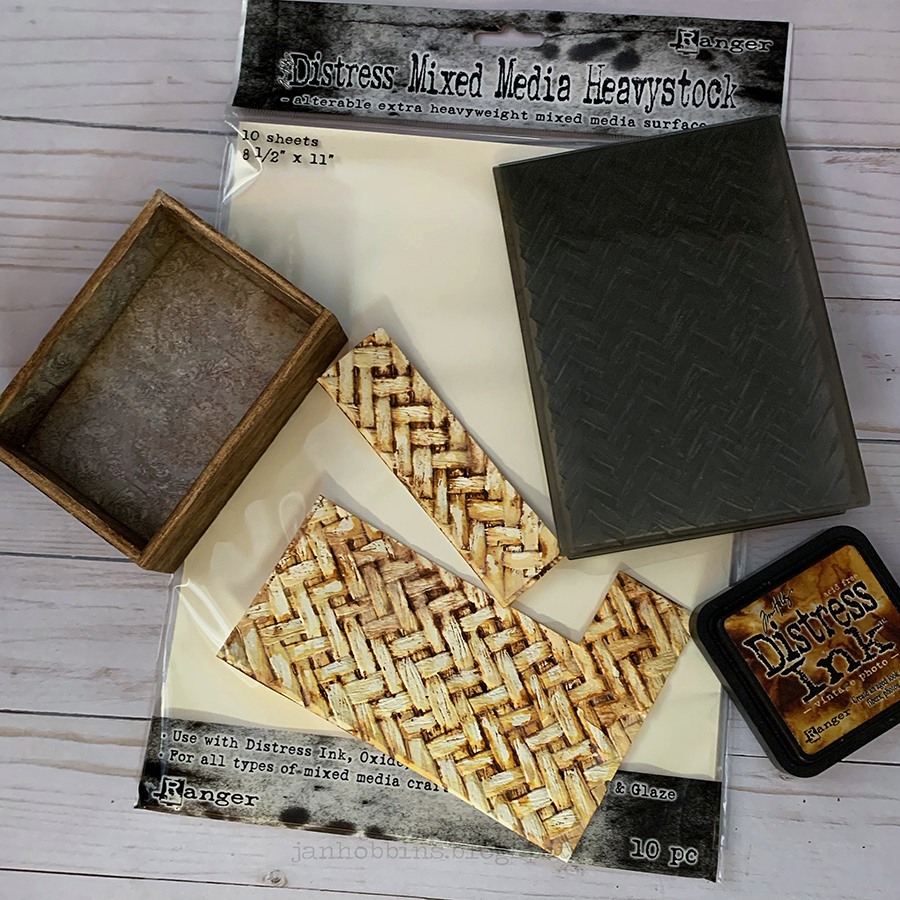
I started out with making my basket vignette 4 1/2" x 3 1/4" box. The inside was lined with patterned paper from the Tim Holtz Abandoned mini stash. I embossed enough of the Distress Mixed Media Heavystock to cover around the outer box sides. I inked my embossing folder with Vintage Photo Distress Ink pad before embossing. Using Distress Antique Linen ink and water finish off the colored embossed paper. Cut out your strips and glue to the outside edges.

For the top edge, I applied Ranger Opaque Crackle paste(INK57505) to Etcetera Scallop Trim and set aside too dry. Once this had dried, I applied Walnut Stain Distress crayon to the cracks and a wash of Distress Antique Linen Ink to colour. This was glued around the edge, slightly higher (about 1/4") than the box edge. Don't throw away the scraps after you punch out your Etcetera trims, I have found lots of uses for these! I used my scrap pieces of Etcetera Pinked trim and used this to line the inside of my box edge, on the back of the Scallop Trim. It gives the edge a nice finished look and secures the scalloped trim. These were also crackled and coloured.


Here's a close up of the embossed Interwine box and the scalloped trim edge.


Die-cut three rabbits in chipboard and two rabbits in Distress Watercolor paper. One of the watercolor rabbits will be for the back of the rabbit, if you want the textured side facing out, make sure you die-cut it the opposite way. Glue the three chipboard pieces together. Color your water-colour pieces. I just used various Spring coloured Distress ink and a Ranger Waterbrush.

Colour Mixed Media Heavystock with various green Distress Sprays and Distress Oxide Sprays. Die-cut your Funky Nature pieces. Also die-cut the eggs with various Spring coloured papers.


A close up of the eggs.

Here's a look at the inside of the box.

Thanks so much for dropping by, I will be sharing all my Idea-ology projects next!
Until next time,
Jan


1 comment
Absolutely beautiful!
Post a Comment