Showing posts with label Diecuts. Show all posts

MR SNOWMAN TAG - TIM HOLTZ SIZZIX CHAPTER 4 2019 RELEASE

Hi everyone, I'm back again with another project created for the Tim Holtz Sizzix Chapter 4 2019 Release.  I've created this Etcetera Tag featuring the new Colorize dies, Mr. Snowman and Deck the Halls.


If you go to the Sizzix site, search for your Colorize die, there is a YouTube video for each die, to assist you in assembling your die-cut.  So helpful!


Paint a Vignette Frame(TH93694) first with Ground Espresso Distress paint, let it dry.  Then dry brush Candied Apple Distress paint for this.


Tint Idea-ology Wood Slices(TH93745) with Bundled Sage Distress Spray stain and then adhere them to the top part of a Stampers Anonymous Mini Etcetera tag(ETC004) that has been covered with plaid paper from the Idea-ology mini Christmas paper stash.  With my craft knife, I cut down the   center lightly, then it should snap in half when pressure is put on it.  Lightly sand the edges to smooth it out.


Adhere your painted Vignette frame to the front of your covered tag.  Adhere the Mr. Snowman die-cut within the frame.  I had the one arm on the outside edge of the frame.


Die-cut all your Deck the Halls(664229) Colorize pieces.


These are adhered on top of the wood slices.  Add Rock Candy Glitter to parts of the foliage, ribbon and snowman.  A strip of dyed Mummy cloth was tied around the hole of the tag.


For the hanging 'Let It Snow" I die-cut my letters with Alphanumeric Classic Upper 1 1/2"Thinlits set 664223 and Shrink Plastic.  I used these ones by Ranger Ink, but I think they have been discontinued.  To shrink them, I used my Ranger Heat It Craft Tool and tweezers to hold the letter.  It will start to curl, but I keep a Tim Holtz Die Pick handy to hold it lightly on my glass mat.  The longer it is heated, it will straighten out.  You might want to practise a few first!  Before heating, I lightly color the letters with Alcohol ink(I think I used an older colour-Juniper or Aqua), this won't look like they've been coloured much, but they will darken when shrunk.


Adhere the letters to one of the die-cut garlands, tuck the ends under the snowman thumbs. Add in the die-cut stars to the garland also.  Add some clear Rock Candy Glitter.  I lightly coloured some Tim Holtz Mica Flakes and glued these underneath the snowman.
A Idea-ology Clippings sticker was attached under this on the frame.


This completes your Mr. Snowman tag!

Thanks so much for visiting, 

Jan


2

A TUTORIAL WITH SIZZIX - TIM HOLTZ CHAPTER 4


Hi everyone, I'm back today with some exciting news!  Sizzix has invited me to make a few projects for their blog, using dies from the Tim Holtz Chapter 4 release.  As many of you know, I have been a long time fan of Sizzix and Tim Holtz, so how could I resist!  Here's a sneak peak of my first project, but I hope you head on over to the Sizzix blog for my full tutorial!

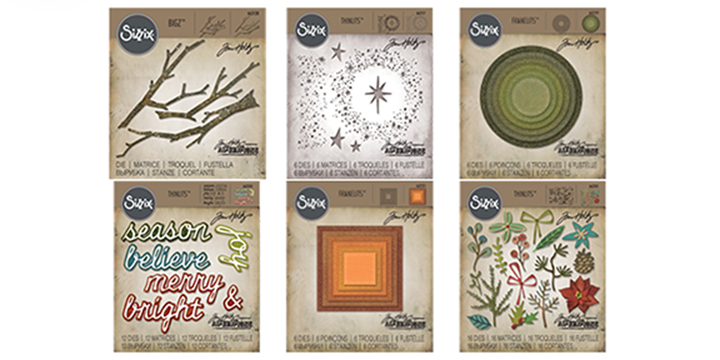
I'm using my favourite dies, the Mini Tree Rings, Pine Branch and Christmas Ribbon!

See you there!

Jan


0

HALLOWEEN VIGNETTE TRAY - TIM HOLTZ IDEA-OLOGY RELEASE 2019

Hello everyone!  I still have a few Tim Holtz Halloween Ideaology projects to share and today I have this Halloween vignette tray.  I think poor Dorothy didn't know what she got herself into when she married Mr. Aughinbaugh, the pharmacist.


How many ways can you use the new Tim Holtz Creepy Eyes(TH94984)?  I don't know why, but I thought of flowers right away!


The trinket tin opens up to reveal some deadly potions.


I've used the larger 6 x 12" Vignette tray for my structure.  The inside was covered in a piece from the Abandoned Paper Stash (TH93962).  Don't you love this pattern?  I had to use two pieces to cover the tray, but I placed the seam where I knew the top of my tin was, so it was not noticeable.


I lightly stained my wood tray with Distress Paint that was diluted, so it was more like a wash.  I think I used a combination of Peacock Feathers and Faded Jeans.  If you want a darker stain, had in some Distress Spray stain to your mix of paints, then add a bit of water.  


I used tiny nails(TH93668 Vignette Hardware) to nail my tin to the tray.  If they poke through just nail to the side and flatten, you can cover the back with paper. This secures it as it will probably be opened often.  Paint the insides edges of the lid top and bottom.  


Cover the lid and bottom of the tin with Abandoned patterned paper.  I then used Ranger's Crackle Texture Paste as shown in the photo.  Set this aside to air dry, then tint with Distress Crayons.


I built a little shelf for my creepy eye floral display using Etcetera Pinked Trims (THETC-009).  This was painted, crackled, and distressed with Distress crayons.


I gave my Halloween Paper Doll couple (TH93973) a ghostly appearance.  These paper doll collections get better and better, thanks to Paula's daily hunt for photos!  These were placed inside and with the gentleman coming out past the Halloween Baseboard Frame (TH93986).  A piece of Abandoned paper was used behind the frame also.


I added a tiny bit of Picket Fence white Distress paint to a small amount of Collage Medium, blended the two and then applied with my finger to my paper dolls.  I used a swirly motion as it gives an uneven look, and you don't need much.  If applied lightly, you can also go over and add more!  Just a note here; small bunch of dyed black flowers(TH93569 Bouquet Findings) was added on top of the brides's bouquet after the photo was taken.


For my Creepy Eyes(TH93984) flowers, I used Mixed Media Heavystock paper, coloured with Distress Oxides, and Abandoned patterned paper  that was die-cut with Tim Holtz Sizzix Large Funky Florals  and the leaves from Funky Foliage.  I added in some cut up die-cut pieces of the Tangled Twigs Sizzix die, and Mummy Cloth (TH93982). I also added in some tinted Bouquet Findings (TH93569) and a bit of Spanish moss.


A metal Corner Adornment (TH93979) accented with green Distress Paint was adhered to the bottom corner of my Baseboard Frame.  I attached a Spider Adornment (TH93985) to the corner of the metal embellishment.  The pearl was coloured with Distress Alcohol Ink.


Don't the flower centers look like eyelashes on my creepy eyes?  The whites of the eyes were slightly tinted with alcohol ink.  One of the girls who also created for Tim, it might have been Zoe, popped out the iris, tinted the white area, and replaced the iris.  I thought this was a great idea! I added in some Clippings Stickers from the Curiosities Sticker Book(TH93969) to my pinked ledge and outside and inside of my tin.  Love these little stickers, they add little subtle phrases that can add a story to your project.


For the inside of my Trinket Tin (TH93976), I added in ephemera from the Halloween Ephemera Pack(TH93963), Halloween Snippets Ephemera(TH93983), glass apothecary vials(TH93302 and TH92899),  a skull (TH93968), bones (TH93964) and Clippings stickers(TH93969).  The vials were coated with clear Rock Candy paint(TDC31888) after the ephemera was adhered.  My cardstock frame on the tin bottom was die-cut with Sizzix Trinket Frames Bigz die.


Here's another look at my finished Halloween Vignette Tray.  Thanks so much for visiting me here!

Until next time,

Jan


1

CHRISTMAS CARDS

Hi everyone! Well, December has arrived and so did 12 inches of snow this weekend.  It looks like a winter wonderland here, so it definitely puts me in the mood for Christmas!  My house is all decorated and I even have a few cards to share!


I was able to purchase the Tim Holtz Stamptember set from Simon Says Stamp before it sold out.  Love these images in this set.
I used the bird, sentiment and music notes stamps for this card.  My sentiment was stamped on the smooth side of Distress Watercolor cardstock and die-cut with Tim's Tattered Banners.  My stamped bird with the music notes was coloured with Distress Markers and a water brush.  I also used Distress Oxides on the background.  The frame was created with Stacked Baroque Tim Holtz die, and the foliage from the Funky Festive set.  My pinecone paper is Tim Holtz Christmas Worn Wallpaper TH93777.


The stamped images(coloured with Distress Markers/watercolour brush) on this card is from Tim's Stampers Anonymous set, Yuletide CMS356. The card base is stamped in Oxide ink with the music note stamp from the Stamptember set. I also used Oxide ink on my stamped background.  My foliage is Tim Holtz Sizzix 662425, the little trim on either side of the sentiment is from an older set, Holiday Knit 660981. The plaid paper is Tim Holtz Christmas Paperie TH93739, the distressed Silver cardstock is Mushroom from TH93784.

I also am sharing the rest of my cards created for Tim's Holiday Sizzix Release Video.


These two cards feature the 3-D Kaleidoscope  Texture Fade folder.  They both were embossed on gold metallic kraft cardstock, but I used Distress paint to alter them. This one was used like a frame, with Tim's Stacked Label die cut out in the middle. A piece of Christmas Ephemera was adhered behind.  My foliage was Distress Oxide coloured Mixed Media cardstock and gold metallic kraft cardstock all cut out with  Funky Festive Thinlits set.  Paper was also from Tim Holtz Christmas Paperie.  My sentiment was from TH Christmas Quote Chips.


Lighter shades of Distress paint was used on my embossed gold metallic kraft cardstock here.  The snowflake is Flurry #4,  and Joy is Shadow Script Christmas.  The star in the middle of the snowflake is one of Tim's Mirrored stars.


I had created the background before I decided to use it for this card from Distress Oxide inks and Mixed media cardstock.  It's fun just to create different looks from these inks, and save them for future use. I had intended to go with just the brown tones, but somehow that Blue Jeans Distress crayon snuck in there once I had adhered my die-cut Flurry #2, #3 and #4 snowflake dies to the background cardstock.  I also added in some Crackle Texture Paste around the snowflakes before colouring.  Once I had this background finished I added in chipboard die-cut snowflake Ice Flake which I also die-cut it in Gold Metallic Kraft cardstock to adhere on top of the chipboard.  I added some clear Rock Candy Crackle paste and Oxide Distress ink to this too.  A White Christmas rub-on was adhered to a piece of gold metallic cardstock.


And my last card created for this holiday release, was a fun card using the Crazy Bird die and stamp set.  I added the beard, moustache and hat from the Cool Yule Thinlits set.  My foliage is the Funky Festive set cut out from white cardstock.  A Quote Chip, Woodgrain cardstock and Christmas Deco Sheets finish off my card.

Hope my cards have inspired you in your card making or Christmas crafts!  Thanks so much for visiting me here and your wonderful comments are much appreciated!

Until next time,

Jan


5

COOL YULE CHRISTMAS SHAKER CARDS

Hi everyone! It's hard to believe that November is half over already.  That means cardmakers have either finished all their Christmas cards or if you're like me, haven't started yet! For some inspiration, here's a couple of shaker cards I created for Tim Holtz that were also featured on his Sizzix Holiday Part 2 video.


This fun Thinlits set, Cool Yule is one of my favourites from this year's Holiday release. You can create all sorts of different looks for each of the four characters.  The Snowy Stars Thinlits set was perfect for using around my shaker opening.


Die-cut the Snowy Stars ring on a piece of white cardstock.  Using the Stitched Circles die that fits on the inside of the ring, die-cut a circle in the middle.


Cut out a piece of clear acrylic and adhere to the back of your die-cut starry cardstock. Then die-cut an adhesive backed foam ring(if you want a bit more depth to your shaker box, use two of these), using two sizes of the stitched circles and glue onto the acrylic piece.


Die-cut your character pieces and adhere.


Cut out another ring from cardstock and adhere to the front of the card.


Your character will be adhered to the front of the acrylic piece.


Fill the circle with your shaker bits.  I just used the cut out star pieces from my starry ring.
Adhere a die-cut stitched circle to the back foam ring.  I used strips of foam the same depth as the ring, around the die-cut cardstock.


I chose a coloured piece of cardstock to adhere behind the front so it shows through the stars.


Adhere the two mat papers onto your card base, then your white die-cut card front.


Finish off your card front with a sentiment, I used the Christmas Shadow Script.  The stars are from the Snowy Stars Die set too.  The words, 'tis the, are from the Holiday Talk Metallic Sticker Pkg. (TH93347).


I used the same idea, but a square cutout instead of the circle.  I used the straight strip of stars and cut it out four times, around the cutout stitched square.  Some of the strips slightly overlapped, but you can't really tell.  The bingo card is from Tim Holtz Christmas Ephemera pack. The branches are from Tim's Branches Bigz Die and the greens are from Funky Festive.  Happy Holidays is also a Holiday Metallic Sticker.  The plaid paper is from last years Christmas Paper Stash.


4

MERRY MOOSE CHRISTMAS CARD

 Hi everyone, I have one of my Tim Holtz Sizzix Christmas cards to share with you today.  This is one of the cards I created for Tim's Sizzix Christmas video which you can watch here.


I love this whimsical Merry Moose Thinlits die set!  My foliage is created with the  Funky Festive Thinlits set.


Love all the little details with this set.  I used Tim's Substrate Sheets(TH93291) that die-cut beautifully. These papers have a suede type texture that can be sewn, stitched, punched, painted or stained.  I used Distress Oxides to colour.   Sizzix also makes Leather sheets, which are similar.

 
These trees are so fun, I'm sure I will be using these a lot!


Behind my moose, I used Tim's Bigz Die,Tree Rings.  I had a piece of adhesive backed thin real wood, I had been hoarding from a long time ago, perfect for this die.  The edges and raised areas were inked.


                                         Can't have a moose card without plaid, right?


A bit of ribbon, Ephemera Card and a Tim Holtz Christmas Quote Chip, complete my card.  

Thanks for stopping by, I will be sharing more cards!  


Jan
5
Back to Top