Hello friends! If you have watched the Tim Holtz YouTube live, then you know by all the amazing makes created with this Chapter 3 collection, that the possibilities are endless! So many ways and ideas to use these 5 die sets and 2 embossing folders! If you missed the live, the replay is always there to watch on Tim's Channel. What I love about this release is, that it's all the basic dies I need or want to create something specific to my project. How many times have you seen a folder, envelope, tag, or label that you wish was in a different colour or paper to match what you are creating? These sets are perfect for creating what you need or want. I'm a gardener, so I created this Seed Box to store my seeds and information about my garden. Can't wait to start using it!
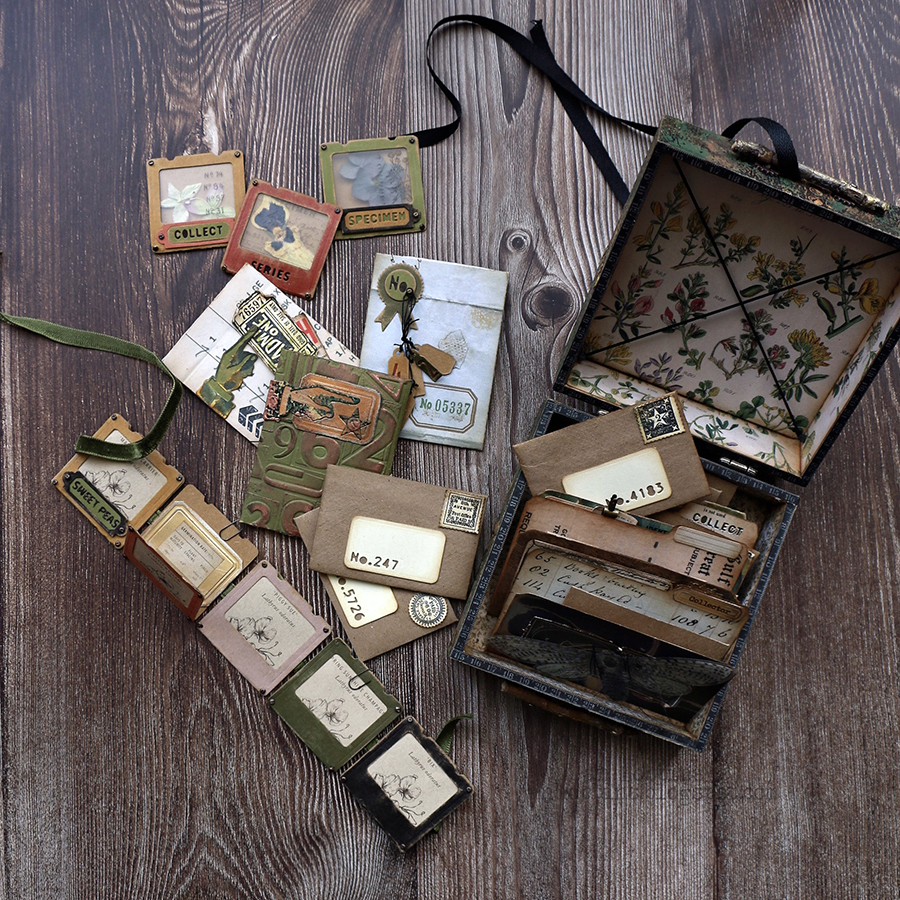
The box itself is made with two square Vignette boxes.
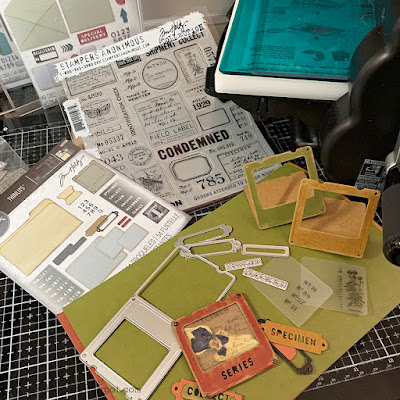
Here's a look at all the goodies inside!
I haven't got step by step photos for everything created here, but I think most of it is pretty easy to recreate. Just let your imagination take over.
Specimen Thinlits set 665930
Alphanumeric Nomads Thinlits Set 665924
Postale Thinlits set665927
Vintage Labels Thinlits Set 665929
Steel Plate 3D Embossing Folder 665754
Numbered 3D Embossing Folder 665753
I covered my vignette boxes with Black Kraft Stock that has been altered. I wanted my box to have a vintage painted look with a touch of metal showing through, so I applied Foundry Wax randomly on the paper. After applying the wax, heat it to create the shine.
I then embossed my paper with the Steel Plate Embossing folder. You will need more than one sheet to cover both boxes on the outsides.
I first applied Rustic Wilderness Distress Paint very lightly on the raised parts.
When that was dry, I next applied a very small amount of Crackling Campfire (I use my finger) in a few areas.
Lastly, Fossilized Amber was applied. If you find you have too much of a colour, just lightly cover it with another paint.
This Vintage Labels set is amazing! It debosses and cuts out the shape. I cut out quite a few using the Metallic Kraft Stock. Because I used metallic paper, I did not apply an oil-based ink before die-cutting. If you are using a porous paper, ink your metal die before using, and when it's die-cut out, the ink will stay in the debossed areas. At this point, I wasn't sure what I was going to use, but they can be saved for later.
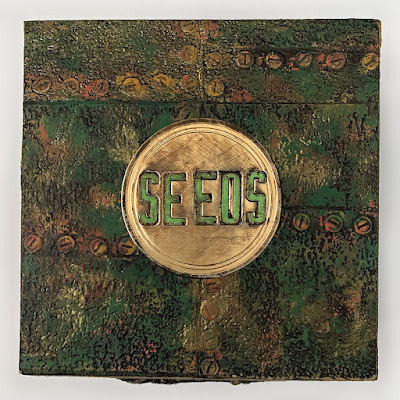
I used the larger circle one for the top of my Seed Box. I die-cut the word, "Seeds" using the new Alphanumeric Nomads set, in the middle of the circle. This new set has two different sizes of upper case letters, which are meant to use together, and for the smaller ones, you can add a dash underneath to line it up with the larger letters. I just used all the larger size for this make, but I will definitely use a combination of the two in future makes, love this font! The word was die-cut again in green metallic kraft stock. Everything was distressed and inked, then the green letters placed inside. Whenever I need to die-cut words that I am using the negative space, with individual letters, I always use Sizzix's Sticky Grid Sheets(663533), to line everything up.
Tim Holtz Hinges with an added bit of Foundry Wax, were used on the box.
The inside of each box was covered with Ideology Backdrops Volume 3 paper and trimmed on the edges with Design Tape Trims.
For the closures on my box, I used some twigs from one of my trees. These were cut down to the same width. I've added some Foundry Wax to these also, then nailed them to the box with Tack Nails. I wanted a space between the twigs and box, so I used some older Idea-ology Mini Gears behind the twig to raise them off the box.(the nail went through the middle). To close the box, I used some linen ribbon I had.
Now you're ready to fill the box with all the goodies! There are Tim Holtz Stamp sets that can be used with some of the dies to enhance your die-cuts. Love the Specimen Slide die, how can you tell, I have quite a few made for this project! For these ones, I had in my stash, some Frosted acrylic sheets, and I've stamped with Archival Ink and the Field Notes Stamp set. The labels were added to some of them and others, I just die-cut the word into the front of the slide.
I've added some dried flowers in-between. The slides are closed with the Mini Fasteners Brad Screws Hardware.
Here's another look at the different ways, you can use the small labels and word dies.
Love all the different envelopes in these sets! This one is made with coloured Kraft Stock and the envelope from the Collector set.
I embossed this one with the Numbered 3D Embossing Folder and highlighted with raised areas with Foundry Wax.
I had some leftover Steel embossed pieces, so I used these with some of the die shapes. The hand and star here. There is also one of the Vintage Labels.
Here's the fronts of the three envelopes I created. The Ticket Booth Stamp from Stampers Anonymous can be used with the Collector ticket dies. Before adhering my envelope with the tickets, I die-cut the arrows from the Postale Set in the corner and placed a piece of dark Backdrops paper behind the die-cut area. I've used the little jewelry tags, cutting out two for each hanging tag, one is a solid back piece and the front has a number die-cut out, using different colours of Kraft Stock. These were tied together and with a brad, attached to the Medallion die-cut.
These are the backs of the envelopes, using the circle tab die(it has a little hole in the middle for your brad).
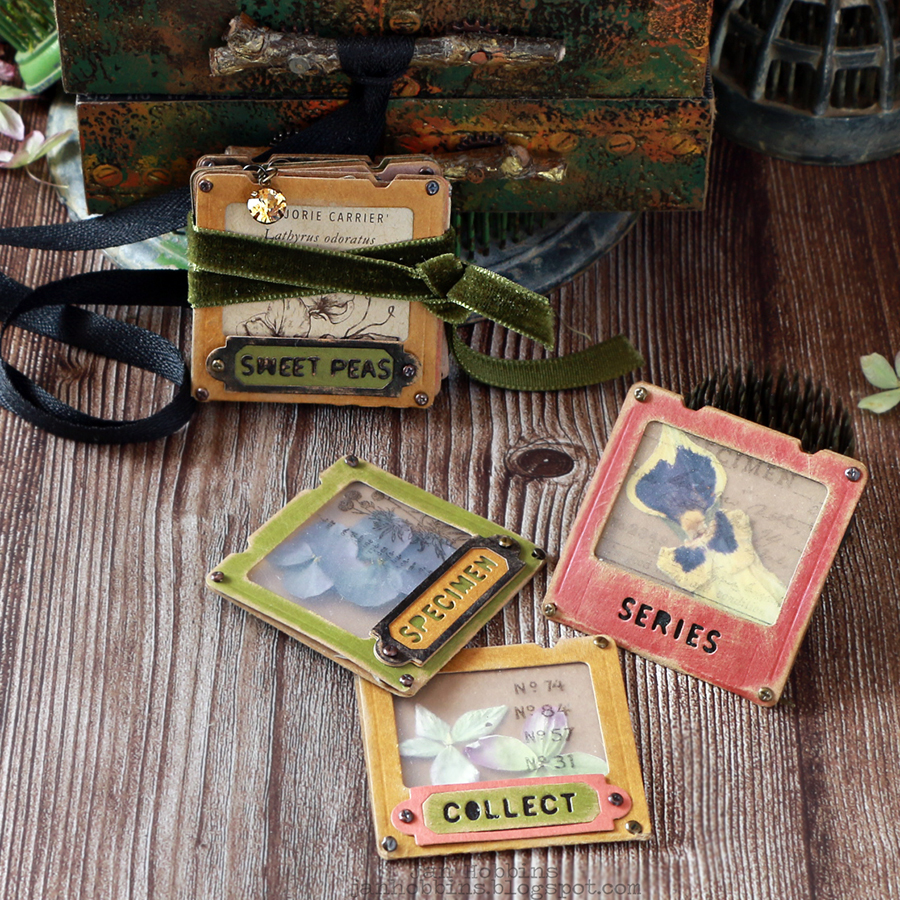
Because I love this Specimen die so much, I decided to make a tiny book. I die-cut it out in different colours, five total.
Using Velvet Trim, I stitched the back of the dies together.
My book is about Sweet Peas, one of my favourite flowers. I had these empty seed packets (from Floret Farm) and decided to use them in my book. I've used some of the names, pictures, flower information and even the directions for the seed planting.
I've added labels in front of some of them, some I left open at the top, and closed with a paper clip and Antique Gem or Jewelry Label.
The book is folded up and closed with the ribbon tied around it. I've used letters from the word dies to spell out Sweet Peas.
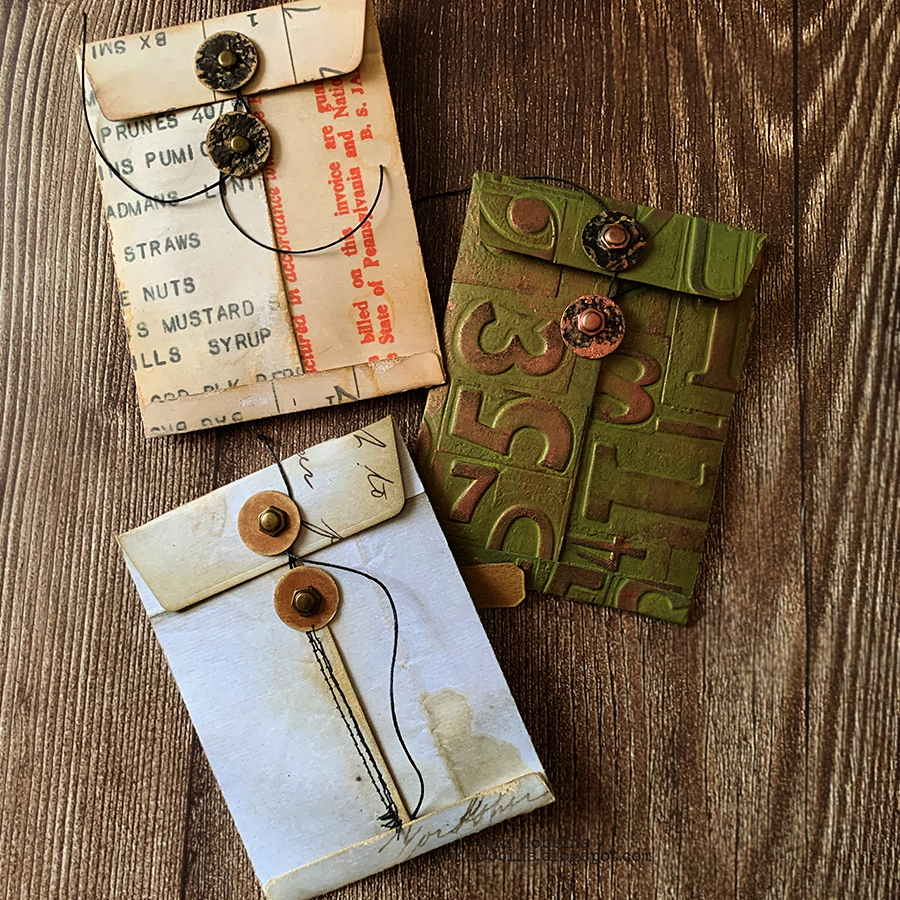
I love these little envelopes in the Postale set. They are perfect to keep my seeds in. I've used brown paper grocery bags to cut them out. I wanted something thinner, as I will probably have lots of theses and also if they get tattered or worn out, I don't mind recycling them.
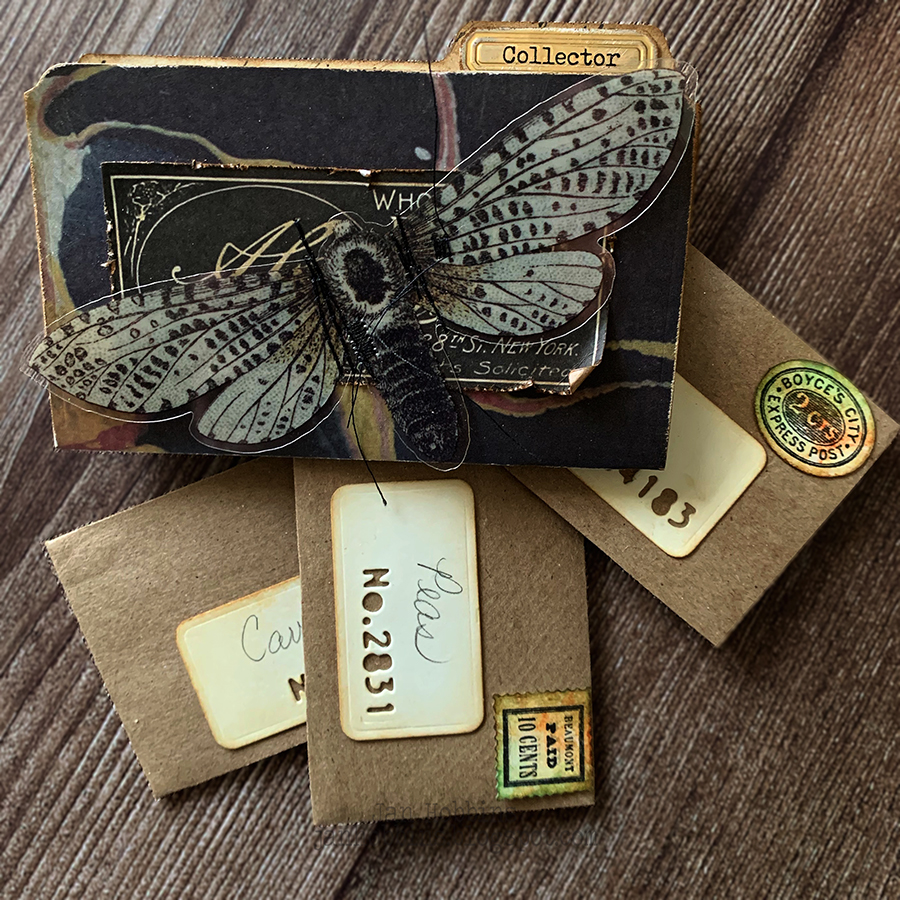
I've used the label dies for my envelopes and die-cut numbers in the corner, so I'm able to write down the type of seeds. I've stamped on the stamp die-cuts with Stampers Anonymous Stamp Collector set. I must admit, I got a little addicted to making these! I've die-cut the Folders from the Specimen Set. I can separate different types of seeds in each folder. The fronts of the folders are decorated with die-cuts, ephemera, etc. Use a label die-cut to write on, or use Idea-ology rubs.
On this folder, I've used a large moth from Idea-ology Transparent Things and stitched it on a piece of Ephemera.
I've used a distressed Idea-ology Flashcard, and ephemera, with a Tiny Clip.
Here's a look at all my envelopes and folders.
On the lid of my box, I've used thin elastic(purchased from a fabric store) and knotted the end around a Tack nail and hammered this into each corner. This holds envelopes or anything you would like, like photos.
Another look at all the different goodies!
Hope you were inspired by my project! I know I was inspired by all the makers and their ideas. Their projects were incredible! Make sure you check out Tim's website for all the names and links of the makers.
Thanks so much for stopping by,
Until next time,
Jan
Some Materials used:
Square Vignette Boxes TH94242
Black Kraft Stock Black Paper TH94165
Distress Paint, (Rustic Wilderness, Crackling Campfire, and Fossilized Amber
Metallic Kraft Stock
Backdrops Volume 3 Paper 94247
Design Tape Trims TH94218
Tack Nails TH94240
Mini Gears TH93012
Ranger Gilded Foundry Wax
Mini Screw Fasteners Hardware TH92790
Field Notes Stampers Anonymous Stamp set CMS396
Stamp Collector Stampers Anonymous Stamp Set CMS338
Ticket Booth Stampers Anonymous Stamp set CMS337
Heavy Black Thread (I've used Tim Holtz Coats Black Craft Thread(unfortunately discontinued)
Velvet Cool Trim TH94113
Mini Paper Clips TH92791
Antique Gems TH94033
Transparent Things TH94241
Flashcards TH94224
Tiny Clip TH94025
loading..


12 comments
This is so charming and useful, too! 👏👏
love this project and the technique on your box. my dies should be here tomorrow. can't wait too play. thanks as always for sharing and all the inspiration.
This was my favorite make of the day. Beautiful and practical.
Another amazing project from you, you are amazing as well! : ) Super creative project and the SPECIMEN SLIDE booklet... just brilliant!!! tfs T in AZ
Incredible make!! I love gardening and all things botanical, so this spoke to me ❤️
Absolutely love this make. Colors are stunning. Can you tell me how you fastened the hinges to the box? Thanks
Another incredible make! Love everything about this.
Oh I absolutely loved this project .. It ran away with my heart.. Thanks so much for sharing it I can't wait to make my own similar version.. Very inspiring!!🌹🇨🇦
Jan, I love your Seed Box so much that I keep coming back to read your post. It’s the perfect combination of decorative and useful. I also love the way you mixed the natural with the metallic. Everything about it just speaks to me and it is one of my favorite makes of all time.
Such a beautiful make!!! I’m amazed at your talent. Thank you so much for all the inspiration! And the pics!!!!♥️♥️♥️
I adore this project. It will go down as one of my all time favorites. Every little detail is perfectly created.
I cant believe I missed it when this post first went up. This is wonderful such rich earthy colours perfect for the gardening theme. The dies are wonderful and you have used them so well. I love all the enveelopes, files, and slides with pressed flowers it gives the whiole thing a seasonal feel from seed to flowering petaals from the year before. Just magical, love it truly! thanks for all the details you always share enabling or at least incouraging us to try our own :)
Post a Comment