Hi everyone, I am sharing a project today created for the Tim Holtz Christmas Idea-ology FaceBook release. I have had a few attempts at creating a December Daily, but never finished, so I'm actually amazed that I even completed this! For those of you who aren't familiar with a December Daily, it was created by Ali Edwards as an album project documenting the 25 days leading up to Christmas. It's created for documenting one story each day to capture the spirit of Christmas with photos, stories, memories, thoughts or anything you choose.

I decided to create my daily memories with small cards, as I didn't want to overwhelm myself with the task and to be honest, I was on a time crunch to complete this! (actually I think I had only 2 or 3 days left before I had to ship it out!)

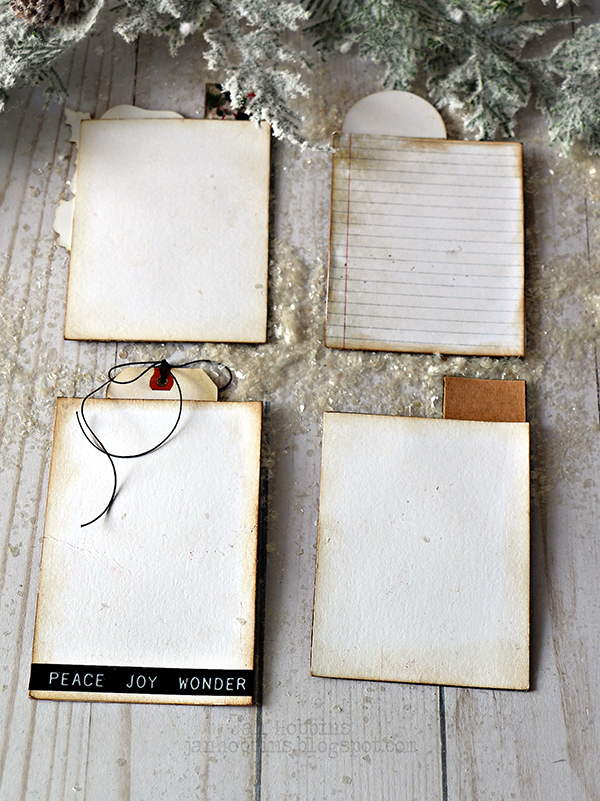
This Vignette Drawer can be used every year, and a new set of cards created. The previous year's cards can always be placed in a dated box or in an album.

I'm going to show you how I created the drawer for my December Daily first.

I used the Vignette Divided Drawer (TH93793) for my base with the dividers removed. You could also put these back in after covering if you chose. Sheets from the Christmas Worn Wallpaper (TH94088) were used for the inside drawer.

Cover the inside of your drawer with the Worn Wallpaper. You will have to piece the bottom and longer sides as the paper is 8.25" in length. Ink your edges before adhering. I would leave the front inside piece off at this point, I ended up removing mine to secure the Mini Hardware Pull (TH93685) at the front of the drawer.

The inspiration for this drawer to hold my cards all started with this tutorial by Stacy Hutchinson here. Instead of showing you how I created this vintage looking leather drawer, I suggest you visit her site, she has the best ideas and tutorials, and explains everything so well. I used an older Tim Holtz Stampers Anonymous stamp from set CMS207 Christmas Nostalgia, Cracked Leather Cardstock TDA71280, Distress Embossing Glaze, crayons, inks and sprays. I used two stamped pieces on either side of the box. I used a large sheet of the Cracked Leather and stamped on either side, then coloured the entire piece with my sprays and inks (you can always use the leftovers in your cards). Cut out your measured pieces and cover the outside of the box. You can now attach the Metal Label Pull to the front. I used two nails from the Vignette Hardware Findings pkg.(TH93668). The wood is actually pretty soft, so I usually just poke a hole through with Die Pic or Metal Awl (something pointy) or if you have a small drill. Just be careful, you don't poke yourself ( I did that on one of my projects, ouch!)


To finish of the edge of the drawer, I used this gold pinked Trim Tape(94107). I love this tape, I just want to use it on everything! Even though it is adhesive backed, I did use Collage Medium to glue it down so it's very secure. I went over the tape lightly with some steel wool that was stuck on a Ranger round ink blending tool (a tip from one of Tim's FaceBook lives) to give it a worn look. After my drawer was completed, I adhered on the Tim Holtz Metal Box Feet Foundations (TH92821). I just use Collage Medium for this, and set it aside to dry. I usually try to leave it overnight, so it's really secure before handling it. For the feet, I usually add a bit of paint or Alcohol Ink to age my metal pieces.
Now, onto the cards!

Here's a look at all the cards, there's more below. I won't go into great detail about creating each one, that would take forever! I will tell you what I used on each one, the approximate size, and on the more detailed ones, a brief explanation.

This is a great way to use up all those little bits and pieces you have been hoarding! I would gather up most of the things you would like to use on your cards. I went through all the number embellishments I had, and for the ones you don't, use die-cuts. Most of my card bases were cut out from Tim Holtz Distress Watercolour cardstock. I wanted something that was sturdy, that didn't flop with the numbers attached. This cardstock is flat on one side and textured on the other. I kept the flat side on the back, so it would be easy to write or stamp on. All cards were cut 3"wide to fit in the drawer, but I cut various heights to add interest. They were 2, 3, 3 3/4, 4 and 4/12" high. I pre-cut most of my 25 cards and laid them out, along with my numbers, just to get an idea of what I wanted to do. I also tried to alternate the different heights, so they weren't all the same before and behind each card. As I went along, I did change some of them around or used something else as the base, as I got ideas for each one. All patterned papers were from the new Tim Holtz Mini Paper Stash Christmas TH94085 and Worn Wallpaper TH94088. Most edges were inked with a brown tone Distress ink and coloured cardstock was Tim Holtz Kraftstock. The stencil chips were alcohol inked, distressed and inked. Here we go!

- #1 card - was 4" high, Stencil Chip TH94018 (#1) with red paper behind, plaid paper from Mini stash, Santa head from Christmas Layers TH94092, book quote from Christmas sticker book TH94041
- #2 card - was 3 3/4" high, #2 was ephemera from Christmas Layers, Woodgrain paper (inked and sprayed) sticker label from Sticker Book, Milk cap from Christmas Milk Caps TH94104, Tape Fabric Tape TH94095. The lined paper on the back was from older Journal Cards TH93957
- #3 card - was 4 1/2" high, #3 Countdown Coin TH93144(RETIRED) Worn Wallpaper, Tag was Salvaged Tags TH94048, Christmas Label Tape TH94102
- #4 card - was 4" high, Stencil Chip #4, Red Plaid Mini paper stash, dog Christmas Ephemera TH9408, Joy - letters from Sticker Book


- #5 card - was 4" high, #5 from Christmas Layers, Compliments of the Season label and holly, was also from the Layers Ephemera.
- #6 card - was not from watercolour paper, I used one of the baseboard frames(4 5/8"high) from TH94094. #6 was a Typed Chip TH94031 that was bent in half. I made a pocket, using Kraftstock for back, place Pinked Tape around the front of the frame along the edge and over the Kraftstock on 3 sides, do the top separately on both pieces. It's ready to insert your own photo in the top opening. Santa button from Christmas Flair TH94105
- #7 card - was 4 1/2" high, Stencil Chip #7 with ephemera behind, Poinsettia Worn Wallpaper, Christmas Paper Doll TH9409 coloured with Distress Crayons, Christmas Velvet Trim TH94108, Pinecone Metal Charm - Festive Adornments TH93990
- #8 card - was 4" high, #8 was from Urban Layers Ephemera TH94042, Santa Worn Wallpaper, Matchbox TH94050, Ephemera, Book Clippings Stickers, Mini Christmas Tree inside box, Ring Fastener TH93060 with Christmas Tiny Bell TH94100 attached, as a pull to open. The back is covered with a journalling card from older Journal Cards TH93957


- #9 card - was 4 1/4" high. #9 Stencil Chip #9 backed with paper covered in Holly Collage Paper TH93762, and joyful word tag from Christmas Word Adornments TH93991. Pocket in front and back, Christmas Ephemera sewn on Plaid Mini Paper Stash (front) and Holly collage papercovered the back of watercolour base. Stamps were from some of my antique stash.
- #10 card -was 4" high and the #10 was die-cut with Sizzix Alphanumeric Shadow Numbers #664808 The front was covered with Woodgrain paper from Mini Paper stash, adhere the lower half of a Milkcap and sew across the top of the card. Take a card (Santagram) from the Christmas Layers, and sew the three sides onto the back of the card, creating a pocket. If you want to sew from the front, tape it temporarily in position (masking tape or clips) to hold. You now have a pocket in the back. Add label tape to the back top as the card is shorter. Add a coloured paper doll, Christmas Ephemera
- #11 card -instead of the watercolour paper, a 4" Baseboard Frame was used. The #11 was a Countdown Brad Fastener TH93679 attached to the middle of a Memo Pin TH92833(wrap the brad ends around the ring) and poke through Christmas Chip Quote (JOY) TH93998 and into the frame. A pocket was created again in the back to hold a photo, sew fabric tape along the edge of cardstock and adhere the edges on the three sides, and cut out a small half circle at the top, easier access to the photo, add a sticker on the back of the JOY quote chip. A Christmas word band from the Adornments TH93991 was added below the photo.
- #12 card- was 3 1/2" high,#12 Countdown Coin TH93144(RETIRED),Woodgrain paper from Paper Stash, Candy Cane from the Christmas Ephemera, Velvet Ribbon for bow adhered to that. Merry & Bright Remnant Rub TH94046, Transparency Baseboard Frame, attached with Hex Fasteners TH93268, Book Clipping from sticker book, coin attached with Loop Pin TH93200, Label Tape on the back, Lined paper from Journal Cards TH93957


- #13 card - was 4" high, #13 die-cut from Sizzix Alphanumeric Shadow Numbers #66480, Salvaged Tags TH94048, Christmas Milk Caps TH94104 sewn on top of tag, Stitched Scraps TH94035, Ephemera Stickers, Fabric Tape are all stitched to front edge of tag, number adhered on bottom of milk cap, Flair Button adhered to tag, then tag adhered to patterned paper covered base. Sticker and lined journal paper adhered to back.
- #14 card - 5" high and I used the Large Poinsettia Layers Card TH94092 for the base and #14 was die-cut with Sizzix Alphanumeric Classic Lower Case & Numbers #664224. This card has a pocket on the side. Stitch the tops and pocket opening of the front and the back(lined journal card TH93957) separately, then stitch the other side and bottom together. Adhere the Date DialTH93953 in-between the front and back, so the top part sticks above the card. I reinforced it to the back with embroidery floss. Adhere the #14 in front of the dial.
- #15 card - was 4 1/4" high and number #15 Plaquette TH92921(retired but there still are mini plaquettes available), card covered in Worn Wallpaper, Box Top side that I had left over from another project - TH94089, paper doll(coat and hat embossed with Distress Glaze, book clippings from Christmas Sticker book. Label from Christmas Ephemera on the back to cover brads.
- #16 card - 4 1/4" high and #16 was die-cut from Thin Alphanumeric Sizzix 662226(retired), Worn Christmas paper, Paper Dolls (group was cut apart and the end two pop-dotted higher and overlapping the back middle one to make the group fit on the card. The plaid shirts were embossed with distress glaze and embossing pen), cut a triangle piece of double adhesive the size of the triangle on Stitched Scraps TH94035(see photo) and stick it on there.Adhere the #16 in the middle of it and cover with Rock Candy Glitter, take off the excess. Adhere another stitched label to the back of the card. I adhered a small sticker in the middle.


- #17 Card - 4"high, number 17 is Plaquette TH92921(retired), I used the small boxtop from the Christmas Boxtops TH94089 and cut off the sides. Add a piece from one of the Christmas Vellum Scenes TH94094 in the cut out part, add a couple of pop dots inside the middle puff it out. Group a bunch of tickets from the Christmas Ephemera pkg and I also used few from the Ticket Book TH94036 and adhere behind the box top. Attach the Plaquette in front and adhere to card. Take a journal card cut to size and adhere to the card along the edges on the sides and bottom, making a pocket. Cut a piece of kraft paper, apply a sticker for journalling. Apply Christmas Rub to the pocket.
- #18 Card - 4 1/2", Typed Chip TH94031 for number and use Tiny Attacher (Stapler TH92800) to attach tag TH94048, card covered in plaid mini stash paper, then label tape on top and bottom Christmas rubs below tag, Black Kraftstock with lined Journal Card on top
- #19 Card - 4 1/4" high, Frosted Acrylic Sheet TH93153 (retired)for back and a small Vellum Scene sewn together into a pocket for the main card. Adhere a baseboard frame to the front, a milk cap adhered to the top of the frame with a Countdown Coin TH93144(RETIRED) in the middle
- #20 Card - 4 1/2" high, woodgrain coloured cardstock sewn onto Tim Holtz Substrate paper TH93291 (retired) but Sizzix has a similar paper/fabric-Texture Roll 663896- that can also be sewn, die cut. This paper was cutlonger (4 3/4) than the woodgrain, and the word "Believe" was die-cut on the end, then folded up. Red cardstock was adhered behind before sewn onto the woodgrain. Before sewing the woodgrain, adhere a clock from Ephemera, then a round metal tag from Christmas Word Adornments TH93991 attached with Hex brad and two more, this is the 0 in #20. 2 is from the Layers Ephemera. A piece of velvet trim behind the metal tag


- #21 card - 4 1/2" high, number is die-cut from Sizzix Alphanumeric thinlits. Plaid paper stash, large Ephemera card in front of patterned paper, tag ephemera in-between card and paper with number on top. Book clippings from sticker book all around card. On the back a pape pad created with thin kraft paper sheets, stapled together at top, covered with a strip of fabric tape, a small ephemera piece adhered on the back of the top tag.
- #22 card - 4 1/4" high, number is die-cut from Sizzix Shadow Numerals 664808 on a round circle diecut from Cracked Leather cardstock, plaid paper from Christmas Mini Stash, Deer from Christmas Ephemera, a small bell tied with heavy thread tied around neck and a frame from Christmas Layers underneath. This is adhered to a piece of Gold Metallic Kraftstock, cut slightly larger than the patterned paper. The kraft side is facing out on the back.
- #23 card - 4 1/4" high, covered in Worn Wallpaper, Pinked silver tape along outside edge to back. Number is from Christmas Ephemera. Stamper's Anonymous Etcetera Cathedral Window THETC-015, primed with white, then white Crackle Texture, brown Distress Crayon applied in cracks. A poinsettia charm from Festive Adornments TH93990 was painted, Rock Candy Dry Glitter TDR35879 applied lightly, and tied with thread to window. Also a Stitched Label. Back is plain.
- #24 card - 4 1/4" high, number is ticket from Ephemera, as is the large Santa. Book clippings from sticker book and a small amount of Rock Candy glitter added randomly to Santa. The Kraftstock envelope was made using my envelope maker, two Hex brads used for closure with string, along with a sticker label on the back.

- #25 Card - 5" high Gold Metallic Kraftstock, edges distressed, front and back. Christmas Layers Ephemera "December 25th" on front, matted with red, then green Kraftstock. Metal Wordband from Christmas Adornments TH93991attached with brads, a Type charm TH92819 with a Countdown Brad Fastener TH93679 inside hangs from the corner. A handmade Kraftstock envelope on the back, two Snowflake Adornments TH94007 attached with brads used as the closure. Book clippings from sticker book also.

Whew, that's everything, and now you are ready to fill your December Daily Vignette Drawer with your cards, waiting for all those Christmas thoughts and memories! This is just some inspiration to start you off on creating your own cards. It seems like such a large project to tackle, but really, once you do your first few cards, the ideas just start flowing, and even better...all the treasures you have tucked away in your stash are brought out and used! Because my cards are quite small, I tried to have as many pockets, and envelopes as I could to fill with folded journalling papers and memories.
For more inspiration I highly recommend visiting Ali Edwards' site, there are so many journaling and daily ideas. Also, on Pinterest, if you search, "December Daily" there are so many inspiring projects!
Hope you enjoyed my December DailyVignette Drawer and it inspires you to create your own! This would also make a great Christmas gift!
Until next time,
Jan


22 comments
Blogging takes an age and then some, so I really appreciate your post! Love your beautiful creations and the box is fantastic!
Thank you so much for talking us through your amazing project. Totally inspired to bring out my stash now 😁
Beautiful! Thank you for sharing.
So beautiful! Thanks so much for taking the time to post the blog.
What a wonderful post. The inspiration is phenomenal. I have a lot of stash that needs to be brought to life as you did here. Thank you for sharing this. I will be looking forward to the next post on your blog!!
Wow, I love that you showed the front and back of each card. That took some time to write...I need to get started on this one NOW!!! Such a great project!!!
This is so precious!
This is really fabulous...definitely going to make one this year to keep all my favorite holiday pictures & recipes in for yearly display...Thanks!
Hello Jan, what an amazing project, I can’t imagine how long this took, it is so beautiful.
I am obsessed with this project. I have to make it with my girlfriends. Thank you so munch for sharing and being amazing.
This might have been my fav make from the LIVE. I cannot even imagine all the work that went into this, but what a treasure you have. LOVE each little detail and that there is so much to see. I want to look and touch each creation inside this box.
Jan, the instructions probably took longer than the cards...so much work to write this all down. This was my favorite make from the LIVE...just took my breath away!
Thank you so much for sharing your tutorial. Your creativity is just amazing. I was lucky enough to see your projects at TM. Wow, is all I can say. It would be really great to have you consider putting classes and kits together for those of us who want to learn from you. Just saying.
Thanks again Jan!!
One of my favorite Makes!! They are so awesome!
This is fabulous! Such a lot of work and love to create it. Awesome!! 😊 x
Wow. This is fabulous! Such a lot of work and love to make it. Awesome!
This is the most amazing project I have ever seen. WOW
Beautiful cards! What do you use to color the Paper Dolls? It must have taken ages to do those plaid shirts! Wow!
Thank you for the instructions, this project is fantastic.
I love this! Since watching the Ch 3 makes, I've been thinking along this line for my G45 entry this month. I'm thinking October Daily spells card file. Creative Blessings!
I just love this, it's sooo striking! And...your instructions are right on for me...thank you for all your work, lovely.
I have been a huge Tim Holz fan for years and I thought nobody could do what he did better than him. But I actually think I like your designs better. There’s a clean lines look in them that I really love
Post a Comment