Hello friends! Today I am sharing a project I created for the Tim Holtz Christmas Idea-ology 2021 YouTube live.

The base for my project is the new 9 x 9” Vignette Display Panel. I didn't take very many step by step photos as I was creating. I really didn't have much time to get my projects done so there was some late night crafting!
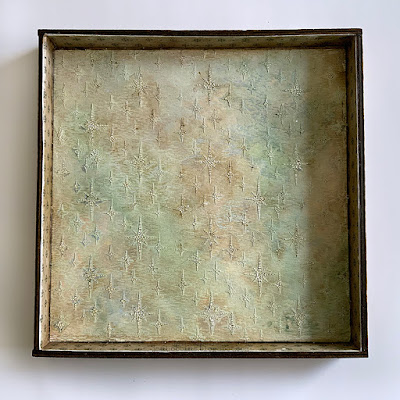
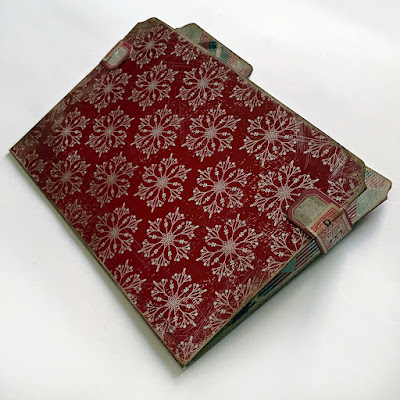
For the inside of my panel, I’ve used the Sparkle stencil(THS132) with Distress Texture Paste, on Distress Watercolour cardstock. After the paste dried, I coloured lightly with Distress Oxide and Distress Sprays. Sorry, I didn't have the colours written down, I'm pretty sure Bundled Sage was used though, lol! The inside edges are covered with Backdrops Christmas paper TH94181.
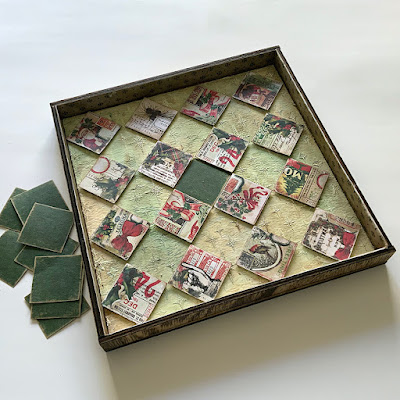
Next I used the Christmas Collage Tiles (TH94189) and green cardstock cut the same size as the tiles to create my background pattern. The Collage tiles are adhered with foam adhesive squares so they are raised.
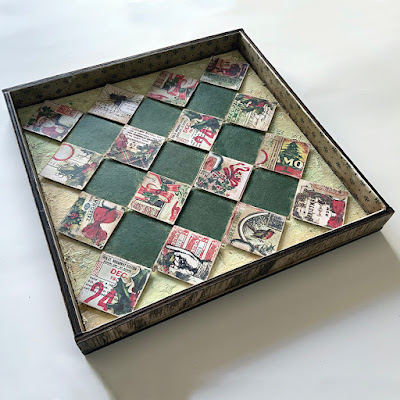
This is my background pattern completed. Something similar to a quilt pattern. At this point, you can finish off the front edge of the panel sides. I just apply Distress Opaque Crackle paste TDA71303 randomly on the fronts, let dry naturally, then colour with Distress Brown crayon.
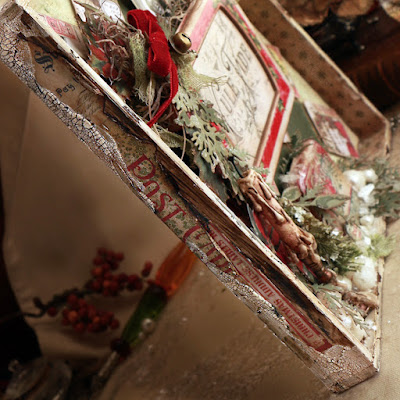
For the sides and back of my tray, I'll show you how I finished it here now, but I did do mine later on, as I wasn't sure how I was going to finish these parts yet. I applied pieces of the Christmas Post Cards TH94192, Christmas Ephemera TH94187, Christmas Snippets TH94187 or any other paper pieces. These can be cut, torn, curled, anything to make them look like they have some history on this box. I leave some of the wood box exposed and once you have it all glued on, apply Distress Crackle Paste randomly. I have even cut out a piece of chipboard the size of my label or paper, laid it down, then apply my crackle, then lift off the chipboard. You are left with the blank spot that you will glue you paper piece onto, after your crackle has dried and you have tinted and coloured the crackle. I use any dark brown Distress Crayon, usually Walnut Stain. Apply this into the cracks, I usually wet my fingers lightly from a wet paper towel, and rub the colour in. After I apply a light wash using Distress ink from my craft mat, and a watercolour brush. Heat dry.

For the back of my tray, I covered it with Christmas Collage Paper TH94192 and Distress Collage Medium. You have to apply it a little heavier, so the paper becomes transparent, and then apply the collage medium on top after. If it tears in places, I'm ok with that, but you can always cover those spots with more tissue or your Distress Crackle paste. The label in the left cover, is an example where I used the piece of chipboard (not glued on) the same size as the label, and then applied the crackle paste. The label glued on after, looks like it's embedded into the paste.
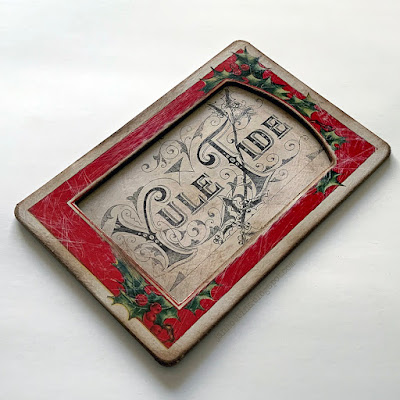
Now for the embellishments. I’ve used the Yuletide card from Christmas Layers(TH94185) which is a thicker coated cardstock and placed it behind a Baseboard frame (th94143). This is the front of my pocket.
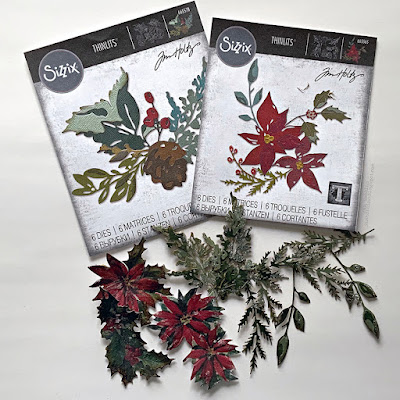
I die cut a selection of Christmas foliage from Sizzix Holiday Brushstroke 2,(665578) Festive Bouquet (665565) Thinlits sets and also used poinsettia die-cuts from the Christmas Worn Wallpaper scraps(th94182). The foliage is a combination of cardstock, oxide or ink coloured Distress Heavystock. These pieces all have randomly applied Rock Candy Glitter to them.
The poinsettia pieces are shaped slightly with a Tim Holtz Sizzix shaping tool 665304 (a metal ball) to curve the petals, then Rock Candy glitter applied randomly. Do enough of these to cascade down the side of your pocket, a few in your pocket, and on the bottom of your tray.
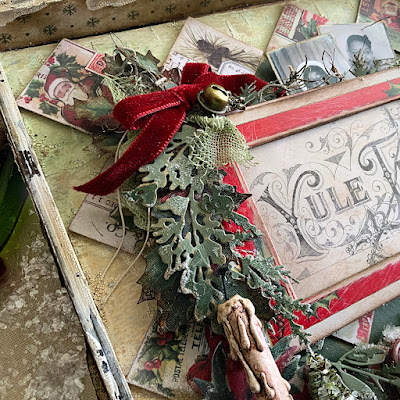
I have also used Idea-ology Warm Velvet Trim th94115, Tiny Bells th94201, and Snowflake Adornments th94200 for the top corner.
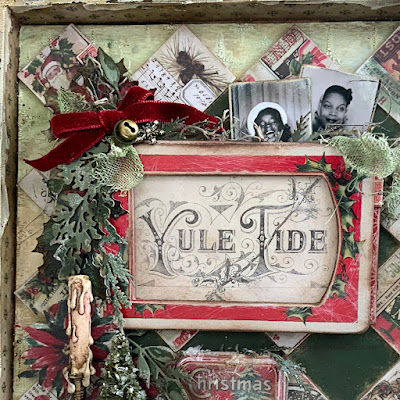
Here's a better look at the photo booth photos, and the snowflake adornment (love these!!)

For the bottom of my vignette tray, I have used a Drippy Candle th94172, Candlestand Adornment th94166, Woodland Tree Lot th94211, Baubles Findings th94099, Tin Tops th94204, and Mini Flair th94197. The Drippy Candle is adhered to the top of my Candle Stand (coloured with Alcohol ink to make it darker and more vintage). Once that was secure, I added more drippy parts at the base and down the candle stick with hot glue. Colour the drips with paint and Distress Crayon.
The Baubles are covered in the Holiday Snowfall Grit Paste (this is Ranger's limited Holiday Texture Set, tsck78227) with some Distress Mica Flakes added into it. The Christmas Tin Top is covered with Icicle Crackle Paste, also from this Holiday set. White Picket Fence Distress Crayon is rubbed into the cracks. The Holiday Snowfall Grit Paste is applied on top and also on the base of my tray. My small tree is coloured with green, and Mica Flakes applied. I think I've got everything!
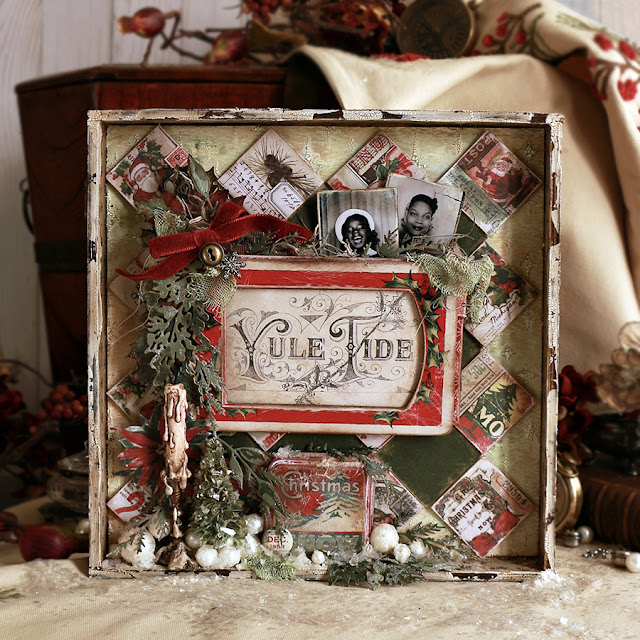
Here's another look at my Yuletide Square Vignette tray! Any little embellishments can be used for these vignettes to create your own Christmas magic!
I still have two more Idea-ology projects and another Sizzix one to share, hopefully soon. My back is still bothering me to sit too long, so I'm doing things a little at a time! But, my house is decorated, finished this week! Yeah!
Thanks so much for visiting here, and also for the lovely comments. They are so appreciated!
Until next time,
Jan


2 comments
Love the tray! Thanks for describing your process. Inspiring!
Jan, it's beautiful. Thanks for the inspiration!
Post a Comment