Hello friends! I'm sharing a project today that was created for the Tim Holtz Idea-ology 2023 release. If you missed Tim's YouTube Live of the reveal, a link to his replay video can be viewed here or on Tim's YouTube Channel. You always learn so much about his products, little hints on how to use them or even the thought process behind the creation, not to mention the inspiration from all the talented maker's projects.

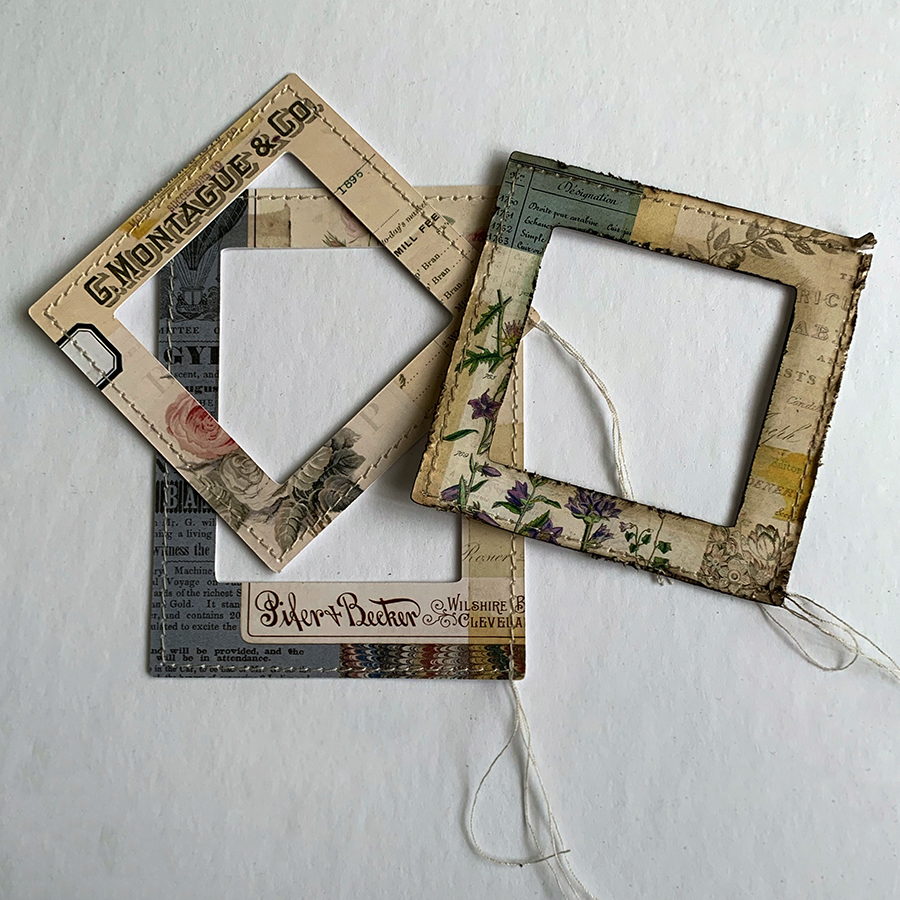
This is my first make I will be sharing today. I've created this vignette using the Square Vignette Display Panel. In this release, colour palettes have been created in all the paper goods, which I find so inspiring.
I normally gravitate to anything green (I've always loved the colour green, even when I was little, no pink for me!) but for some reason, I was drawn to all of the blue tones. I've taken a lot of photos, so hopefully there's something in this project that inspires you to include in any of your own projects.

I feel like I need to include tiny lights in all my vignettes now! I didn't use the whole strand this time, I really just wanted a glow behind the leaves, giving additional dimension to my shadowbox.

I started with creating a background paper for the inside of my panel. I’ve used Distress Watercolour Cardstock coloured with Distress Sprays and Oxide Sprays. I wanted this Cardstock to slightly disappear into the background, so I kept the colours soft and similar to my paper colour choices. The Cardstock is 8 1/2 by 11", so I cut mine to 8 1/2 x 8 1/2", slightly smaller than the 9 x 9 panel.

After colouring my paper, I stamped with Frayed Burlap Archival Ink and then embossed with Distress Lost Shadow Glaze. I've stamped parts of my stamps, randomly, mostly just pressing my stamp into the paper without a stamp block or platform. If some stamped parts didn't pick up any glaze powder, I was ok with that. Quite a bit of this is going to be covered with embellishments.

I randomly added Statue Foundry Wax to parts of my stamped images. Heat these parts to create that nice shiny finish.

The inside edges are covered in paper from Backdrops Volume 4 . I added about 1/4” extra in width, so that it folded onto the back. My watercolour cardstock doesn't quite reach the edge, so this covers the exposed wood. I've applied my Opaque Crackle Medium on the inside and along the wood panel edge. After this has dried, use a Distress Crayon (Walnut Stain) in the cracks and using my finger, I apply a little bit of water that has been tinted with brown ink.

The edge of the Heavystock paper was machine stitched. Before adhering anything, mark where you want your hole to be drilled for the Tiny Lights then create the hole. The wood is pretty soft, so usually I just poke a hole through with my Tim Holtz Die Pick tool and then with a long cylinder Needle file, enlarge it big enough for the string of lights to go through. Mine was slightly lower than the middle, as I knew I was only using lights at the bottom of my inner vignette box.

I’ve glued my paper on the inside of my panel. Poke through for the lights hole. I’m going to mention here that if you wanted to sew any of the paper pieces to your paper beforehand, I would do it now before gluing down this piece. I was going to sew some of my paper ephemera to this before I glued it down (the ones surrounding the inner vignette box), and forgot. Oh well..... In one corner, I had the paper curl out more, so I stuck in a piece of ephemera (stamps) under the watercolour piece.

I’ve covered the back with Backdrops Volume 4 paper. I don't know why, but I always like to finish off my piece on the back. Must be the sewer in me, always told the inside should look as good as the outside of your garment, lol!

Then Photographic Collage Paper was glued on top. I've applied a generous amount of Collage Medium first to the Backdrops paper, then laid down the Collage paper. Smooth this out with Collage Medium on top. I use my Distress Collage Brush (TDA50896) for larger surfaces, it is designed to spread easier as it is hollow on the inside to hold your medium. Poke through the hole for your lights. I don't have any photos of the process, but I did cover the outside sides of my panel after this. I have finished photos of some of the finished sides at the end of this tutorial.

Next, I worked on my small square vignette box (4 x 4"). I've covered the inside and outside edges with Backdrops(Volume 5 on the inside, Volume 4 on the outside) paper. I also cut thin strips to cover the front edges(photo below). This box will be adhered in the centre of the panel. I measure where it will be, and then place the box in it's place and poke my die pick through to mark where the hole will go in this box.

I've chosen this landscape piece of ephemera from the Palette Ephemera pack for the back. This Transparent Layers piece is my favourite!

It's a little wider than the box, so I've clipped off the extra. I still left it a little wider than the box, so the ends curve out slightly, for more interest. The bottom will be covered up with die-cut leaves. I've also used the tiny scrap from the end.

This Transparency is longer, so it will be trimmed. The trimmed piece is saved and adhered to the open side.

You can see here, how the sides curve out a bit. I wasn't sure if I was going to put lights behind the edges yet, either. I haven't glued anything down yet, just getting everything ready.

Here's the transparency trimmed and the leftover piece will be used.

This is where it will be adhered later (not yet!). The seam and empty spot will be covered.

I decided to apply Distress Opaque Crackle medium around the outside of the 4 x 4 box. Use Distress Crayon on the cracks, again apply a touch of water with your finger or damp towel.

Adhere the box to your Display Panel with Collage Medium. I would put a weight on top and let it sit for awhile to make sure it dried solid.

Pull the string of lights through.

Adhere the battery pack to the back of the panel.

I place my lights all along the bottom, and cut off the extra at the end of the string that I didn't need. I place a small square of paper over the hole as there was a light there and it appeared like a dot of light on my background paper.

Adhere the landscape ephemera to the back. It's just above the lights. I glued down two pieces of thick foam on each side.

I cut out a strip of leftover Backdrops paper. I cut the top edge with the Deckle Trimmer to get an uneven edge. This was adhered on top of the foam pieces.

This is how far it stands out from the back, letting the light shine up.

In front of that, I added the leftover piece of the landscape ephemera. I cut the top so it wasn't straight across.

With various leaf die-cuts, cut out with Sizzix dies and patterned paper, I adhered them on the two strips of paper.

Once you have everything in place, now adhere the transparency. I've used thin double faced adhesive. You won't see it, as it will be covered by Design Tape trim. In the photo you can see I started to add in my bits of Collage Strips, Ephemera(machine stitched before adhering down) and Collage Frames (these come already stitched) around the vignette box.
Because I didn't adhere these down before the box was added, I just cut the frames where they met the edge of the box, tucking the ends under the box a little bit. These pieces are distressed and inked along the edges.

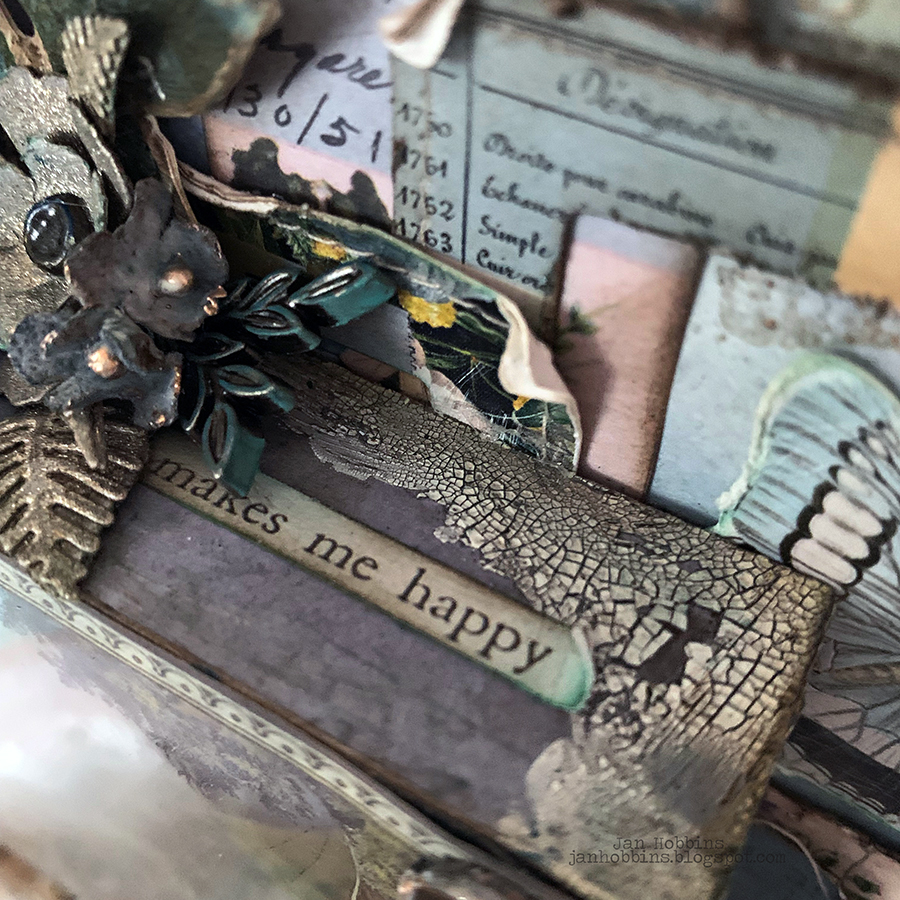
Design Tape Trim was added around the Transparency edge. Before adhering the large word plaque, I applied Grit Paste in the recessed areas. After it had dried, it was lightly tinted in areas. This can be done with paint, ink, crayon, whatever you have. I've added the Large Fasteners on each end which have been hammered with the new Tiny Texture Hammer. A small piece of ephemera is added to the bottom of the plaque with the fastener. This will cover the small hole and I bent it in half.

You can see the corner where I've bent the ephemera piece in half. The Word Plaque is adhered down with Collage Medium.

Next, I started on my other embellishments. I've die-cut all my flowers and leaves from the new Sparkle Classic Kraftstock. Before removing the die-cuts from the paper, I sanded them lightly. So much easier, and you don't risk the little petals ripping off. Love this paper, when sanded it really looks vintage. A bit of brown Distress Crayon, rubbed into the edges was added.
On the bigger flowers, I've used fasteners, that have all been hammered with the Texture Hammer.

Next, I chose a photo from the Photomatic pkg. and a Photo Frame. Love all these photos, but the one I chose almost looked like the background in the photo could have been the same area as my Landscape Ephemera piece. The photo was distressed with some Oxide ink. The metal frame was also distressed. A bit of paint, Oxide Ink, and Grunge paste were used to make it look old.

The photo is adhered behind the frame and placed on top of a box made from a piece of Backdrops paper. Ephemera is added to the box and aged.

Dyed Mummy cloth (coloured with Distress sprays and Oxide Sprays) was adhered at the bottom of the Panel. My die-cut flowers and leaves were added, along with distress leaves from the Organic Layers pkg. A painted pointy hand from the Figures Stand pkg. was tucked in next to the framed photo. For the hand, I painted my two pieces (stand and hand) first with Ground Espresso first, then after it had dried, dry brushed Pine Needles and Pumice Stone paint. You can lightly rub off any areas, that you don't want the colours.
I've also added in die-cut flowers and leaves on top of the inner box. Tiny Bouquet flowers were coloured with Distress and Oxide Sprays, then the edges lightly coloured with Statue Foundry Wax. A Foliage Adornment was also painted, the same way as the hand, and adhered with my cluster of flowers.
The little words strips are cut out from one of the Collage Strips.

I've added more pieces from the Ephemera Palette pkg, Collage Strips, and Organic Layers throughout my piece.

You can make little boxes out of your ephemera. They are a bit fiddly but fun to make and use in your vignettes. I cut a strip of the Sparkle Kraftstock, taking into consideration how wide you want your box and add in a little extra on for each side (the sides are folded in to support the top and bottom). I've scored lines on each side. Double sided adhesive is applied to the two outsides. This label is a bit trickier, there are lots of sharp points, so you have to clip the two side pieces where it comes to a point. I do this as I go along, when adhering to the top piece. It doesn't have to be perfect, you can always hide the parts you don't like! I had cut out a piece of scrap paper for the bottom, matching the top. Glue the bottom on, folding in the sides.

Distress the edges and top of the label, I also added in a label from the Ephemera Package. For the final touch, I tied a small Word Tag (the round star) that had been painted around the box. In photo below!

My birds are from the Organic Layers pkg. and the frames are from the Ephemera Palettes Pkg. These were also distressed with inks and sprays. I've added more die-cut flowers and leaves, dyed blossoms and Mummy cloth on this side.

I've also rolled up a leftover piece of the Collage Frame that I cut to fit around the middle box. This is tucked into the bottom cluster.

My Quote Chip was really distressed. Because there's so many layers of chipboard in these embellishments, I can spread them apart. Just soak them with water, pat dry and start pushing the layers apart just on the sides with your fingers. After they are completely dry, ink or paint the edges and top.

Here's the top of the Display Panel. I've aged a handle from the Mini Hardware Set and adhered this on my top of the panel. Fasteners that have been hammered were added in the handle holes. Holes were poked into the wood, so the brad ends would go in. I've clipped the ends, as they were a bit too long, and also added Collage Medium to secure them. A bit of Grit Paste was added around the ends. I was almost out of Opaque Crackle Paste, so I did add a bit of the Transparent Crackle Paste to the crackled areas.

Besides Ephemera pieces, I used some Collage Palette Paper pieces on the sides.

Here's a close-up of the corner where I had it bent forward. Stamps Ephemera was placed underneath.

Here's another look at my finished project. I hope you enjoy creating with this release as much as I have!
I have another project to share in the coming week, thanks so much for visiting me here.
until next time,
Jan
Supply List
TH94308 Backdrops Volume 4
TH94209 Backdrops Volume 5
TH94328 Collage Strips
TH94317 Ephemera Palette pack
TH94310 Photomatic
TH94327 Transparent Things 2
TH94329 Transparent Layers
TH94318 Layer Collage Frames
TH94316 Organic Layers
TH94312 Palette Collage Paper
TH94319 Photographic Collage Paper
TH94315 Sparkle Classic Kraft Stock
TH94320 Labels Quote Chips
TH94306 Figure Stands
TH94321 Photo Frames
TH94330 Word Tags
TH94329 Large Word Plaques
TH94311 Foliage Adornments
TH94324 Tiny Texture Hammer
TH94314 Large Faseners
TH94244 Vignette Display Panel (9 x 9 x 1)
TH94242 Vignette Square Boxes (small 4 x 4)
TH94123 Mini Hardware )Set (Handle)
TH94019 Clear Tiny Lights
TH93569 Bouquet Findings
TH94218 Design Tape Trims
Mummy Cloth
Stampers Anonymous
CMS447 Botanic Collage
CMS396 Field Notes
CMS266 Newsprint & Type
Ranger Ink
TDA53927 Watercolour Cardstock
Frayed Burlap Archival Ink, Frayed Burlap, Walnut Stain Distress Ink
Distress Sprays and Distress Oxide Sprays - Bundled Sage,
Blueprint Sketch, Chipped Sapphire, Pumice Stone, Frayed Burlap, Old Paper, Weathered Wood, Stormy Sky, Antique Linen, Lost Shadow
Lost Shadow Glaze
Clear Embossing Ink, Distress Paint (Ground Espresso, Pumice Stone, Pine Needles, Uncharted Mariner)
Statue Foundry Wax
Collage Matte Medium
Opaque Crackle Paste
Transluscent Crackle Paste


3 comments
Absolutely Beautiful piece, Jan. Thanks so much for sharing your process.
Oops much have done something wrong it says anonymous instead of my name. Lol This is Angie Hall Haviland by the way LOL
This is just amazing! Thank you so much for sharing!
Post a Comment