
Hello everyone! Hope all of you are enjoying this new Idea-ology release from Tim Holtz and getting inspiration from all the wonderful makes that everyone has shared. If you missed Tim's YouTube Live Release, you can always watch all his videos on replay. This is my second project created for the release, a Curio Clock. As soon as I saw the round Transparencies, I knew I wanted to create with the clock and one of these.

I feel like I need to use Tiny Lights with every Idea-ology make now, are any of you the same?

I usually thread my Tiny Lights through the back of my clocks, but this time I decided to drill a hole through the base and clock body at the bottom.

On this clock, I decided to add in Mini Foundation Legs to the base. I used scrap pieces from some Etcetera Trim Thickboard pieces and cut them so they fit in each end so the legs have something to glue onto, as in the photo. These are glued to the bottom of the base with Collage Medium.

This is where the legs will go.

I've used a generous amount of Collage Medium on the legs and another coat on the ends of the scrap pieces. I've let this dry overnight so it's nice and solid.

The legs and thickboard pieces are painted green with Ranger's Rustic Wilderness paint. The legs are lightly sanded to expose the metal in the raised areas. The battery pack for the the Tiny Lights fits in-between.

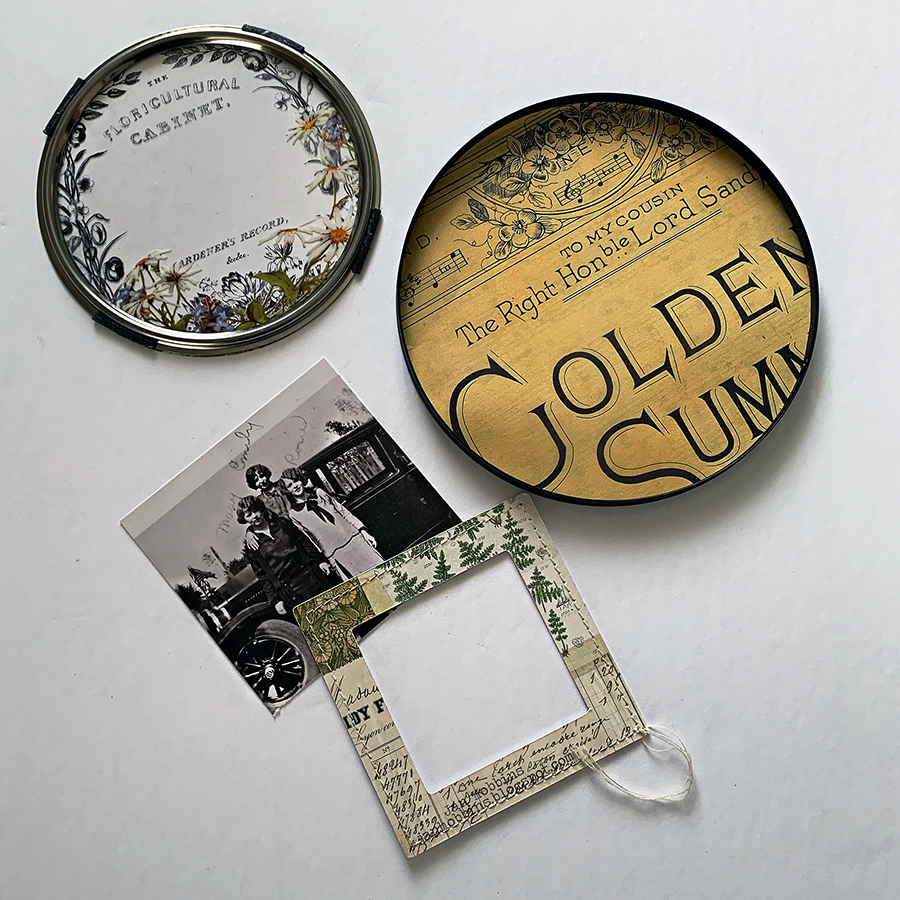
I am loving these colour palettes in the new Idea-ology paperie items. I decided to go for a yellow palette in my clock. The Collage strips were used around the outer clock body. A Snapshot photo was tinted and trimmed to fit behind a Collage Layer Frame. The edges were inked with Distress Ink and distressed. Narrow strips cut from the Collage Strips were used as trim around the clock base.
A yellow coloured paper from the Backdrops Volume 5 pkg was cut to fit the inside of the clock back. I
have chosen a round Transparency from the Transparent Layers Pkg. to place in the rim of the clock.

I've also used Rustic Wilderness paint on my Ornate Foliage Adornment and lightly sanded.

The photo, frame, Ephemera pieces, painted foliage adornment and a Quote Chip Label (this was wet with water, edges manipulated and after it was dry, inked) were adhered to my clock back.

The Collage Strips were adhered to the outside ring of the clock. The edges of the strips were sanded first. I've also used Design Trim Tape around the edge.

Now for the rest of the embellishments in the clock insides. A barrel was used at the bottom of the clock inside. With the Transparency in the front, my barrel was a little wider and was pushing on it, so I filed down a back corner so it fit and was snug against the back. The barrel was tipped on its side so that my flowers were spilling out.

The flowers were cut out with Sizzix Small Tattered Flower Thinlits Die and the new Sparkle Kraftstock and Backdrops Paper. For the centre, I used the large Fasteners which have been hammered with the new Texture Hammer. A bit of paint was rubbed in to highlight all the bumps.

At the bottom of the clock, arrange your Tiny Lights before adding in the barrel and flowers. I didn't use the whole strand, if you just want a small amount of lights, just snip off the end of the string. I've arranged them at the bottom of the clock, but if you would like the whole inside light up, you can adhere your string around the inside round opening. Next, adhere your barrel, then all of the flowers with a few leaves from the Organic Layers pkg. and decorative moss.

This is what it looks like when the lights are on.

I've also added die-cut flowers, tiny Bouquet flowers that have been tinted with Distress Sprays, and a few Idea-ology Beaded Berries to the top of the clock. Some dyed bias ribbon and moss were also added.

These little word tags are my new favourite in the Idea-ology metal pieces. These were coloured with Rustic Wilderness paint also and tied with string, facing the front. I've also added in two foliage adornments (they are just peaking out under the flowers in the photo) that were also painted with Rustic Wilderness.

Here’s another look at my finished clock. The yellow trim around the bottom base is thin strips cut from Collage Strips that have been inked on the edges.
Well, that’s all for today, thanks so much for visiting!
Until next time,
Jan
Supplies
TH94328 Collage Strips
TH94209 Backdrops Volume 5
TH94317 Ephemera Palette pack
TH94238 Barrels
TH94216 Curio Clock
TH94329 Transparent Layers
TH94318 Layer Collage Frames
TH94316 Organic Layers
TH94322 Snapshots Volume 2
TH94315 Sparkle Classic Kraft Stock
TH94320 Labels Quote Chips
TH94307 Ornate Adornments
TH94330 Word Tags
TH94311 Foliage Adornments
TH94324 Tiny Texture Hammer
TH94314 Large Fasteners
TH94019 Clear Tiny Lights
TH93569 Bouquet Findings
TH94218 Design Tape Trims
TH93581 Mini Foundations
TH93779 Beaded Berries
Sizzix 661806 Small Tatttered Flowers
TDF72843 Rustic Wilderness
Distress Collage Medium


3 comments
So beautiful! Thank you for sharing this tutorial.
Those tiny tags are one of my faves as well. Just love all the floral flowers and bits and bobs that are on the inside/outside of the clock. This one ranks right up there with the Halloween version you made. Love!
Thank you for sharing this tutorial.
Post a Comment