Hello there! Shaker Cards are still all the rage in the world of card making and chances are you've created a few yourself. Or if you've been meaning to give shaker cards a try but didn't know where to start, join me and let's get shaken'!
I've used Sizzix's Lindsey Serata Mini Shaker Pocket Thinlits Set to create my Shaker pocket gift card holder. I needed something to put a gift card in for an upcoming birthday, and the recipient is a dog lover so how could I not add in one of those Tim Holtz Crazy Dogs!
For those of you who like videos, Lyndsey Serata has a great tutorial with some tips and tricks when making the shaker pocket.
Cut out two squares from the larger square die and one of the smaller square. The larger ones will be your pocket and the smaller one is the back of the shaker box. Die-cut three of the small tabs (these are used to make your pocket).
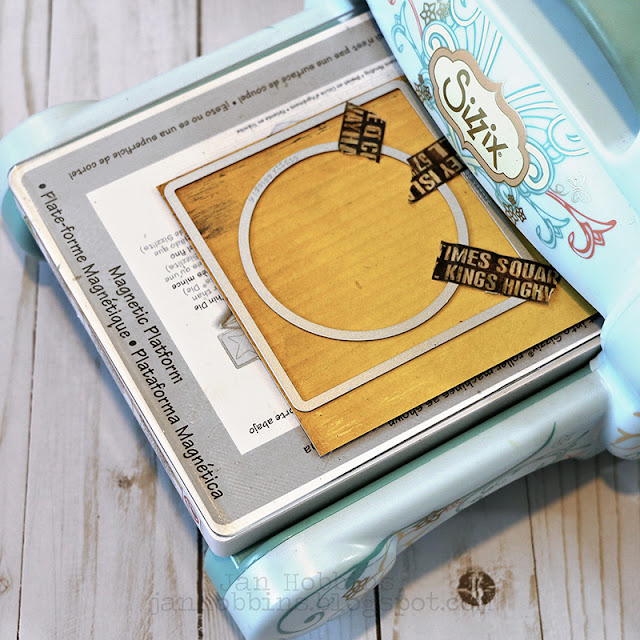
For the front of the shaker box, die-cut the smaller square with the smaller circle die inside. I tape the circle with washi tape(removes easy) to make sure it doesn't move. If you use the magnetic plate it usually stays in place, unless you bump it like I usually do! My Sizzix Sandwich for die-cutting thin dies, is Magnetic Platform, Standard Cutting pad, Paper, Die (cutting side down), and Cutting Pad.
This is the back and front of your shaker box.
Die-cut an acrylic circle using the larger circle die. Adhere this to the back of your square with the circle cut out. Next, you need to use foam to create that space in-between your layers. I used a foam sheet and applied an adhesive sheet to both sides. This was then die-cut with the small circle inside the larger circle die, creating a ring.
In Lindsey's video, she suggests cutting the ring in half, making it easier to line up. It really does! I didn't stretch my foam quite enough but it was easy to add in a small piece. Your circle is ready for your shaker elements. I've used beads, sequins, Prills, anything that is flat enough for the spacing. Don't overfill! Once you have your elements in place, remove the adhesive from your ring and adhere the square you have die-cut for the back.
Take the three tabs and fold each one in half along the crease. Apply adhesive to the outside on both sides. Line up your two large squares, good side facing out, and adhere the tabs in between on three sides, leaving the top open.
I stamped my Crazy Dog stamp three times for layering, and then coloured them with markers. One of them was used for the eyes, nose and collar, one for just the head and the third, I used the entire stamped image. These pieces were die-cut using the Crazy Dog Thinlits set.
I adhered my pieces with small foam dots for added dimension.
I added a Happy Birthday rub-on onto my acrylic. Adhere this shaker box to the front of your pocket.
I decided to add a piece of twine on the same side as my dog stamp, which should be placed before you adhere your dog to the front of your pocket (it's not on yet in this photo).
I stamped using pieces from my Crazy Dogs Set, on a small piece of plain white tissue, then lightly sprayed the tissue with Distress Spray. I used decorative edges scissors to trim my paper. This was tucked into my pocket along with my gift card.
Here's another look at my Shaker Pocket Card!
Thanks for stopping by,
Jan


4 comments
Love this stamp set. Great video and awesome shaker pocket.
This is so awesome! Love it! Going to try it using one of the cats.
This is really cute Jan! Love the stamped tissue paper!
Such a great card and I appreciate the how to as well!
Post a Comment