Hello everyone! I can't believe it’s Halloween in a couple of days and then we're already into November. I’m sharing my last Halloween Idea-ology project in today's post.
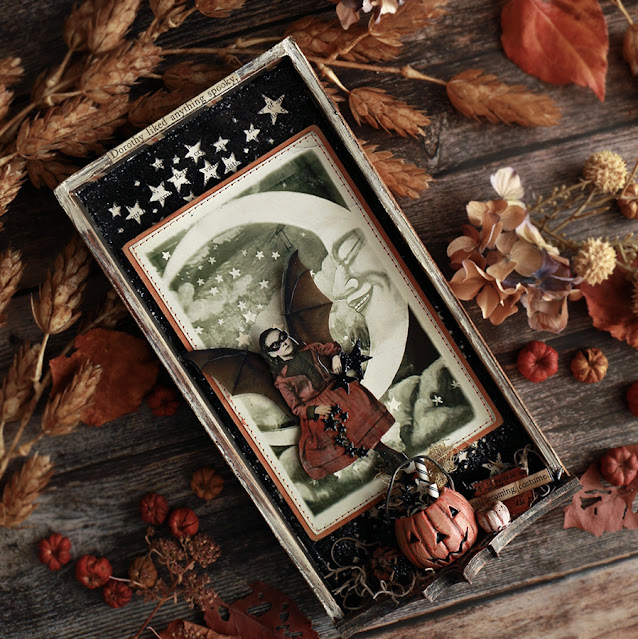
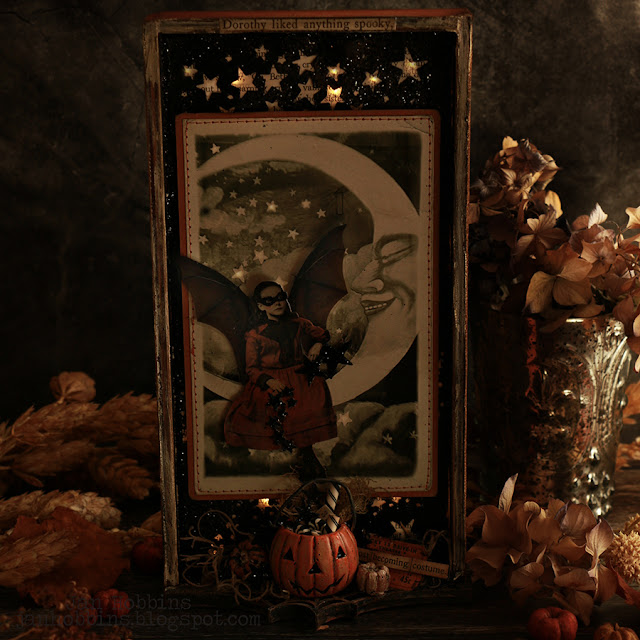
My favourite piece in the Layers Package is this Vintage Moon Card. I love any kind of vintage looking moon illustration, so I was excited to see this one. It's perfect for the Paper Dolls.
I've used the smaller Vignette Tray TH93568 as the base for my make.
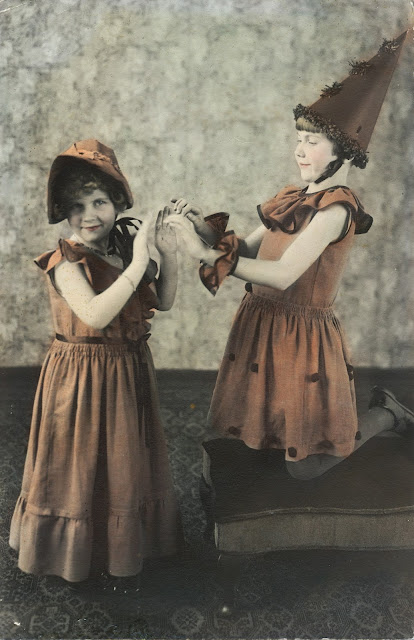
I have this photo of my mom and her sister in costumes made by my grandmother, who was a beautiful seamstress. This photo was taken around 1935, so my mom would have been around 10 (she's got the cone hat). I love the old photos that were tinted with colour, and I was inspired by this faded orange colour with the black and faded white photo, so I wanted to use this colour scheme in my project.
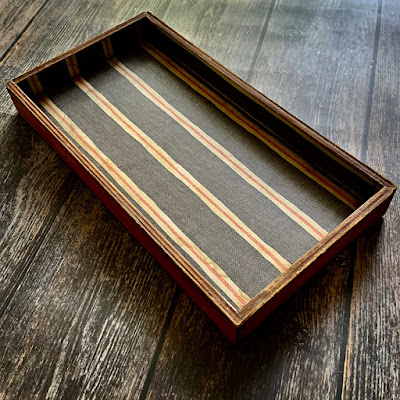
My Vignette Tray is about 9 x 4 3/4". I covered the inside with paper from the Backdrops pkg. TH94146. The outside was covered with Orange Kraftstock from the Warm Package(TH94112). At this time, I did not cover the outside bottom of the tray. This smooth Kraftstock can be sanded to reveal the kraft underneath. You're not going to really see the paper on the inside back, just a bit of the sides, as it will be covered.
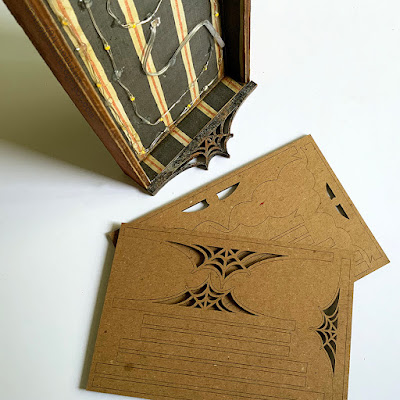
I decided to have this stand up and as the frame is only an inch wide, I decided to make a bigger base at the bottom using Stamper's Anonymous Bat Web Trims Thickboards(THETC014). I've glued two together of the same width (There's two different sizes), I think I had to take a touch off on each side to make it the same width as the tray. I used two to make my base thickness the same height as my tray base, about 1/4". This was painted with Distress Black Soot, then dry brushed with an orange, then cream color. This was glued to the bottom with Distress Collage Medium. To secure the web add-on, I covered the vignette tray bottom with the Warm Orange Kraftstock, extending it past the vignette tray to the back solid part of the web trim. I hot glued (careful, don't glue near the lights!) the tiny lights mostly the edges, top and bottom. There's a few in the centre. The hole for the lights is drilled in the middle.

I painted a piece of white Distress Heavystock cut to fit inside the frame, with Black Soot paint. Then with Glossy Accents and Ranger's Distress Nightfall Glitter from the Halloween Sparkle Set TSHK77411, I covered the entire piece. I really wanted the glitter to stick well, glossy accents did that, and if there were any parts that weren't covered thick enough with glitter, the black underneath covered that. After everything had dried, I used Tim's Sizzix Swirling Stars Thinlits set to cut out masses of stars. I used the negative piece and saved the cut out stars for future projects and the Paper Doll and pumpkin. I had to move the dies around a few times to get more stars cut out. The reason I didn't cut the stars out first and then glitter, is that I wanted the stars to have a crisper look. You could always do it the other way, and probably have less mess, as there might have been a few, ok, a lot of glitter everywhere!
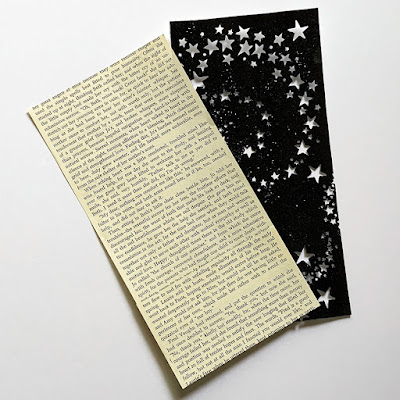
I wanted the lights to shine softly behind the cut out stars, so I used a page from an old book (I had to use two pages to extend it to get the same length) to place behind the black glittered paper.
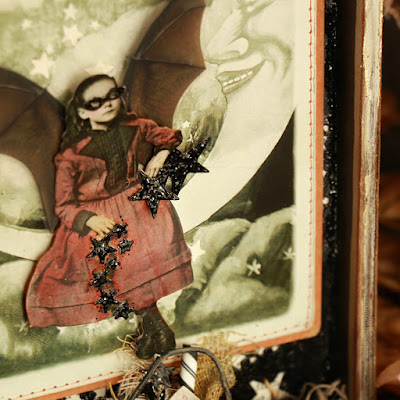
I've lightly tinted the girl's dress with Distress Crayon. I want to say that it was Carved Pumpkin, and a lighter shade of Orange, but I didn't write it down, sorry! I added a bit of glitter to a mask sticker (Curiosities Sticker Book TH94148) and placed that over the doll's eyes. Leftover glitter stars were added by her hands, and falling downward. The Bat Wing Transparency was adhered behind her. Now, because the matted postcard is too thick for any light to go through, I punched some tiny holes through a few places where the stars are in the moon picture. I didn't do too many, I kind of wish I had done a few more. I added a few holes where there weren't any stars too. I die-cut some stars with my Swirling Thinlits die out of the same book paper, using parts of the paper where there wasn't any words. This book paper was the same colour as my postcard and quite thin, which was perfect. These stars were glued on top of the holes, so you just saw stars, but when it is lit up a tiny bit of light shines through.

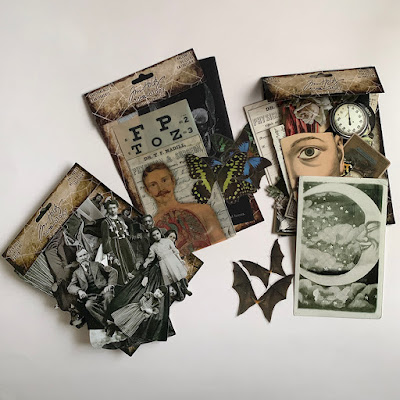
I had enough room at my base to add in a little cluster of goodies. I've used the Jack O' Lantern TH94179 as my main object. This is quite a bright orange, so I painted it lightly to tone it down with Distress paint. I think any combination of these; Dried Marigold, Rusty Hinge, Old Paper, or Bundled Sage works. In the Jack O' Lantern, there's a tiny bit of Mummy Cloth TH94155, Halloween Confections TH94170, some glittered stars, and a '31' Sticker from the Sticker Book. Spanish moss with some Pumpkins TH94169, Book Clippings (TH94148) and a ticket from Ephemera TH94151. My book clippings used were: ‘Dorothy liked anything spooky’ - at the top of the vignette frame, and at the bottom ‘most becoming costume’.
Here's a look at the back of my project. This paper was also from Halloween Backdrops TH94146.
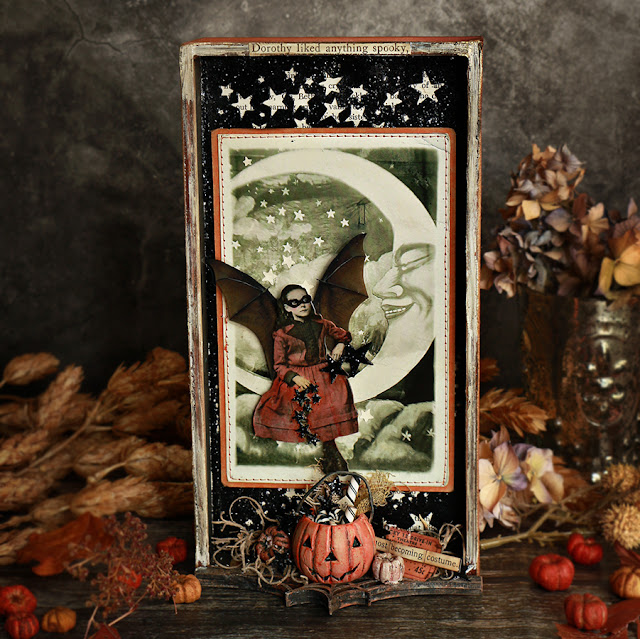
Here’s what my project looks like with the tiny lights on.
Thanks so much for visiting and for all your wonderful comments! I will be sharing my Christmas projects next!
Until next time,
Jan


4 comments
Love the swirling stars cut from the back, what a great idea to use the stars in the postcard and punch tiny holes in them and the old paper from books is a great color isn't it...I am very happy there are 2 of the Moon postcard...that must have been Paula that made that happen...LOL.
i soaked up every word of how you did this. Each time I bookmark, and say next year i will do this! ... haven't yet, but I have started buying some T H supplies, eventually i will have enough to begin. THANKS for sharing and inspiring and teaching us HOW TO! big hugs and BOO!!!! Teresa in AZ
Fantastic artwork. Happy Halloween!
wonderful! I love the project and that photo of your mom and aunt! what a treasure!
Post a Comment