Showing posts with label 3D Texture Fade. Show all posts

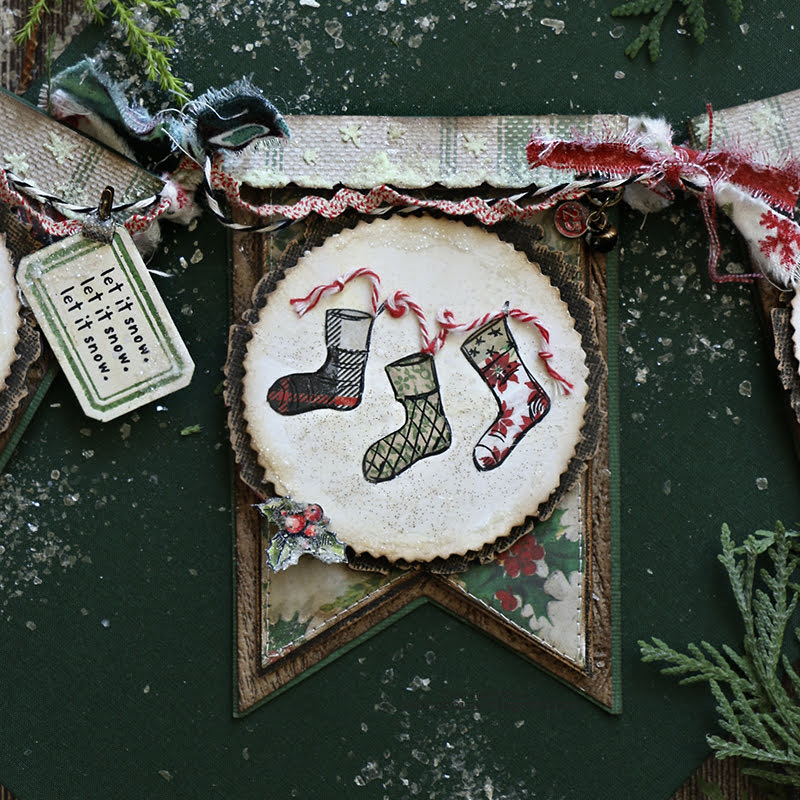
CHRISTMAS BANNER - SIMON SAYS STAMP STAMPtember 2023


Hello friends! Today is the much anticipated exclusive Tim Holtz STAMPtember YouTube live day!  I've created this Christmas Banner for the Simon Says Stamptember exclusive Tim Holtz set.


There is a limited supply of this set, which usually sells out fast!  

As an extra surprise, Simon Says Stamp also created this very limited amount of Die sets that coordinate with the stamp set.  These are sold separately!


When I decided to make a banner, I wasn't quite sure what I was going to create, so I started by stamping my main images on Ranger Ink Watercolour Cardstock (flat side) that had been lightly tinted with Distress  Oxides Lost Shadow and Antique Linen.  For a few extra dots, Lost Shadow ink sprayed with water on my mat, and the paper dipped on to my ink splotches.  I left enough room  to die-cut circles around each image.  I've used Sizzix Stitched Circles 662229.  I decided later to tear/snip off the smooth edge, as I wanted the piece underneath to show more.  Ink the edges.


Next, I stamped the same images again, this time on patterned paper (Tim Holtz Backdrops).  I usually save those little leftover pieces, they come in handy! I've also used smaller ephemera or the journal cards as the pattern's are smaller.  I cut out some of the larger stamped parts and glued these in the same places on the watercolour paper images.  You don't have to cut out stamped lines that stick out, they will show up on your main stamped image.


Before glueing on these pieces, do any inking or this Santa one, I applied the Sparkle Texture Paste to my Santa Bag (with a brush).  I also took a brown or black felt pen and went along the edges carefully to removed the white edges.  On the parts of your stamped image that aren't covered with paper, colour with ink, crayons, watercolours, or glitter, whatever you want!


For my main banner pieces, I die-cut these shapes from  a discontinued Sizzix Framelets Plus Die set (660836).  It's a huge set made for larger machines, but I use the smaller dies.  If you don't have a banner die set, this shape is easy to cut out with a trimmer or craft knife. I've cut out a black cardstock mat slightly larger than my patterned paper and machine stitched the two together.  I love banners that have lots of layers, they just seem to look better to me.  So I just kept adding more layers, lol!


Forgot to take a photo earlier, but this embossed layer is a slightly larger size and is Kraft Heavystock embossed with the 3D Woodgrain Texture Fade Embossing Folder (555297).  I inked the folder with Ground Espresso Archival ink before I inserted my paper.  Ink the edges after embossing.  Then adhere your matted patterned paper layer on top of this.


And because I still love this discontinued Bigz Tree Ring Die and Embossing Set (662429), I added this next.  I die-cut black chipboard, then Tim Holtz Black cardstock, which was embossed then lightly sanded.  Glue the two together.  Your stamped images on the circles are adhered on top of this.  I've added some dots and dashes of Glossy Accents and Rock Candy Glitter on my stamped images and circles for extra Christmasy goodness.  If you don't have any of these dies, check your stash for any larger shape dies you have, I'm sure you will find something you can use!


Now I had to come up with how am I going to connect these altogether, there are a lot o different ideas out there.  I decided to add a piece of dark green cardstock (another layer!)  but cut this piece longer so the top folds over about 1/2 inch and a fabric strip (I've used a piece of Tim Holtz Flannel Etcetera fabric torn in a 1/2" strip) goes under it and across each banner.  I left enough to tie a knot in-between each banner piece, connecting them.


This trim piece is die-cut from Tim Holtz Sizzix Decorative Trims Thinlits set 665435 and Backdrops Patterned paper.  I applied stars with the included stencil and the Distress Glow Paste.  I also added Glow Paste with a palette knife along the edge.  Distress Rock Candy Glitter was applied immediately while the paste was wet, and I let it air dry.  Some glittery glow at night!  Once these pieces were dry, ink the edges.


These trim pieces are adhered on top of the folded over piece to hide any fabric poking out and I used dimensional pop dots so it stands out.  I've tied some extra ribbon and string loosely to hanging from each banner.


I've also added in small embellishments, some are stamped with the small included stamps (sentiments, mittens, holly, etc.)  Some of these are die-cut out with various small dies - Sizzix Collector Set 665926, Specimen set 665930, Postale set 665927 and Vintage Labels set 665929 are full of lots of little tags, labels, etc. Idea-ology metal embellishments are also added.  A close up of each banner is below.


Thanks so much for visiting me here!  I unfortunately received my package too late to send my make to Tim for the live, and  I was really pressed for time to get this done!  If I've missed anything that I didn't include here, let me know!    Hope those of you who wanted this set, managed to order it!  Happy stamping!

I am trying to get my Halloween tutorials done while it's still the making season, sorry to those of you waiting.  I've been dealing with sciatica since the summer, it's getting a lot better but sitting at the computer seems to aggravate it and  has to be done a little at a time. 

Until next time,

Jan


1

LOVE CARD - TIM HOLTZ SIZZIX EVERYDAY 2023


Hello everyone! Today I'm sharing a card using the Tim Holtz Sizzix 2023 Everyday collection.  The wedding season is upon us and I thought it would be fun to create a card.  I always like to create a special card to include with the wedding gift, which lately it seems like it ends up as gift card or money, so a special card becomes the gift too.  This card can also be for an anniversary too.


 I gave myself a challenge of using the Gentlemen Thinlits set with this wedding theme.  I have also used The Alphanumeric Bulletin, Mini Brushstroke flowers, and the Entangled 3D Texture Fade Embossing Folder.


I love the new Tim Holtz Classic Sparkle Kraft Stock.  These silver or gold sparkly papers can be embossed, sanded or distressed to create a vintage look.  The sheets are very smooth, it's like the really thin Deco vinyl sheets, but printed on kraft stock.  I've embossed a gold piece with the Entangled folder, sanded and slightly inked the raised areas.


The word "love" is die-cut with a pearl cardstock (Sizzix) tinted lightly with Victorian Velvet Distress Ink.  I die-cut the letters again with Black Matte Cardstock and used the outside ring.


I always end up using a few matts in my cards, I like all the layers and it just seems to finish off the card.  If you're worried about the weight of the front, just add in an extra matt on the inside of the card. I just adhere the corners of the inside matt, so it can be easily removed, just in case the recipient wants to reuse the card. My main card base is the pearl cardstock, my pink patterned paper is from the new Backdrops Vol. 5(I machined stitched around the edge), and the embossed paper is backed with black cardstock.


I wanted to include a female partner for my "Gentleman" so I decided to use a paper doll (the cheeks and flowers were lightly tinted with Distress ink).  We need a set of Victorian Lady die-cuts!  The patterned paper circle is cut from the Backdrops volume 5, also used, a Collage Strip, and a Transparency Circle.


Everything was adhered behind the transparency, the excess parts of the paper doll and collage strip were trimmed.


My Gentleman was diet from the Gold Sparkly Kraft Stock and also black cardstock.  The black was adhered slightly to the right with pop dots.  The gold piece was lightly sanded.


I've die-cut lots of the brushstroke flowers also from the gold Kraft Stock.  Some of the flowers also have pieces die-cut from my Backdrops pattern paper remanent.  When I have small layered pieces, I usually apply double faced adhesive to the back of my paper before die-cutting.  The gold sparkly was also lightly sanded.


Here's a closer look at the finished flowers after everything was adhered to the card front.


Here's another look at my finished Card.


Here's another wedding card using the  same dies, except instead of the Gentlemen thinlits die, I used the Tailored (666289) and die-cut my heart with True Love (666290).

Thanks so much for visiting here.  It's been awhile since I've been paper crafting, I took a break to get some things done.  Lots of sewing, working in the yard (what a mess after winter and we went from minus temperatures to record highs in less than a month here!) and of course the dreaded tax time!  We've been visiting the granddaughters, (can't show up without some new clothes sewn by grandma)so I'll have more time in the craft room when we get back! 


Supplies

Gentlemen Thinlits 666286
Alphanumeric Bulletin Thinlits 666281
Mini Brushstroke  Thinlits 666284
Entangled 3D Texture Fades Embossing Folder 666155
Sizzix Opulent Cardstock Pack 664553

Idea-ology Paper Doll
Idea-ology Collage Strips TH94238
Idea-ology Backdrops Volume 5 TH94309
Idea-ology Transparent Layers TH94326

Distress Ink
Tim Holtz Alcohol Ink Matte Black Cardstock TAC65487


Adesive, pop dots


0

FREE TO FLY CARD - TIM HOLTZ RANGER INK FOUNDRY WAX RELEASE

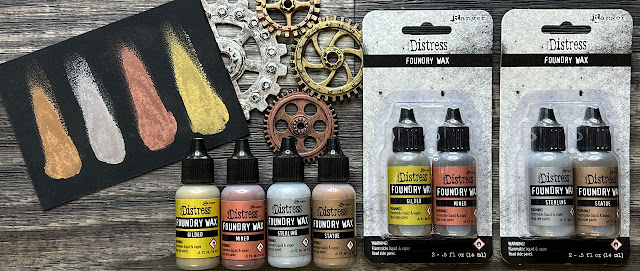
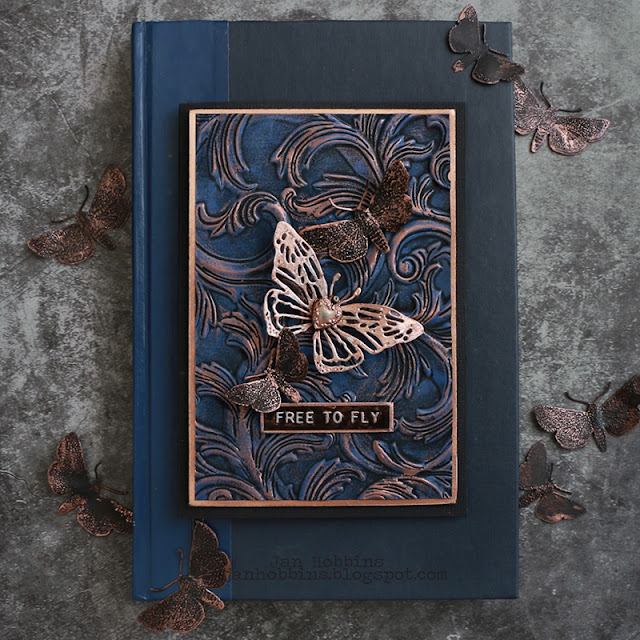
Hello friends! If you managed to catch the Tim Holtz YouTube Live today (March 12th), you are aware of his very new Ranger Ink product, Foundry Wax.  I was lucky enough to receive some to create with, and all I can say is, wow!  This wax is nothing like any other wax that you have used.  I don't know about you, but it is very dry here, so every time I would buy artist's wax products, they would dry out in no time and I would have to throw them out.  Also, when heated, it looks more like leafing and is permanent. If you have ever tried gold leafing, you know how messy that can be!


Foundry Wax comes in two different sets.  Wax Kit #1 is Gilded and Mined and Wax Kit #2 is Sterling and Statue.

  
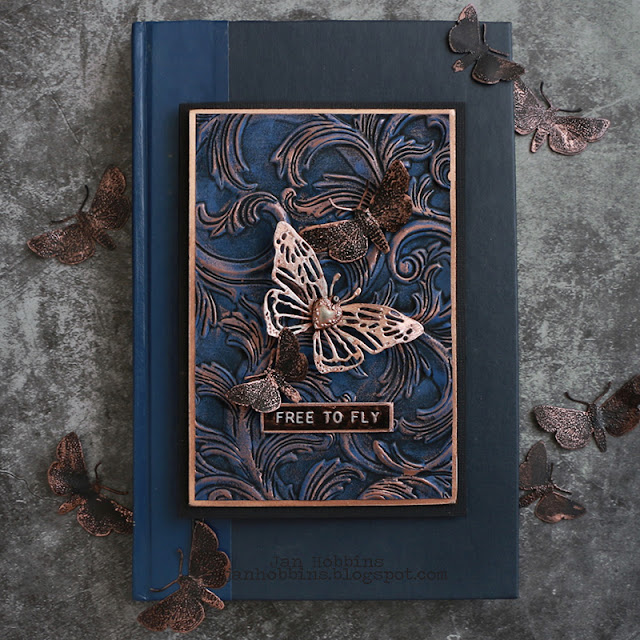
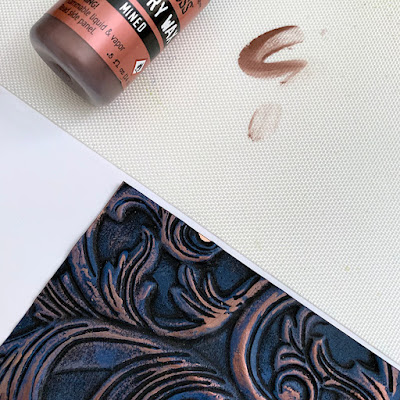
I've created this card using the Mined Foundry Wax, which is a very rich coppery colour.  Just a quick explanation to show you a few different ways to use it.


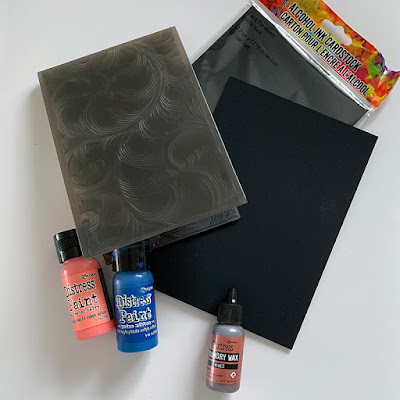
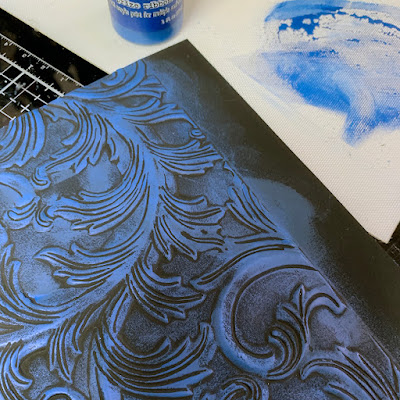
I first embossed a piece of Black Alcohol Ink Cardstock with the 3D Elegent Embossing Texture Fade.  I used this cardstock as I love the matte velvety texture and it's really black.  It is designed to work with Alcohol Inks, Pearls and mixatives, therefore it doesn't buckle and is a good weight. I wasn't sure what medium I was going to use when I first started, I was thinking Alcohol Ink, but then I just decided to use paint to see how Foundry Wax worked with this medium. 


After embossing, I applied a very small amount of Prize Ribbon Distress Paint, almost dry brushing it, so my black still showed through.  I dry brushed a touch of Saltwater Taffy Distress Paint in a few areas, just to give it a bit of warm colour.


After my paint dried, I started applying my Foundry Wax.  I did this with a very small amount on my craft mat at a time.  I’ve used my finger to apply it on my embossed surface but you can also use a small brush. Since this is a very new product, I would suggest watching Tim's video to hear all his tips and tricks with it.  He has so many different amazing techniques using this product.  It dries very fast, once out of the bottle, so I used small amounts at a time.  A little goes a long way. You won't want to waste any, as you will want to use it on everything!  Once I had it applied to my surface, I used my Embossing tool to heat it.  It doesn't take long, a few seconds, and like magic, it turns shiny immediately! A word of caution, do not heat next to your Foundry Wax bottle, it does react to high heat very easy!  That was cautionary advice from Tim!


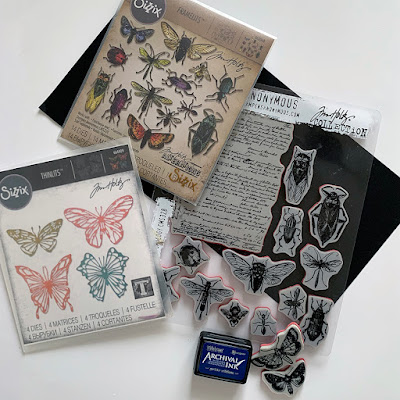
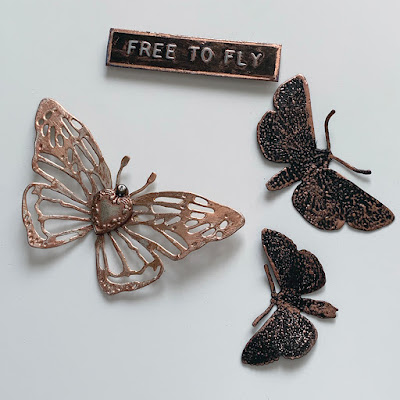
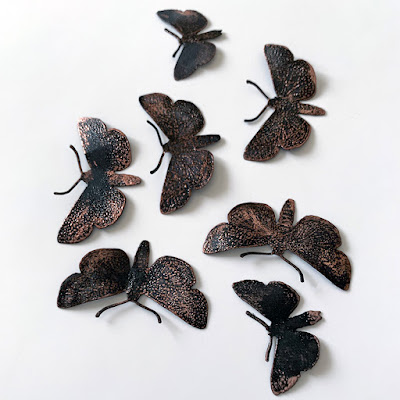
Next, I used it on a butterfly die-cut.  I used Metallic Kraftstock for the large butterfly, lightly sanded the edges.  I also used this Entomology Stamp Set with matching dies for the smaller butterflies.  These were die-cut out from regular black cardstock, then stamped with Prize Ribbon Archival Ink,  and embossed with clear embossing powder.  I wanted the Foundry Wax to pick up all the raised embossed stamping on my butterflies. After my stamped and embossed images were finished, I applied the wax with my finger. Wow!


I love how this wax highlights the stamped images, can't wait to try other stamps!  I didn't use a lot on the larger butterfly, but I did use it directly on the metal Heart Adornment.  Love how it works on metal! (I use my Tim Holtz reverse grip tweezers to hold my metal piece to avoid burning your fingers)There was a tiny bit left on my mat, so I touched up my label sticker too.  I did say, you will want to use it on everything, didn't I? lol!  On all my items, I have applied the wax with a thinner amount, but you can also apply it heavier or even reapply more layers. 


I was having fun making my butterflies, I couldn't stop.  I'll save them for another card!


I matted my card front to a piece of copper Metallic Kraft Stock, then my black card base.  Adhere your butterflies and label sticker, and the card is done! I’m sure I will be trying this wax on everything! There's so much to learn and experiment with Foundry Wax.  Hope you try out this new product, I can't wait to see what everyone creates!  

Thanks for stopping by,


Jan

Materials Used:

Alcohol Ink Matte Black Cardstock TAC65487
Mined Foundry Wax
Scribbly Thinlits 664409 (large butterfly)
Entomology 663068 (small butterflies)
CMS328 Entomology Stamps
3D Texture Fade - Elegant 664172
Prize Ribbon - Distress Paint & Archival Ink
Saltwater Taffy Distress Paint
Metal Heart Adornment TH94130
Label Sticker TH94229 (Free to Fly)


5

LET IT SNOW CARD - TIM HOLTZ CHRISTMAS SIZZIX 2021 YOUTUBE RELEASE

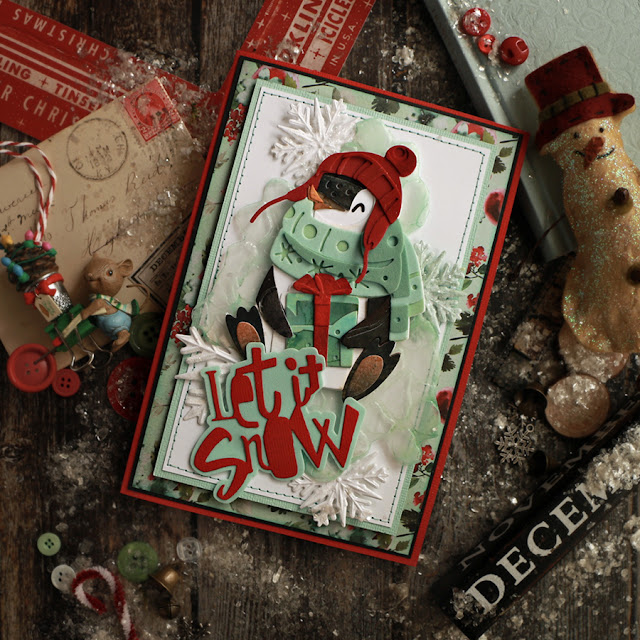
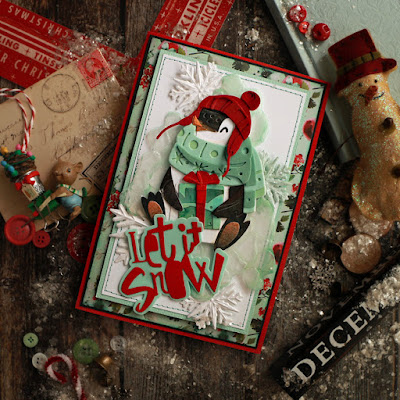
 Hello friends!  Well, it has officially turned into winter here, we’ve had quite the blizzard here with lots of snow and colder temperatures.  That means it definitely feels Christmasy now, so it feels right to start sharing my Tim Holtz Sizzix and Idea-ology makes. Hope you will bear with me, these posts will be brief, as I’ve hurt my back, somehow(feels like a pinched nerve which I have done before or maybe I’m just getting old!), unfortunately it has been quite painful to sit at the computer, my craft table, or sewing machine. Wouldn’t you know, my favourite activities! Any hard chair actually, so I’ve piled up pillows to help but that only works for so long! I’ve created this winter card for the Sizzix Tim Holtz YouTube live using the new Colorize set, Eugene.


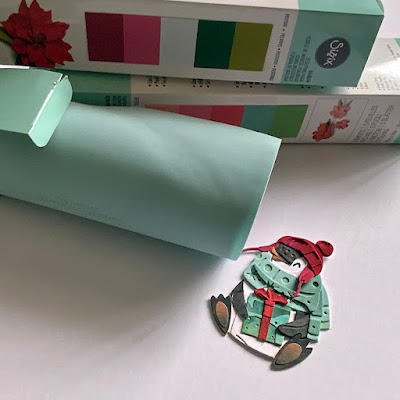
How cute is this penguin set, Eugene?  I really like the combination of bright red and minty green in Christmas displays so I thought Eugene would suit this colour scheme. 


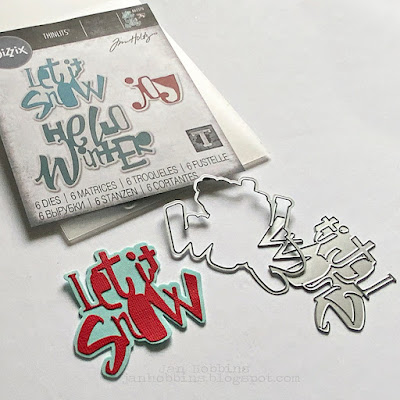
I’ve also used this Festive Words set. Love this font!

           
I’ve used a combination of different mediums on this card.  Sizzix Sculpting Foam seemed like a perfect choice to give a soft texture for the hat and scarf on Eugene and also the backdrop for my “let it snow”. This foam comes in many different colours and also can be sculpted to give a bit of shape, fantastic for flower dies. I’ve also used textured, smooth, and watercolour cardstock, plus mixed media Heavystock coloured with Distress and Oxide inks, sprays. Sizzix has videos to explain how all the pieces go together on all their Colorize sets. I highly recommend!


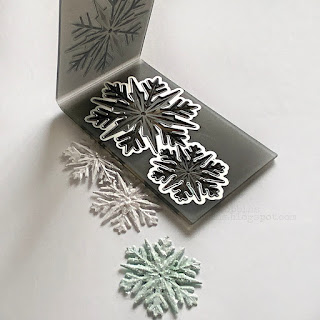
This Snowflake Impresslits embossing die is so beautiful!  Just added a tint of colour on one and Distress Rock Candy Glitter on all of them. 


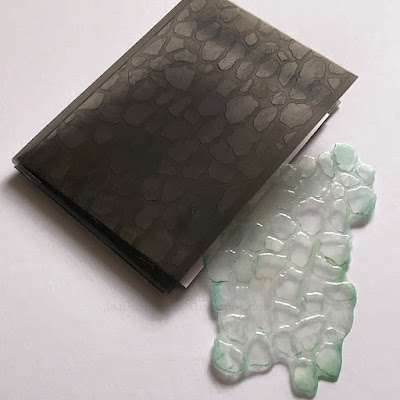
The “ice mat” behind Eugene is made with a piece of acrylic and embossed with the Cobblestone 3-D Texture Fade Embossing folder. I lightly sanded it and rubbed a light touch of Distress paint, mostly on the edges. 


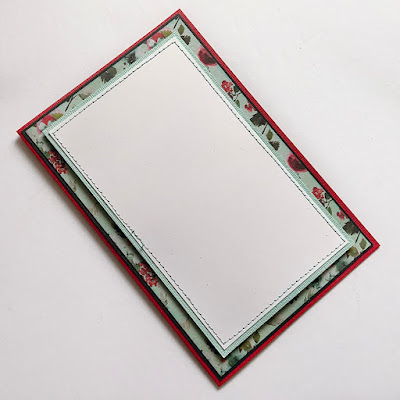
I’ve used several mats with cardstock and patterned paper from last year’s Idea-ology Christmas line. 


Just adhere your acrylic piece with the snowflakes tucked behind and then Eugene, words, let it snow, on top with dimensional foam adhesive dots. You’re done!  

Thanks so much for visiting,
See you soon!

Jan


3

THE APOTHECARY CABINET - TIM HOLTZ HALLOWEEN IDEA-OLOGY 2021 RELEASE


 Hello everyone! It's hard to believe that Halloween is almost here, I don't know where this month has gone.  Here's my second Halloween Idea-ology project that I had created for the YouTube reveal.


This is another project that became a lot bigger than what I had planned!  I've concentrated more on the front of my cabinet and have explained how the door was created.


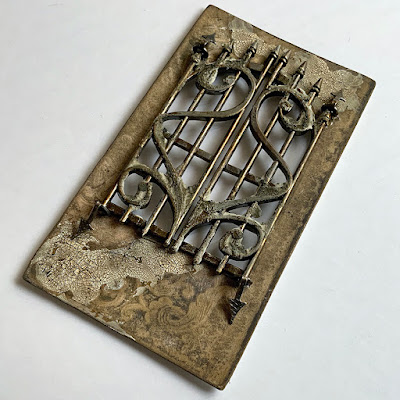
I've used the new Ornate Metal Gates(TH94159) on the front of my Apothecary Cabinet. Of course they need to be locked up, there might be a few sinister potions and spell books in there.


Here's a photo of the cabinet opened, revealing it's contents.


Here's a look of the side and back.  I've made a small paper pocket for the Tiny Lights battery case to fit into.  Now, on to my tutorial, it is a rather long one.  


For my cabinet, I’ve covered the Vignette Divided Drawer (TH93793) inside and outside with Backdrops (TH94146)


The 'feet' of my cabinet are the skulls(TH94169) that have a hole drilled into the top of the head.  I hammered a nail from the inside of the cabinet through to the head (fill the hole with Distress Collage Medium first for extra strength).


The cabinet door is made from Sizzix's Mat Board 656492, but you can use chipboard.  I like this mat board as it's very lightweight yet still sturdy and I wanted to keep the door as light as possible especially because the Ornate Gates are a thicker metal.  The door piece was cut to fit the dimensions of the outside Divided Drawer. On the door piece, I traced around my gates to get an idea of placement and how big to cut out the opening.  You will want to leave room for the spinners(hinges) that make the gates swing open.


I decided because the gates were quite heavy and I didn't want the door to bend, I cut out an extra center piece, plus 2 extra small pieces for above and below the center piece. There's about 1/4" space in-between and this also looks like panels. The hole is cut out in the middle for both the main door and the center piece, so they match up. At some point, while you are working on the door front, if you choose, add some Halloween Distress Grit Paste to the gates, along with colour(paint or alcohol ink) to age them.  Set aside to dry.  


These pieces were also covered in Backdrops paper except for the door inside.  This was painted with Distress Paint.  Ink the edges.  


Now for the Metal Game Spinner (TH92717) hinges.  Lay your metal gates on the front where you would like them and mark where the little bars will connect with the spinner.  The top ones have a bit more room to play with, but you have to be pretty exact with the bottom ones.  Make a cut wide enough for the spinner to poke through with your craft knife.  The center of the spinners is a hole, which is what your gate posts are going to fit into.


On the backside, bend the end of the spinner down at the bottom and then up at the gate tops.


After making sure that your gates and spinners are connecting, reinforce the back of the spinners with Distress Collage medium.  I put quite a bit on and let it dry naturally to ensure there was no movement.


The Game Spinners at the front of the door piece and bent down at the bottom and up at the top, as shown in the photo.  Your gate can now swing open.  I've also added Distress Crackle Texture Paste(TDA71303) to the door and cabinet base.  This was coloured and aged with brown Distress Crayons.


Here's a closeup of how the gate bar fits into the game spinner at the top.


Here's another closeup of the bottom hinge game spinner and bar.


To stop the gates from swinging open, I've used the new Lock & Key Adornments (TH94162) latched to the gate with a Hook Clasp TH94133. These were grunged up with a bit of Halloween Distress Grave Texture Paste and paint.  A door knob was added to the edge which is a Hitch Fastener TH92731.  I've added another game spinner on the other side, the screw going through this to the hitch knob on the front of the door.  The game spinner is bent so it is used to keep the door closed.  The pointed end is bent over the bolt and the other end is bent 90 degrees.  There's another photo further down of the bottom of the door.


To attach the door to the cabinet I have used Tim Holtz Hinges TH93075.  These attach with brads.  I've poked a hole through the wood divided drawer and the door for the brads.   These hinges were also grunged up with grit paste and paint. 


To cover up the brad bent ends and secure them, I applied Distress Collage Medium quite thick, dry, then applied a bit of grit paste with some Hardware Heads TH93788 that were also painted a bit.  A piece of Halloween Ephemera TH94151 was adhered (also distressed and inked) with a portrait sticker from the Halloween Sticker book TH94148.  Also included were some Book Clippings from the sticker book.


You can see the game spinner behind the door knob(hitch fastener), where it is bent so it catches the edge of the cabinet to keep the door closed.  Ephemera was added under the cabinet opening also.  Also hardware heads covered the brads from the hinges.


Now for the inside of the cabinet, which I did not take any step by step photos.  Must have been a very late night!


This is the top shelf.  I started my Halloween Tiny Lights 94157 at the top here (the hole is drilled behind the moon).  I used just a few along the bottom and then pulled the strand behind the shelf to the one below.  The moon face is from the Halloween Layers TH94150.  This has been grunged up and also with a bit of Crackle Texture Paste on the edge.  A Halloween Quote Seal sits on top of the boxes, distress crayon was added in the recessed areas.  A Corked Vial Glass Bottle TH92899 is filled with Creepy Eyes TH94061 in Resin.  There's also a Tiny Vial Corked Glass Bottle filled with.  A rolled up piece of Ephemera is laying on its side.


My little boxes, explanation below, have the Halloween Snippets TH94152 glued on the ends.


I made the little boxes using the skinny house from the Paper Village Thinlits set 664741.  I cut two pieces per box. glued together like I was building a house, expect I bent the pointy ends in to look like a flap.  I also clipped the other end along the fold, just enough so they would fold closed also.  If you want a shorter box, just cut of a bit from the one end.  Perfect size for vignette and the Snippet Labels!  It's also a good way to use all those small scraps of paper that we never want to get rid of.


For the middle shelf, I have the Lantern TH94160, which has a bit of Distress Crypt Texture Paste and paint added to age it.  The tiny lights come down from above behind the rolled Ephemera papers, poking out behind the Candle Stand TH94166, then behind the books, into the Lantern and out again, down behind the shelf to the bottom shelf.  The Candle Stand has been grunged also with Texture Paste and paint.  A small Mini Flair button 94158 was adhered with Collage Medium, upside down so that the Alcohol Inked (purple) Glass Bubble TH94180 sits securely inside.  This was also adhered with Collage Medium and a bit of Texture paste added around the bottom.  My books were made with the Book Covers that are included in the Halloween Ephemera package TH94151.  I cut up old book pages to fit inside.  Halloween Snippets were added to the book covers.


The bottom shelf has more boxes made with the Tiny House Thinlits set.  Halloween Snippet Labels were added.  There's a Halloween Baseboard TH94153 in the back (the tiny lights come down behind it) which has been distressed.  The tiny lights come behind the candle and one is right behind the wick, then back down behind the book and Test Tubes TH94156.  This is where the tiny lights end.  The Test Tubes are filled with moss, the smallest Toadstool (TH94082) in one and bones TH93964 in the other.  The outsides were covered with Collage Medium to make them look aged.  Distress Crackle Paste was added lightly to the edges of the Divided Drawer, Distress Crayon added to age.


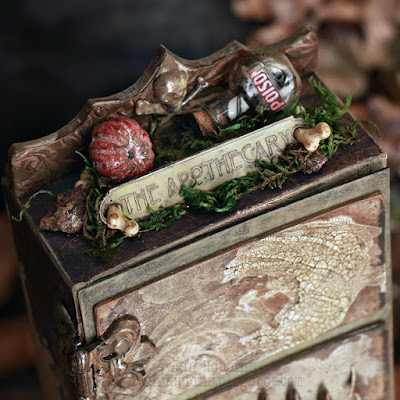
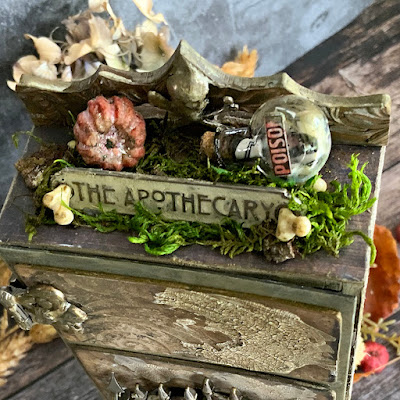
For the top of the cabinet, I used a Stampers Anonymous Bat Web Etcetera Thickboard Trim ETC014 cut to fit the width of the cabinet.  This was covered with a piece of embossed mixed media cardstock.  I used the Mini Botanical 3D texture fade 665631 to emboss this.  Distress Paint was used to color it.  A skull from the Skull & Spiders Adornment pkg TH94161 was adhered in the middle.  A bit of Grave Texture paste added to it to make it look like it was carved into the back.  This was painted also.  


Moss glued to the top before a pumpkin TH94169 was added.  A Tiny Vial TH93201with cut up pieces of the Halloween Confections TH94170 inside.  A Halloween Snippet label added.  My sign is one of the Halloween Word Plaques TH94164.  The recessed area was filled in with Halloween Distress Grave Texture paste.  I cut two bones in half and stuck them through the holes and glued the other ends behind the sign.  This was adhered to the top also.


Here's a photo with the lights on of the top shelf.


Here's the lantern lit up.


This is what the candle looks like lit up.


Here's another look at my finished cabinet.  Hope you enjoyed my tutorial!

Thanks for visiting, and I hope to post my last Idea-ology project before Halloween!

Until next time,

Jan


7
Back to Top